

TL;DR:
- Homeowners can handle small mould patches under 10 square feet on hard surfaces after fixing the moisture source. Larger or structural mould problems require professional remediation, which focuses on containment, removal, and clearance testing. Preventing mould involves controlling water entry, maintaining indoor humidity below 50%, and promptly fixing leaks or drainage issues.
If the affected area is under 10 square feet, you can handle it yourself with the right PPE and containment. Anything larger, or anything touching your HVAC, structural framing, or sewage, requires a certified remediator. The single most important first step is not the cleaning. It is stopping the moisture.
TL;DR: Measure humidity, isolate the area, and fix the water source before touching anything.
- Measure humidity: Use a hygrometer. Readings significantly above recommended relative humidity levels indicate active risk. Health Canada recommends keeping indoor RH between 30% and 50%.
- Isolate the area: Close off the affected space from the rest of the house. Do not run central HVAC while mould is disturbed.
- Stop water entry: Identify whether the source is a plumbing leak, foundation seepage, condensation, or drainage failure. No cleanup holds until the water stops.
Vulnerable people — those with asthma, compromised immune systems, young children, the elderly, or pregnant individuals — should leave the area immediately and get professional help before re-entering.
MSN Environmental publishes this guide as a practical resource. The 10 sq ft threshold aligns with Health Canada guidance and EPA protocols used as the Canadian industry standard.
Table of Contents
- Why your basement keeps getting mould
- Is mould in the basement dangerous?
- How to safely inspect your basement for mould
- How to clean small mould patches yourself
- When DIY is not enough: knowing when to call a certified remediator
- What a professional mould remediator actually does
- Why professional remediation succeeds where DIY fails
- A layered prevention plan to keep mould out of your basement
- Mould testing and insurance: what actually helps
- Key takeaways
- The part most homeowners get wrong
- MSN Environmental’s mould remediation services
- Useful sources for further reading
- FAQ
Why your basement keeps getting mould
Basements are the most moisture-prone space in a Canadian home, and the reasons are structural, not accidental. Three variables drive mould growth: liquid water entering the space, condensation forming on cold surfaces, and chronically high indoor humidity. Fix all three or the problem comes back.
Liquid water entry is the most obvious culprit. Poor exterior grading that slopes toward the foundation pushes surface runoff directly against your walls. Clogged gutters and undersized or missing downspout extensions dump water at the footing instead of directing it away. Hydrostatic pressure from saturated soil forces water through foundation cracks and porous block walls. Window wells without drainage gravel or covers collect rain and snowmelt and channel it straight inside.
Condensation is subtler and often missed. In summer, warm humid air enters through windows, doors, and gaps. When it contacts cold concrete walls, floors, and pipes, it condenses. This is why basements in southern Ontario can develop mould in July even with no rain event.
Chronic high humidity from plumbing leaks, sump pump failure, inadequate ventilation, or a finished basement with no dehumidifier creates the sustained damp that mould colonies need. Mould can begin colonising damp materials within 24–48 hours, so a slow drip behind drywall is enough.
Where to look first:
- Perimeter walls, especially below grade
- Window well frames and sills
- Around the sump pit and laundry area
- Under finished walls and behind shelving
- Behind stored cardboard boxes on concrete floors
“Moisture problems in existing basements are very common, but often are not understood or properly treated.” — UMN Extension, Moisture in Basements: Causes and Solutions
Pro Tip: Inspect twice a year: once in April after the spring thaw, and again in late August when indoor humidity peaks. The most commonly missed source is not inside the basement at all — it is the exterior grade and downspout discharge point. Walk the perimeter of your house after a heavy rain and watch where the water goes.
Is mould in the basement dangerous?
Yes. Visible mould or a persistent musty odour in your basement is a health concern, not just a cosmetic one. Health Canada states that mould exposure can cause respiratory symptoms including coughing, wheezing, and irritation of the eyes, nose, and throat. No safe indoor exposure level has been identified.
Common symptoms to watch for:
- Persistent coughing or wheezing
- Eye, nose, or throat irritation that clears when you leave the house
- Headaches that improve outdoors
- Worsening asthma symptoms
- Skin irritation after spending time in the basement
The pattern matters. Symptoms that improve when you leave the building and return when you come back are a reliable signal that indoor air quality is the issue.
Who faces the highest risk:
Young children, the elderly, pregnant individuals, people with asthma, and anyone with a weakened immune system are significantly more vulnerable to mould-related health effects. For these groups, the DIY threshold is effectively zero. Get professional help before they re-enter the space.
Statistic callout: Health Canada identifies no safe level of indoor mould exposure. Even low concentrations can trigger respiratory irritation in sensitive individuals, and the effects accumulate with duration of exposure.
The basement matters more than most homeowners assume because it shares air with the rest of the house through ductwork, stairwells, and pressure differentials. Mould spores generated in the basement do not stay there.
How to safely inspect your basement for mould
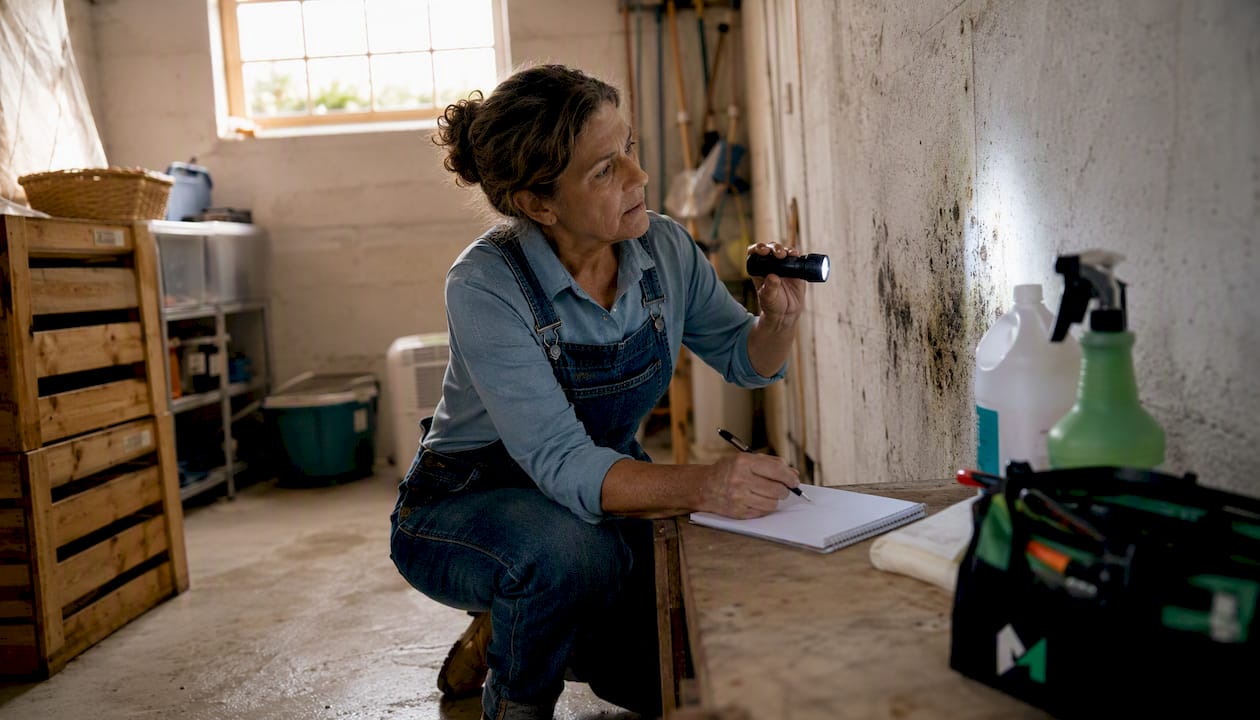
The goal of an inspection is to locate active mould, identify moisture sources, and find hidden growth indicators before you disturb anything. Do not start cleaning until you know what you are dealing with.
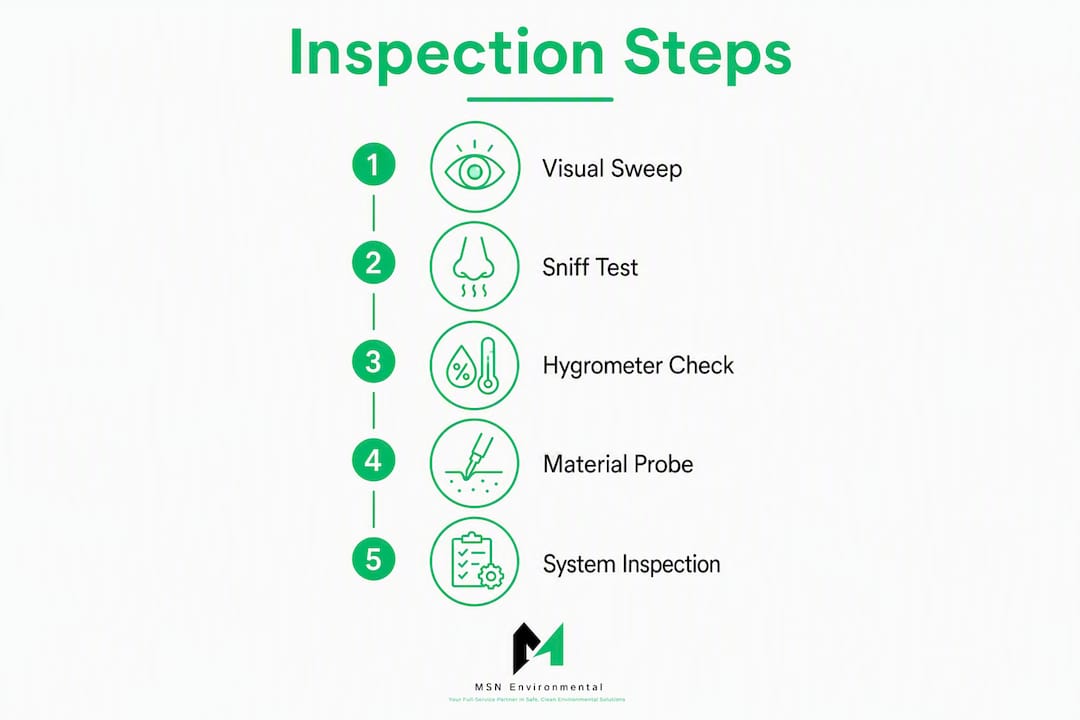
Step 1: Visual sweep
Work around the perimeter in good light. Look for discolouration (black, green, grey, or white fuzzy patches), staining on drywall or wood framing, efflorescence (white mineral deposits on concrete), and peeling paint or bubbling surfaces. These are all moisture indicators even when mould is not yet visible.
Step 2: Sniff test
A persistent musty or earthy odour is a reliable early indicator of hidden mould growth. If you smell it, investigate behind stored items, under carpets, and behind finished walls before assuming the space is clean.
Step 3: Hygrometer placement and interpretation
Place a hygrometer in the centre of the basement, away from windows and exterior walls, and leave it for at least 30 minutes. A reading of 30–50% RH is the target range. Readings above 50% indicate elevated risk, with active growth conditions likely as humidity rises. A single high reading on a humid day is less concerning than a reading that stays elevated over several days.
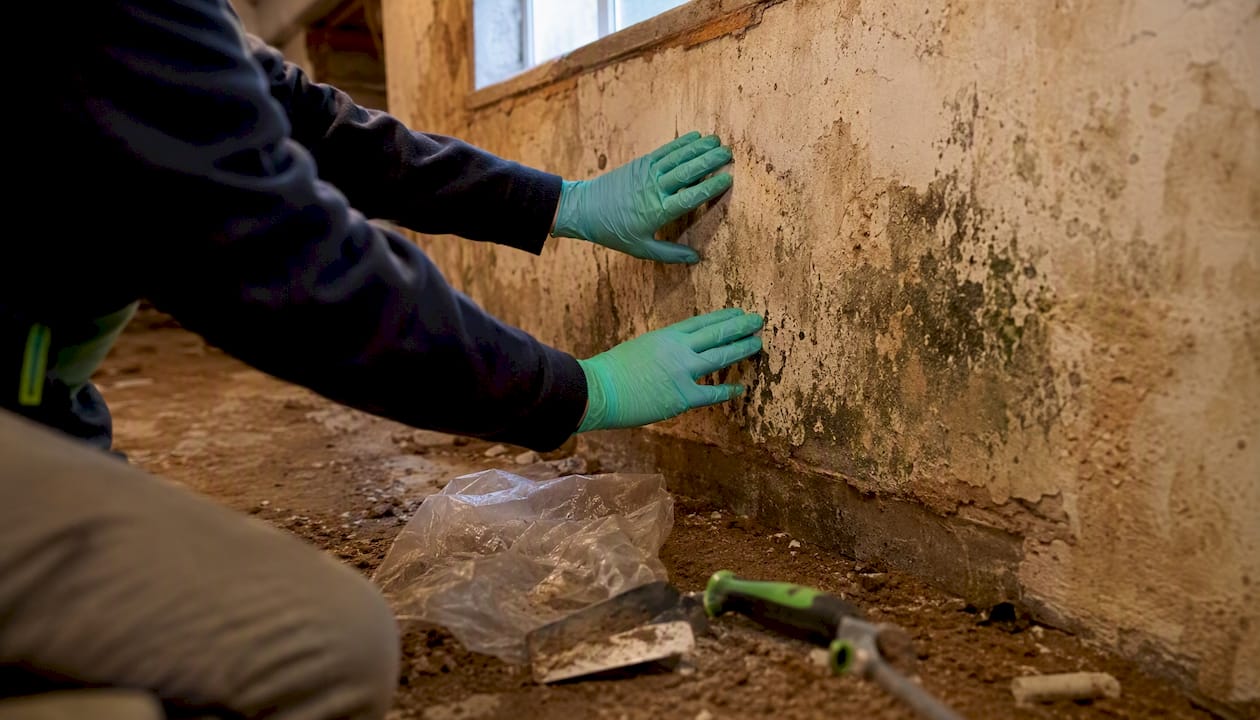
Step 4: Probe for damp materials
Press gently on drywall, wood baseboards, and insulation near the floor. Soft, spongy, or crumbling material indicates prolonged moisture exposure. Do not cut into wall cavities without proper PPE and a clear plan.
Step 5: Inspect window wells, sump, HVAC, and pipes
Check window well drainage and look for standing water or rust staining. Inspect the sump pit for proper float operation. Look at exposed ductwork for condensation or discolouration. Check pipe insulation for dampness or mould growth at joints.
Red flags that mean stop and call a professional:
- Mould covering more than 10 square feet
- Mould visible inside HVAC ducts or on air handler components
- Water associated with sewage or contaminated flooding
- Structural framing (joists, sill plates) showing mould or rot
- Occupants with severe asthma, immune conditions, or respiratory illness
Pro Tip: Wear an N95 respirator and nitrile gloves during inspection, even if you are only looking. Disturbing stored items or moving shelving releases spores. Do not poke into wall cavities with a screwdriver or knife unless you are prepared to contain the area properly.
How to clean small mould patches yourself
Health Canada guidance and EPA protocols allow homeowners to handle mould cleanup for areas under approximately 10 square feet, provided the mould is on hard, non-porous surfaces, the moisture source has been fixed, and no vulnerable occupants are present. If any of those conditions are not met, stop here and call a professional.
Step-by-step cleanup:
- Fix the moisture source first. Cleaning without stopping the water is temporary at best. Repair the leak, improve drainage, or run a dehumidifier to bring RH below 50% before you begin.
- Isolate the area. Close doors and seal gaps with plastic sheeting and tape. Turn off central HVAC to prevent spore spread through ductwork.
- Put on PPE before entering. You need: an N95 respirator (minimum), non-vented safety goggles, long nitrile gloves, and disposable coveralls or old clothing you can bag immediately after.
- Ventilate carefully. If running a dehumidifier, keep windows closed so the unit can work. If not, direct a fan outward through a window to push air outside, not into the rest of the house.
- Scrub hard surfaces with detergent and water. The EPA recommends scrubbing hard surfaces with detergent and water, then rinsing and drying thoroughly. Bleach is not a universal fix and does not penetrate porous materials.
- Discard porous materials. Drywall, insulation, carpet, and cardboard that are visibly mouldy or water-damaged should be removed and bagged. These cannot be cleaned reliably.
- Bag and seal waste. Double-bag mouldy materials in heavy plastic bags, seal with tape, and label them. Check your municipality’s guidelines for disposal — most Canadian municipalities treat mouldy building materials as regular construction waste unless they contain other hazardous materials.
- Dry the area completely. Use fans and a dehumidifier. The area must be dry within 24–48 hours to prevent regrowth.
- Remove PPE carefully. Peel off gloves last, bag your coveralls, and wash hands and face thoroughly before leaving the work area.
What not to do:
- Do not paint or seal over mouldy surfaces without removing the mould first
- Do not use bleach on porous materials like drywall or wood framing
- Do not disturb large colonies or any mould inside HVAC without professional containment
- Do not attempt electrical or structural repairs in a contaminated area
Pro Tip: Buy your PPE before you start, not during. An N95 rated for particulates (not just dust) is the minimum. Hardware stores carry disposable Tyvek coveralls for under $10. The cost of proper PPE is trivial compared to the health risk of skipping it.
When DIY is not enough: knowing when to call a certified remediator
The decisive rule is straightforward: stop and call a professional when the affected area exceeds 10 square feet, or when mould is in wall cavities, HVAC components, structural framing, or associated with sewage or contaminated water. This threshold aligns with Health Canada and EPA guidance and is the standard used by Canadian remediation professionals.
Decision checklist:
- Area size: More than 10 sq ft of visible mould? Call a pro.
- Material type: Mould on drywall, insulation, wood framing, or carpet? Porous materials require professional removal.
- Location: Mould in HVAC ducts, air handlers, or structural members? Professional containment is mandatory.
- Occupant vulnerability: Anyone in the household with asthma, immune conditions, or respiratory illness? Lower your threshold significantly.
- Recurrence: Cleaned it before and it came back? The moisture source was not fixed, or the remediation was incomplete. A professional assessment is needed.
- Sewage involvement: Any flooding that included sewage or grey water? This is a Category 3 water event requiring professional handling.
On cost: professional basement mould remediation in Canada typically ranges from roughly $1,200 to $3,750, with an average around $2,300, depending on scope, materials affected, and whether structural repairs are required. That range reflects jobs where containment, selective demolition, and clearance testing are included. A quote that omits those elements is not a complete remediation.
While you wait for professional help, move vulnerable occupants out of the affected area, reduce HVAC circulation, and keep the space closed off. Do not attempt to dry out or clean a large area yourself in the meantime.
What a professional mould remediator actually does
Professional mould remediation is a controlled, technical process. It is not a cleaning service. The difference between a durable result and a temporary fix comes down to containment, selective removal, and verified clearance.
The remediation process, step by step:
- Inspection and scope definition: A trained technician assesses the extent of growth, identifies moisture sources, and defines the work area. This may include moisture mapping and air sampling.
- Containment set-up: The work area is sealed with polyethylene sheeting and negative air pressure is established using an air scrubber with HEPA filtration. This prevents spores from migrating to clean areas of the house.
- Removal of non-salvageable materials: Porous materials (drywall, insulation, carpet, wood framing with deep penetration) are removed and double-bagged for disposal. Structural materials are assessed individually.
- HEPA vacuuming and air scrubbing: All surfaces in the containment zone are HEPA-vacuumed. Air scrubbers run continuously to capture airborne spores.
- Cleaning and antimicrobial treatment: Hard surfaces are cleaned with appropriate agents. Antimicrobial treatment is applied where indicated by the scope.
- Drying: The area is dried to target moisture levels before any reconstruction begins.
- Independent clearance testing: A third-party air or surface sample is taken after remediation to confirm spore counts have returned to acceptable levels. Without a passing clearance report, the job is not objectively complete.
Certifications and credentials to ask for:
- Technician training documentation (ask specifically what training programme was completed)
- Proof of WSIB coverage and general liability insurance
- Evidence of containment and negative air pressure procedures in their written scope
- Commitment to independent clearance testing as part of the contract
| Cost factor | Typical range | Notes |
|---|---|---|
| Small single-room job | $1,200 | Hard surfaces only, no structural removal |
| Mid-range job | — | Some drywall/insulation removal, containment |
| Large or complex job | — | Structural framing, HVAC, multi-room scope |
| Average across job types | ~$2,300 | Source: DryBasementHub industry data |
Questions to ask any contractor before signing:
- Do you perform independent clearance testing, or do you test your own work?
- What containment method do you use?
- Will you provide a written scope before starting?
- Are your technicians trained and insured?
A single-room remediation with no structural complications typically takes one to three days, including drying time.
Why professional remediation succeeds where DIY fails
Skipping containment and clearance testing is the primary reason mould comes back after a DIY cleanup. When mould colonies are disturbed without negative air pressure and sealed containment, spores become airborne and settle in adjacent spaces, inside HVAC ducts, and on surfaces that were never visibly affected. The homeowner cleans what they can see and considers the job done. The spores that were not visible are already colonising the next damp surface.
Three procedural failures show up repeatedly in jobs that require re-remediation:
Undersized dehumidifiers. A unit sized for a bedroom will not maintain basement humidity in the recommended 30–50% range. When the bucket fills and the unit shuts off, humidity spikes within hours. Basements require higher-capacity units with continuous drainage to a floor drain or pump, so the unit never cycles off due to a full reservoir.
Interior sealants used against active water entry. Hydraulic cement and waterproofing paint are temporary measures. They will fail under sustained hydrostatic pressure. Active water entry requires exterior drainage correction and, in some cases, foundation repair before any interior finish goes back on the wall.
Incomplete removal of contaminated porous materials. Leaving mouldy drywall or insulation in place and painting over it is not remediation. The colony continues growing behind the new surface, and the problem reappears within months.
MSN Environmental’s remediation process includes trained technicians, proper containment with negative air pressure, HEPA filtration, selective demolition of contaminated materials, and independent clearance testing. The company serves residential and commercial clients across Ontario and holds the safety certifications and insurance required for compliant hazardous materials work.
Pro Tip: Ask for the clearance test report in writing before you sign off on any remediation job. An independent passing report is the only objective proof the work was done correctly. Any contractor who resists providing one is a contractor worth walking away from.
A layered prevention plan to keep mould out of your basement
Prevention works in layers. Exterior water management comes first. Indoor humidity control comes second. Storage and finishing practices come third. Treating a single symptom — running a dehumidifier while ignoring the grading — usually fails within a season.
Exterior checklist:
- Grade soil away from the foundation at a slope of at least 6 inches over 10 feet
- Clean gutters every spring and fall; extend downspouts at least 1.8 metres (6 feet) from the foundation
- Install drainage gravel and covers on window wells
- Test your sump pump annually; consider a battery backup for power outages
- Evaluate exterior waterproofing if you have chronic hydrostatic pressure or foundation cracks
Interior checklist:
- Maintain basement RH between 30% and 50% year-round using a properly sized dehumidifier with continuous drainage
- Insulate cold water pipes to prevent condensation
- Avoid wall-to-wall carpet in the basement; use area rugs that can be removed and dried
- Store items in plastic bins, not cardboard boxes directly on concrete floors
- Keep airflow around cold surfaces; do not push furniture flush against exterior walls
- Avoid impermeable interior vapour barriers on basement walls when using air-permeable insulation — these trap moisture and create ideal conditions for mould behind the finish
Monthly and seasonal maintenance:
- Monthly: Check the sump pump float, inspect visible pipes for drips, and read your hygrometer
- April: Inspect the perimeter after snowmelt; check window wells and downspout discharge points
- August/September: Check RH levels as outdoor humidity peaks; inspect behind stored items
- October: Clean gutters before freeze-up; confirm sump pump is operational before ground freezes
| Humidity target | RH range | Action |
|---|---|---|
| Ideal basement RH | 30–50% | Maintain with dehumidifier and ventilation |
| Elevated risk | Above 50% | Increase dehumidifier run time; check for moisture sources |
| High risk / active growth conditions | Above 60% | Investigate immediately; mould can colonise within 24–48 hours |
| Dehumidifier sizing note | Varies by sq footage | Choose a unit rated for your basement’s square footage; use continuous drain |
Dehumidifiers prevent new growth but do not remove existing mould or spores. Correct sizing and continuous drainage are what make them effective long-term.
Mould testing and insurance: what actually helps
Testing rarely changes the immediate decision. If you can see mould or smell it persistently, you already know you have a problem. The moisture source and the visible growth drive the action plan. Testing becomes genuinely useful in four situations: you have a persistent odour but no visible growth; you suspect hidden mould behind finished walls; you need a third-party clearance report after remediation; or you are preparing to sell the property and need documentation.
When to invest in testing:
- Persistent musty smell with no visible source after a thorough inspection
- Large or repeated problems where the extent of hidden growth is unclear
- Post-remediation clearance (this one is not optional for a properly completed job)
- Pre-sale disclosure or litigation support
On insurance: Standard Canadian homeowners policies typically exclude mould that results from gradual seepage, chronic condensation, or maintenance failures. Coverage usually applies only to mould that is a direct result of a sudden accidental event, such as a burst pipe or an appliance failure. Reviewing your home insurance policy exclusions before you have a problem is worth the 20 minutes. If a sudden event does occur, contact your insurer promptly — delays can affect your claim.
Pro Tip: When choosing a lab for air or bulk sampling, ask whether they are accredited and what type of samples they collect (air, bulk, tape lift). An actionable report tells you the species present, the spore count relative to outdoor baseline levels, and a clear interpretation. A report that just lists numbers without context is not useful for decision-making.
Key takeaways
Mould in a basement is manageable when you act on the moisture source first, follow the 10 sq ft DIY threshold, and call a certified remediator for anything larger, structural, or HVAC-related.
| Point | Details |
|---|---|
| DIY threshold | Clean patches under 10 sq ft on hard surfaces only; porous or structural materials require a professional. |
| Moisture first | Fix the water source before cleaning anything; mould can return within 24–48 hours on damp materials. |
| Humidity target | Keep basement RH between 30% and 50%. Readings above 50% signal elevated risk, and the likelihood of active growth rises as humidity increases. |
| Red flags for a pro | Mould over 10 sq ft, HVAC involvement, sewage water, structural framing, or vulnerable occupants in the home. |
| MSN Environmental | For jobs that exceed the DIY threshold, MSN Environmental provides certified remediation, containment, HEPA filtration, and independent clearance testing services across Ontario. |
The part most homeowners get wrong
Basement mould is almost always framed as a cleaning problem. The guides, the YouTube videos, the hardware store advice — they all start with the spray bottle. That framing is backwards, and it is why so many homeowners clean the same patch two or three times before calling a professional.
The real problem is almost never the mould itself. It is the moisture condition that made the mould possible. A basement that stays above 60% RH in summer, has a downspout discharging against the foundation, and uses a dehumidifier that shuts off when its bucket fills is going to grow mould. Cleaning the wall does not change any of those conditions.
The other thing worth saying plainly: the 10 sq ft threshold is not a licence to clean aggressively. It is a ceiling. A small patch on a concrete block wall, properly contained and dried, is a reasonable DIY job. A small patch on drywall that has been wet for weeks is not — the contamination runs deeper than the surface, and removing it without containment spreads spores through the house. The material type and the duration of moisture exposure matter as much as the visible area.
For larger jobs, the value of professional remediation is not the cleaning. It is the containment, the negative air pressure, and the clearance test at the end. Those three things are what separate a durable result from a temporary one. Any contractor who does not offer all three is not offering full remediation.
MSN Environmental’s mould remediation services
When the problem is beyond the DIY threshold, or when you want the job done right the first time, MSN Environmental offers certified mould remediation for residential and commercial properties across Ontario. The process covers everything from initial scope inspection and air quality testing to containment, selective demolition of contaminated materials, HEPA filtration, and independent clearance testing.

When you contact MSN Environmental, the first step is a site inspection and written quote. Technicians assess the extent of growth, identify moisture sources, and outline the full scope of work before anything starts. Services include mould and air quality testing, remediation, and interior demolition where contaminated finishes need to come out. The company holds the safety certifications, WSIB coverage, and insurance required for compliant hazardous materials work in Ontario.
MSN Environmental serves homeowners and property managers in Kitchener, Cambridge, London, Hamilton, Waterloo, Toronto, Stratford, Woodstock, and surrounding communities. If you are dealing with a basement mould problem that exceeds the DIY threshold, or if you want a professional assessment before deciding, request an inspection or call directly to schedule. There are also reasons to hire certified professionals for hazardous material removal that go beyond the visible patch.
Useful sources for further reading
The guidance in this article draws on primary Canadian and US regulatory sources. These are the most authoritative references available for homeowners dealing with basement mould in Canada.
- Guide to addressing moisture and mould indoors — Health Canada: The primary Canadian reference for health effects, humidity targets, and DIY thresholds.
- A brief guide to mould, moisture and your home — US EPA: Widely used as the industry standard for moisture control and remediation protocols in Canada.
- What are the basic mould cleanup steps? — US EPA: Practical DIY cleanup guidance for small areas on hard surfaces.
- Moisture in basements: causes and solutions — UMN Extension: Detailed technical reference on basement moisture mechanisms applicable to Canadian climate conditions.
- MSN Environmental mould removal services: Certified remediation, testing, and clearance services for Ontario homeowners.
- MSN Environmental testing and assessments: Air quality and mould testing services for pre-remediation scoping and post-remediation clearance.
When choosing a lab or remediator, confirm accreditation, ask for written scope and clearance testing as part of the contract, and verify WSIB coverage and liability insurance before work begins.
FAQ
Is it safe to stay in a house with mould in the basement?
It depends on the extent and your health status. Health Canada identifies no safe indoor mould exposure level; vulnerable individuals (those with asthma, immune conditions, young children, the elderly) should vacate until the problem is resolved. For healthy adults with a small, contained patch, short-term exposure with reduced time in the basement is lower risk, but the problem still needs to be addressed promptly.
What should I do first if I find mould in my basement?
Stop the moisture source, isolate the area from the rest of the house, and assess the size of the affected area. Patches under 10 sq ft on hard surfaces can be handled with proper PPE following the DIY steps above; anything larger, or any mould on porous or structural materials, requires a certified remediator.
What are the first signs of mould-related illness?
Coughing, wheezing, eye and throat irritation, and headaches that improve when you leave the building are the most common early signals. If symptoms consistently clear when you are away from home and return when you come back, indoor air quality is likely the cause and the basement is the first place to investigate.
Will a dehumidifier get rid of mould in the basement?
No. A dehumidifier prevents new growth but does not remove existing mould or spores. It is a prevention tool, not a remediation tool. The existing mould must be physically removed first; then a properly sized dehumidifier with continuous drainage helps keep conditions below the threshold for regrowth.
Does home insurance cover basement mould in Canada?
Usually not for gradual seepage or chronic moisture. Most Canadian homeowners policies exclude mould from slow leaks and maintenance failures, covering it only when it results from a sudden accidental event like a burst pipe. Review your policy exclusions and contact your insurer promptly if a sudden water event occurs. This is general information; confirm the specifics of your coverage with your insurer or a licensed broker.