

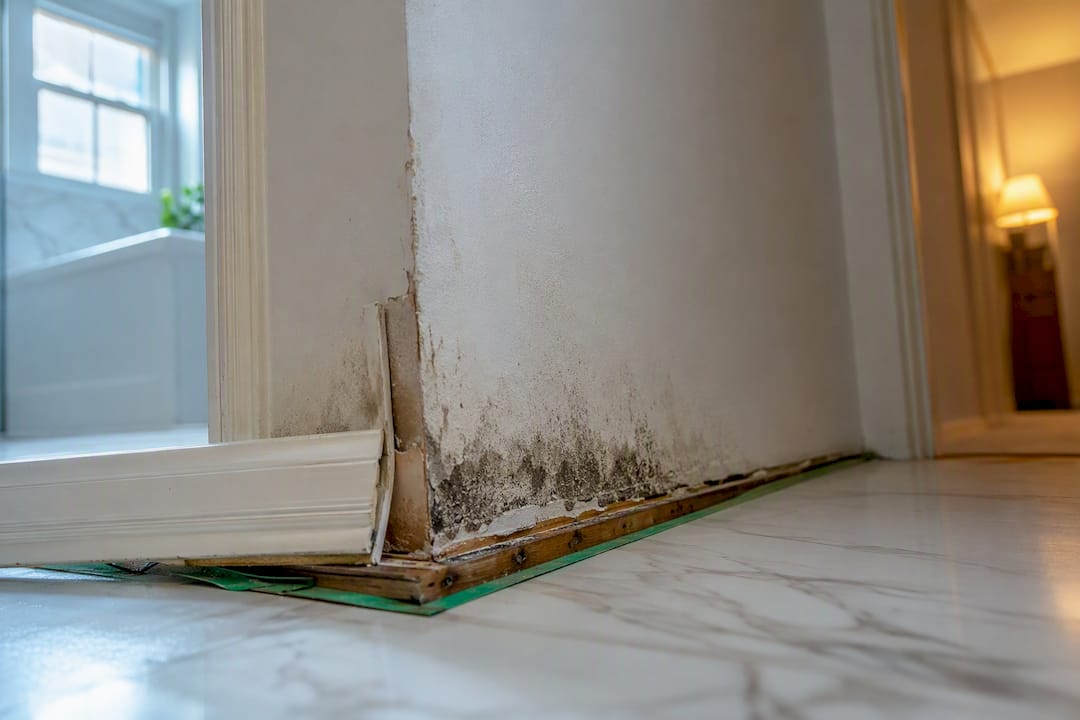
Mould can begin colonizing damp materials within 24 to 48 hours of water exposure, so drying is a race against the clock. Stop the water source, remove standing water, and get affected materials dry before that window closes. If you already see visible growth or smell a musty odour, you’re past prevention and into remediation, and the right move depends on how much area is affected and whether the water was clean or contaminated.
TL;DR:
- Mould can start growing within 24 to 48 hours after water exposure, especially in porous materials like drywall, wood, or fabric.
- Elevated moisture levels lasting days, contaminated water, or warm environments significantly increase the risk of rapid and hidden mould growth.
- Visual inspection, smell, and moisture meter readings are crucial for early detection, with professional tools needed for concealed areas.
- Immediate cleanup requires stopping water, removing standing water, documenting damage, and starting controlled drying within the first two days.
- Professional remediation is necessary for areas larger than about three square meters, contaminated water sources, or recurring mould, with proper containment and verification protocols.
Table of Contents
- How fast mould grows and what increases the risk
- How to inspect for mould after a water event
- Immediate actions after water damage (first 24 to 48 hours)
- Cleaning small mould patches safely (DIY limits and methods)
- When to hire a professional and what to expect from remediation
- How to prevent mould coming back
- How MSN Environmental approaches mould after water damage
- Long-term effects mould leaves behind
- How professionals detect hidden mould
- Drying techniques and equipment that actually work
- Containment and safe mould removal protocols
- What conventional advice gets wrong about mould after water damage
- Get certified remediation from MSN Environmental
- Sources
- FAQ
How fast mould grows and what increases the risk
The 24 to 48 hour window isn’t a scare tactic. Health Canada notes that mould begins to grow in damp conditions within about 48 hours, and it doesn’t need much to get started. A drywall panel, a carpet pad, or the underside of baseboard trim only needs the right combination of moisture and organic material. Porous substrates like drywall paper, wood, and fabric absorb water and hold it, which gives mould spores a stable food source and a slow release of moisture long after the surface looks dry.
Several factors push that timeline faster or slower. Warm rooms accelerate growth compared to cold basements. Contaminated water, think sewage backup or floodwater, carries organic matter and bacteria that feed colonization even quicker than clean supply-line leaks. And water that has migrated into wall cavities, under flooring, or behind cabinetry creates conditions you can’t see or fully dry with a fan pointed at the surface.
The tricky part is that mould doesn’t announce itself right away. Microscopic hyphae, the thread-like structures mould uses to spread, can establish in porous material before any visible colony forms on the surface. This is why a musty odour often shows up before you see a single spot of discolouration. A moisture meter reading that stays elevated days after a leak, even when the surface feels dry to the touch, is one of the more reliable early warnings a homeowner has.
What raises your risk after a water event:
- Water sitting for more than 24 to 48 hours before cleanup begins
- Contaminated water sources (sewage, floodwater, appliance backups)
- Warm, humid rooms with poor air circulation
- Water trapped inside wall cavities, subfloors, or behind insulation
- Materials that were already porous or previously water damaged
Quick fact: the CDC’s homeowner flood cleanup guidance instructs residents to assume mould growth has already started if a home couldn’t be fully dried within 24 to 48 hours after flooding, and to move directly into documented cleanup procedures rather than waiting to see if mould appears.
How to inspect for mould after a water event
A proper inspection covers three senses: sight, smell, and touch (via instruments), because mould doesn’t always show up where you’re looking first.
- Scan for visual cues. Look for water stains with ring-shaped edges, discolouration in shades of green, black, orange, or pink, fuzzy or slimy surface texture, peeling paint or wallpaper, and warped or buckled wood flooring or baseboards.
- Rate the odour. A mild, barely noticeable mustiness usually points to a small or early-stage problem. A moderate, persistent smell that lingers in one room suggests a more established colony, possibly behind a wall or under flooring. A strong, pervasive odour throughout multiple rooms is a signal of significant hidden growth and usually warrants a professional inspection before you touch anything.
- Check with a moisture meter. These handheld tools measure moisture content inside materials like drywall and wood framing, and they’re one of the few ways to confirm a material is actually dry rather than just dry-looking. Readings that stay high days after the water event point to trapped moisture and a higher chance of hidden colonization.
- Prioritize the right zones. Start with baseboards, the bottom 30 to 60 centimetres of walls near the water source, under sinks and appliances, behind furniture pushed against exterior walls, and any spot where flooring meets a wall.
- Escalate when needed. If moisture readings stay elevated in multiple rooms or the smell is strong and diffuse, thermal imaging or a professional inspection can locate moisture inside cavities without opening up walls.
Pro Tip: Don’t rely on smell alone in a finished basement. Concrete and stored boxes can mask odour even when the wall behind the drywall is saturated. A five-minute pass with a moisture meter around the perimeter tells you more than an hour of sniffing around.
Immediate actions after water damage (first 24 to 48 hours)
What you do in the first two days determines whether you’re dealing with a drying job or a remediation job next week.
- Stop the water source. Shut off the supply line, patch the leak, or, if it’s flooding, wait until water levels drop enough to safely access the area.
- Remove standing water. A wet vacuum or sump pump clears bulk water fast; the longer it sits, the more it soaks into subfloors and framing.
- Document everything before cleanup. Photograph and video every affected room, damaged item, and visible water line before you move or discard anything. Insurers routinely ask for this, and it’s much harder to reconstruct after the fact.
- Remove salvageable wet items. Pull furniture, rugs, and boxes off wet flooring immediately so drying can start underneath them too.
- Start controlled drying. Open windows if outdoor humidity is lower than indoor humidity, run dehumidifiers, and position fans to move air across wet surfaces, not just around the room.
A few things matter as much as what you do:
- Cut power to any affected outlets or fixtures before drying begins if there’s any risk of water contacting wiring.
- Check for structural sagging in ceilings or floors before walking on or under them.
- Skip fans entirely if you already see visible mould growth. Uncontrolled air movement across an active colony spreads spores throughout the house rather than drying it out. This is the core difference between mitigation, which follows drying protocols to prevent growth, and remediation, which requires containment once mould is established.
- Never paint, caulk, or seal over a damp or previously damp surface. Trapping moisture behind a fresh coat of paint creates ideal conditions for hidden growth, and it’s one of the most common mistakes homeowners make trying to move fast after a leak.
Cleaning small mould patches safely (DIY limits and methods)
The EPA sets a practical benchmark: areas of about 10 square feet or less, roughly a 3 foot by 3 foot patch, can often be cleaned by a homeowner. Anything larger, or any area touched by contaminated water, moves into professional territory.
Before touching anything, gear up. You’ll want an N95 respirator or better, non-latex gloves, and sealed eye protection. This isn’t overkill. Disturbing a mould colony releases spores into the air, and breathing them in during cleanup is one of the most common ways people end up with symptoms after a “successful” DIY job.
For non-porous surfaces like tile, glass, metal, and sealed countertops, soap and water often handles light surface growth. For more established patches, a diluted bleach solution works on hard, non-porous surfaces, though Harvard Health notes bleach isn’t effective on porous materials since it can’t reach mould growing beneath the surface. Whatever you use, the surface needs to dry completely afterward, since leftover moisture just invites the problem back.
Porous materials rarely survive contact with contaminated water or established mould, and cleaning them is often a waste of effort:
- Carpet and carpet padding that stayed wet more than 48 hours
- Ceiling tiles with any visible staining or growth
- Insulation that got saturated, whether fiberglass or cellulose
- Upholstered furniture and mattresses with active growth
Pro Tip: If the water came from a toilet backup, a sewer line, or floodwater, skip the DIY cleaning step altogether regardless of the patch size. Contaminated water carries pathogens that basic PPE and detergent aren’t designed to handle safely.
When to hire a professional and what to expect from remediation
A few clear triggers mean it’s time to stop scrubbing and start calling. Areas larger than roughly 3 square metres, water damage from a contaminated source, mould discovered inside wall cavities or ductwork, anyone in the household reporting respiratory symptoms, or mould that keeps returning after you’ve already cleaned it, all point the same direction: call a certified team.
That last one matters more than people realize. As Health Canada points out, mould that comes back after cleaning almost always means the underlying moisture source was never actually fixed. No amount of repeat scrubbing solves that; it just delays the next appointment with a contractor.
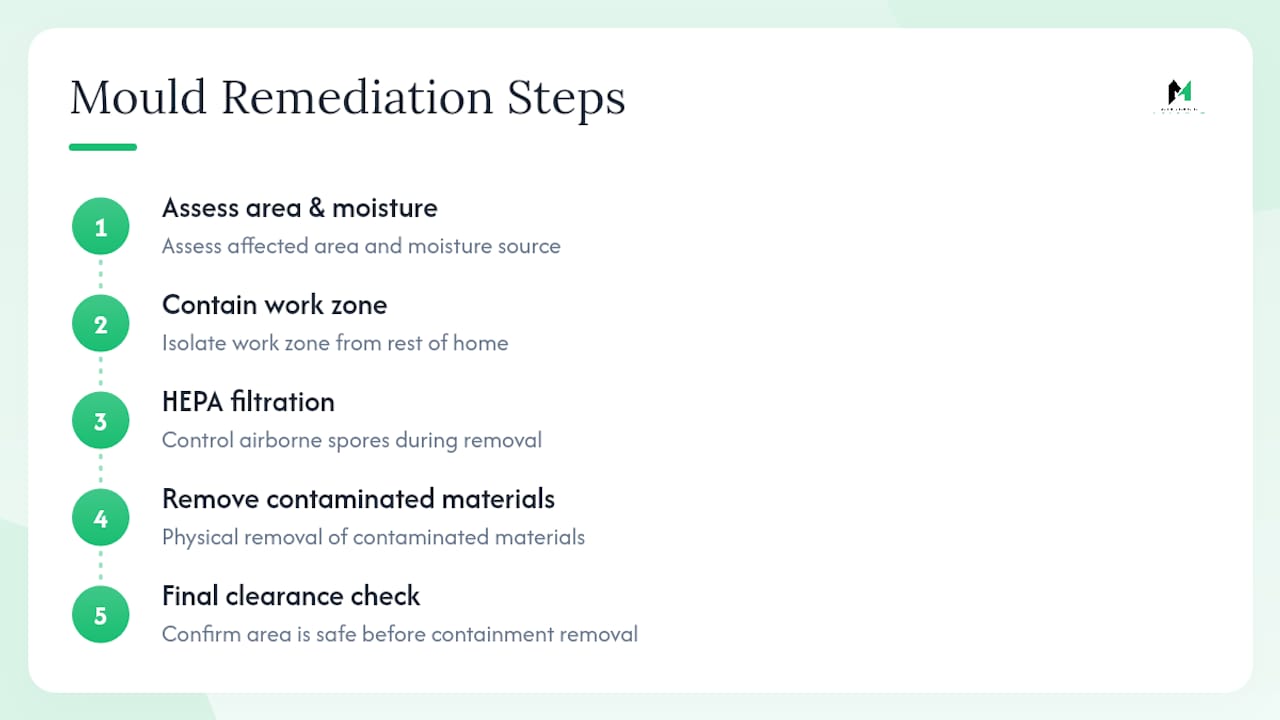
Professional mould remediation typically follows a structured sequence: assessment of the affected area and moisture source, containment to isolate the work zone from the rest of the home, HEPA filtration to control airborne spores during removal, physical removal of contaminated materials, and a final clearance check to confirm the area is safe before the containment comes down.
When vetting a contractor, ask about certifications, not just experience. Look for familiarity with IICRC S520, the industry standard specifically for mould remediation (distinct from S500, which covers water damage restoration and drying). Membership with organizations like the ACAC or NEHA, along with proof of liability insurance, are reasonable things to ask for before signing anything.
A note on documentation: most remediation companies provide a scope of work, before-and-after photos, and a clearance report once the job’s done. Keep every one of those documents. Insurers processing a mould remediation claim generally want proof of the original damage, the remediation steps taken, and confirmation the problem was actually resolved, not just painted over.
How to prevent mould coming back
Cleaning up existing mould without fixing what caused it is a temporary win at best. The moisture source has to go first, whether that’s a slow plumbing leak, a roof that’s letting water in during heavy rain, poor grading that pushes water toward your foundation, or a downspout dumping right next to the house instead of away from it.
Once the source is handled, humidity control keeps new growth from starting. Indoor relative humidity should generally sit below 50 to 60%, and a dehumidifier in basements or poorly ventilated areas does a lot of quiet work here. Bathroom and kitchen exhaust fans that actually vent outside, rather than into an attic, matter more than most homeowners assume.
If you’re rebuilding after remediation, material choice pays off long term. Water-resistant wallboard, sealed and properly graded subfloors, and mould-resistant paint in bathrooms and basements all reduce how fast the next spill or leak turns into a problem.
A short seasonal checklist keeps most of this on track:
- Clean gutters and check downspouts direct water away from the foundation
- Replace HVAC filters on schedule to maintain proper airflow and humidity control
- Test sump pumps before spring thaw and heavy rain seasons
- Inspect crawlspace vapour barriers for tears or gaps
Pro Tip: If a room has flooded or leaked more than once in two years, the issue almost certainly isn’t the mould. It’s a moisture source somewhere in the building envelope that hasn’t been properly diagnosed yet.
How MSN Environmental approaches mould after water damage
Certified remediation isn’t the same as a thorough cleaning, and that distinction is where a lot of recurring mould problems come from. MSN Environmental coordinates the full sequence, testing, containment, removal, and clearance, so the moisture source and the visible problem get addressed together, not just the surface symptom.
Before a technician arrives, it helps to have photos of the original water event, dates of when the leak or flood occurred, and clear access to the affected rooms. That context speeds up the assessment and gives the team a clearer picture of how long materials have been wet.
The advantage of a certified crew over basic cleaning comes down to containment and verification. HEPA filtration helps reduce spores spreading to unaffected rooms during removal, and a clearance check afterward can confirm the job’s success, rather than assuming it did because the stains are gone.
Long-term effects mould leaves behind
Mould damage rarely stays cosmetic if it’s left alone. Structural wood that stays wet and colonized long enough loses integrity, and framing members can weaken to the point of needing replacement rather than repair. Drywall and subflooring exposed to sustained moisture and mould growth typically can’t be salvaged, they get removed and replaced during remediation rather than cleaned.
There’s a financial dimension too. Untreated mould tends to spread gradually through connected cavities and framing, which means a problem that could have been a $500 fix in month one can become a multi-thousand-dollar structural repair by month twelve. Buyers and home inspectors also flag past mould issues during resale, even after remediation, which can affect negotiations if documentation of proper remediation isn’t available.
Indoor air quality suffers in the meantime, with musty odours persisting throughout the home even in rooms far from the original water event, since spores travel through HVAC systems and shared air spaces. That’s part of why acting inside that first 24 to 48 hour window, and calling in professional help once thresholds are crossed, saves more than just the immediate cleanup cost.
How professionals detect hidden mould
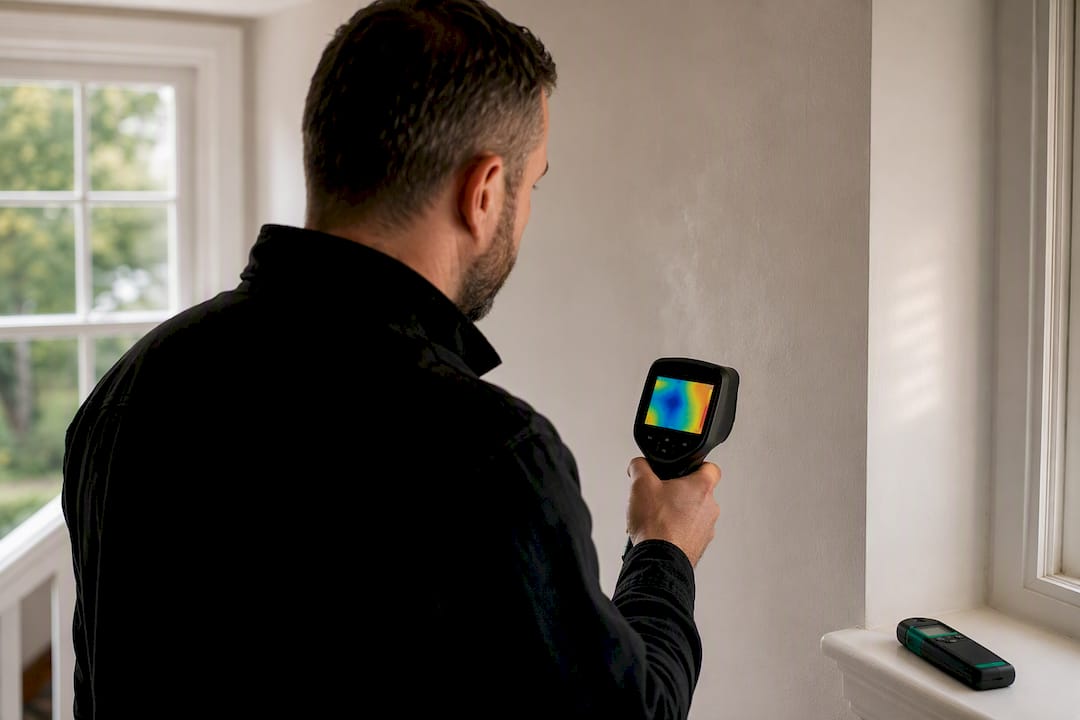
Homeowners can spot obvious surface growth, but professionals have tools built for what’s invisible. Moisture meters remain the workhorse, pin-type meters measure moisture content directly inside materials like drywall and wood framing, while pinless meters scan larger areas without puncturing the surface.
Thermal imaging cameras detect temperature differences that often correspond to damp areas behind walls or under flooring, since wet materials tend to read cooler than dry ones. It won’t confirm mould directly, but it narrows down where to look or where to open up material for a closer inspection.
Air sampling measures spore concentration in a room’s air compared to an outdoor baseline, which can flag elevated levels even when no visible growth is found. That said, most guidance, including from the EPA, doesn’t recommend testing as a routine first step. If mould is visible or the odour is obvious, remediation is the answer regardless of which species is present, and testing before that point mostly adds cost without changing the plan. Air sampling earns its place afterward, confirming a space is clear once remediation work is done.
Drying techniques and equipment that actually work
Not all drying setups are equal, and the equipment choice depends on the material and how wet it got. Air movers, the professional-grade version of a box fan, create high-velocity airflow across wet surfaces to speed evaporation, and they work best in combination with dehumidification rather than alone.
Refrigerant dehumidifiers pull moisture from the air and work well in moderate temperatures, while desiccant dehumidifiers handle colder environments, like unheated basements, more effectively since refrigerant units lose efficiency below certain temperatures. Running dehumidifiers alongside air movers creates a cycle: fans pull moisture out of materials into the air, and the dehumidifier pulls that moisture out of the air, rather than letting it just resettle.
Heat drying systems, sometimes paired with air movers, accelerate evaporation in situations like saturated hardwood floors, though they need careful monitoring to avoid warping or cracking the material they’re meant to save.
The equipment only works if it’s running long enough and monitored properly. Moisture meter checks every day or two confirm when a material has actually reached a safe moisture level, rather than guessing based on how many days the fans have been on.
Containment and safe mould removal protocols
Once mould is established, drying equipment alone isn’t the answer, containment is. Professional remediation typically isolates the work area with plastic sheeting and negative air pressure, meaning air flows into the containment zone but not out of it, which keeps spores from migrating to clean parts of the home during removal.
HEPA air scrubbers run continuously inside the containment zone, filtering airborne spores down to a level that’s safe to release once the job’s complete. Contaminated materials, drywall, insulation, carpet, get bagged inside the containment area before being carried out, rather than through open hallways where spores could escape.
Technicians typically use HEPA vacuums for final cleaning of surfaces within the contained area, since standard vacuums just circulate spores back into the air through their exhaust. Once removal and cleaning are finished, a clearance inspection, sometimes paired with air sampling, confirms spore counts have returned to normal before the containment barriers come down. This structured approach is the practical difference between a job that stays fixed and one that resurfaces in six months.
What conventional advice gets wrong about mould after water damage
Most guidance on this topic treats “clean it up fast” as the whole answer, and that’s where it falls short. Speed matters, but speed without fixing the moisture source just buys time before the same problem resurfaces, often behind a fresh coat of paint that makes it harder to spot the second time around.
The other place conventional advice overcorrects is testing. A lot of homeowners assume they need lab results before they can act, when the evidence actually points the other way: visible growth or a persistent musty smell is enough to justify remediation, regardless of which species is present. Testing has its place for clearance after the work is done, not as a gatekeeper before it starts.
If there’s one priority worth locking in above the rest, it’s this: treat the first 48 hours as non-negotiable for drying, and treat any recurrence as proof the real problem, the moisture source, was never actually solved. Everything else, PPE, cleaning agents, equipment choices, matters less than getting those two things right.
— Moacyr
Get certified remediation from MSN Environmental
Scrubbing a small patch with bleach and hoping it doesn’t come back only works when the moisture source is already fixed and the area is genuinely small. MSN Environmental exists for everything past that point, established colonies, contaminated water events, recurring growth behind walls, where certified containment and HEPA filtration replace guesswork with a documented process an insurer will actually accept.

The team handles mould remediation from initial assessment through clearance inspection, and pairs it with air quality testing and pre-remediation assessments when you need documentation for an insurance claim or want confirmation the moisture source itself has been addressed before rebuilding. Homeowners dealing with basement-specific water intrusion can also check the basement mould removal guide for issues specific to below-grade spaces. If your water damage happened more than 48 hours ago and you’re seeing staining, smelling a musty odour, or watching a “cleaned” patch reappear, book an assessment before it spreads further into the structure.
Sources
For deeper reading beyond this guide, Health Canada’s moisture and mould guidance, the CDC’s homeowner flood cleanup guide, the EPA’s mould cleanup guidance, and Harvard Health’s overview all cover this ground from a public health angle. None of them recommend routine testing for visible mould since remediation is the answer regardless of species.
This article is general information, not a substitute for advice from a qualified doctor. Consult a qualified healthcare professional about your own circumstances before acting on anything here.
- Guide to addressing moisture and mould indoors — Health Canada
- Homeowner’s and renter’s guide to mold cleanup after disasters — CDC
- Mold cleanup in your home — EPA
- Mold in the home — Harvard Health
FAQ
How long does it take mould to grow after water damage?
Mould can begin colonizing damp materials within 24 to 48 hours of water exposure, according to Health Canada. If a space can’t be fully dried inside that window, assume growth has already started.
Is mould from water damage toxic?
Some species produce compounds that can affect indoor air quality and trigger respiratory symptoms, but toxicity varies by species and exposure level. Harvard Health notes remediation should proceed the same way regardless of which species is present, since testing rarely changes the required action.
What are the signs of mould after water damage?
Watch for water stains with ring-shaped edges, discolouration in green, black, orange, or pink, a musty odour that ranges from faint to overpowering, warped wood, and peeling paint or wallpaper. A moisture meter reading that stays elevated days after the event is a strong sign of hidden growth even without visible staining.
How can I tell if I have mould after water damage without seeing it?
A persistent musty smell is often the earliest indicator, showing up before any visible colony forms. Combine that with a moisture meter check on walls and flooring near the original water source, and consider a professional inspection if readings stay high or the odour is strong throughout multiple rooms.
When should I call a professional instead of cleaning it myself?
Call a certified team once the affected area exceeds roughly 3 square metres, the water was contaminated (sewage, floodwater), mould is found inside wall cavities, anyone reports respiratory symptoms, or mould keeps returning after cleaning, per EPA guidance. MSN Environmental handles assessment through clearance for cases past DIY limits.