

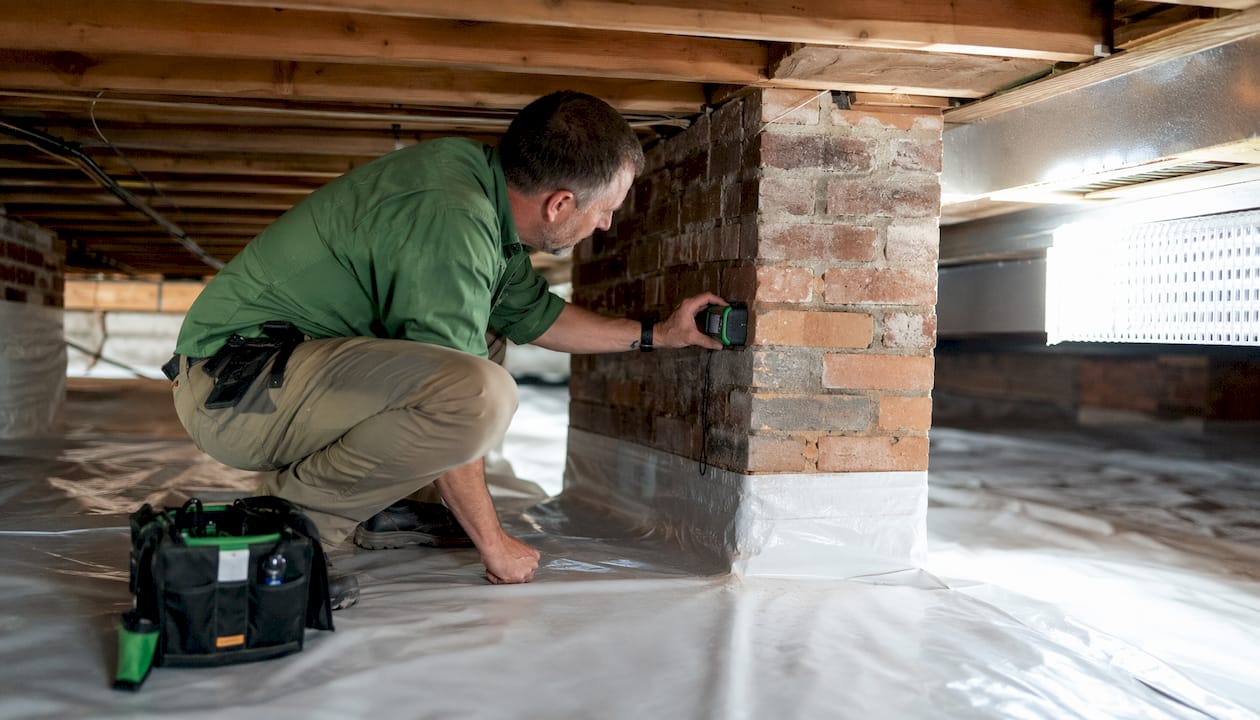
If you find mould in your crawl space, the priority order is this: stop exposure, identify and fix the moisture source, then remove contaminated materials or call a certified remediation team. Cosmetic sprays and bleach will not solve it. The IICRC S520 standard is clear: dry the space first, remove the mould second. Anything else and it comes back.
Immediate actions (do these now):
- Stop access to the crawl space and keep children and pets away
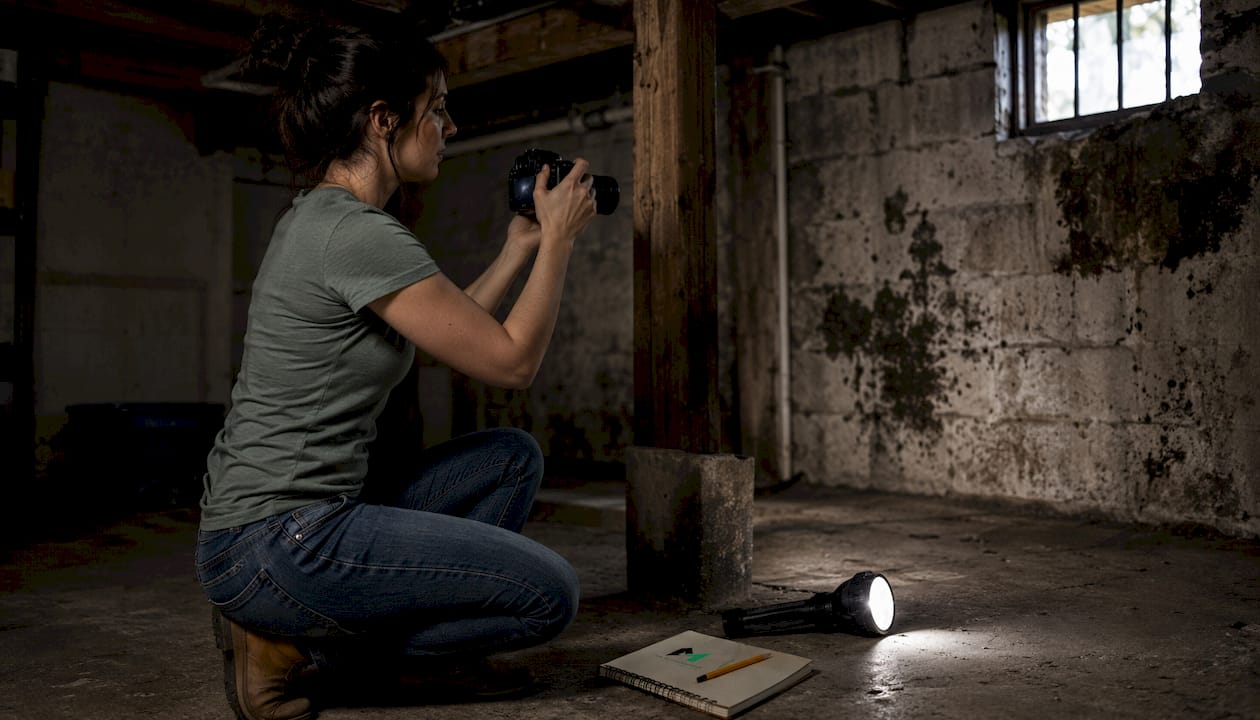
- Document the affected areas with photos before touching anything
- Reduce indoor humidity by running a dehumidifier upstairs if safe to do so
- Call a certified professional if the affected area exceeds 10 sq ft or if you see structural damage
The target humidity for a healthy crawl space is 45–55% RH. MSN Environmental provides certified mould testing and removal across Ontario for homeowners who need a professional assessment.
Table of Contents
- How do you know if your crawl space has mould?
- Why does mould grow under your house in the first place?
- How serious is crawl-space mould for your health and your home?
- What should you do right now if you find mould?
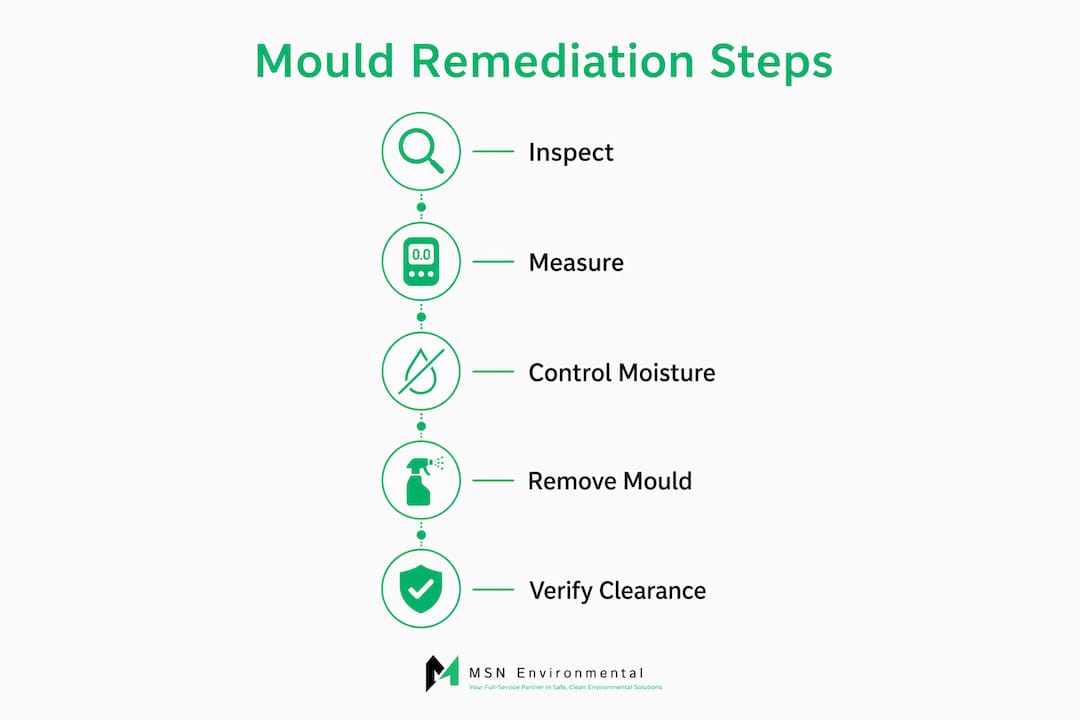
- The two-phase remediation process: moisture first, then removal
- Can you clean crawl-space mould yourself?
- What does crawl-space remediation cost in Canada?
- How to prevent mould from coming back
- What should you expect from a certified remediation company?
- Key takeaways
- A technician’s perspective on diagnosing crawl-space mould
- MSN Environmental: certified mould removal across Ontario
- Further reading and sources
How do you know if your crawl space has mould?
The signs split into two categories: what you can see and what you feel or smell without ever opening the hatch.
Visible signs inside the crawl space:
- Discoloured spots on floor joists or the subfloor — black, green, or grey patches
- White fuzzy or powdery growth (often early-stage mould or efflorescence, but test to confirm)
- Wet or sagging fibreglass batt insulation hanging from the subfloor — wet fibreglass becomes a persistent mould reservoir
- Soft, spongy, or visibly rotting wood along joists or sill plates
- Standing water or consistently damp soil
Indirect signs you notice upstairs:
- A persistent musty smell on the first floor, especially in rooms directly above the crawl space
- Allergy symptoms (sneezing, itchy eyes, congestion) that improve when you leave the house
- Warped or buckling hardwood floors
- Increased pest activity — rodents and insects are drawn to damp, undisturbed spaces
- Condensation on first-floor windows during cooler weather
Before any contractor arrives or any cleanup begins, photograph every affected area. Those photos matter for insurance claims, contractor quotes, and post-remediation comparison.
Why does mould grow under your house in the first place?
Crawl spaces are almost perfectly designed to grow mould. They are dark, poorly ventilated, and sit directly above bare soil that releases water vapour continuously. Fix the visible mould without fixing the moisture source and you are cleaning the same space again in two years.
The main moisture drivers in Canadian homes:
- Ground vapour transmission: Bare soil under the house constantly releases humidity upward. A vapour barrier significantly reduces this, but many older Canadian homes have none or a degraded one.
- Poor exterior grading and gutters: Downspouts discharging close to the foundation and soil that slopes toward the house push groundwater directly into the crawl space.
- Plumbing leaks: A slow drip from a supply line or drain can wet joists and soil for months before anyone notices.
- Condensation: In Canadian winters, warm humid interior air meets cold crawl-space surfaces and condenses. In spring and summer, the dynamic reverses.
- Passive foundation vents: This one surprises most homeowners. Building science has moved away from passive venting in many Canadian climate zones because outside air entering a cool crawl space often deposits more moisture than it removes.
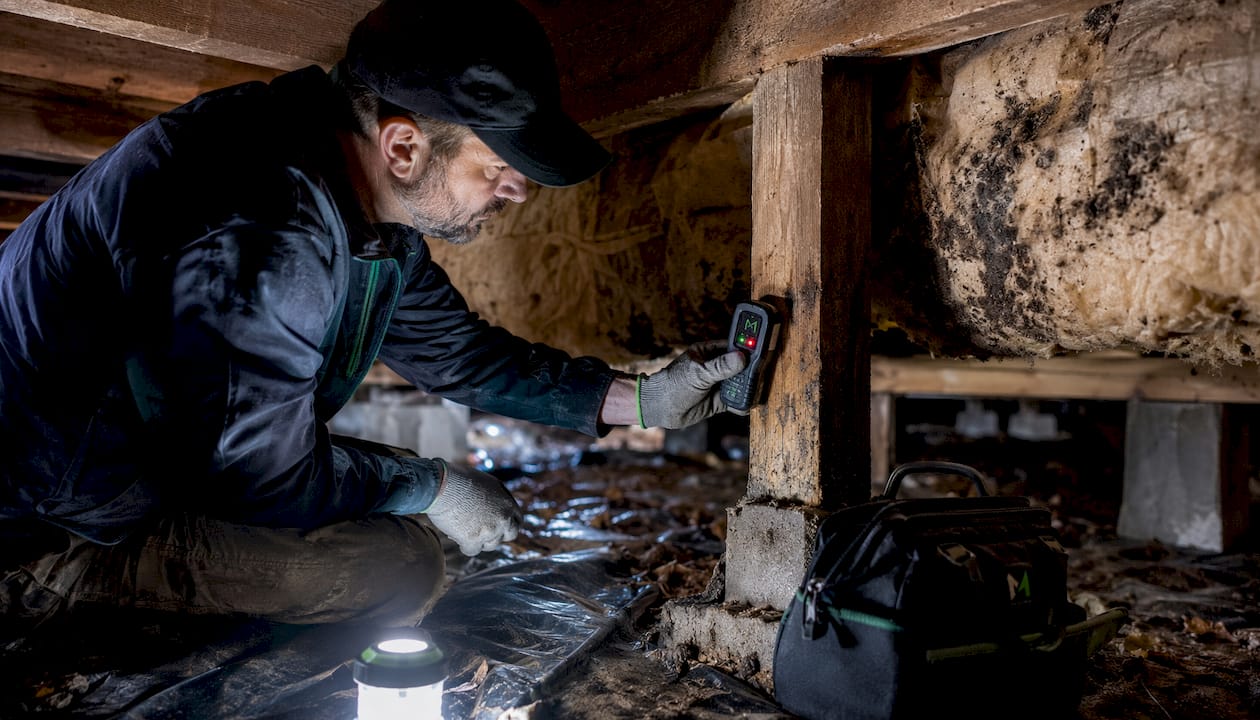
Pro Tip: Buy an inexpensive moisture meter (available at most Canadian hardware stores). Press it against a floor joist: readings above 20% indicate conditions that favour mould growth; above 28%, active colonisation is likely. Check the soil surface and look for plumbing stains on the ground while you are in there.
Encapsulation and mechanical conditioning are now the preferred approach for most Canadian crawl spaces precisely because they remove the passive-venting variable entirely.
How serious is crawl-space mould for your health and your home?
Mould under the house is not just a structural problem. The “stack effect” pulls air upward through a home, which means spores and volatile organic compounds from the crawl space migrate into living areas through gaps in the subfloor, around pipes, and through HVAC systems.
Health effects to watch for:
- Respiratory irritation, chronic coughing, and throat irritation
- Worsened asthma or allergy symptoms
- Headaches and fatigue with no clear cause
- Children, seniors, and immunocompromised occupants are at significantly higher risk and may show symptoms before other household members do
Structural damage that compounds over time:
- Wood decay and joist rot weaken the floor structure
- Wet fibreglass insulation loses its thermal value and holds spores against the wood
- Mould spreads from joists to the subfloor and eventually into wall cavities
Red flags that require urgent professional attention:
- Visible structural rot or soft joists
- Mould coverage larger than 10 sq ft
- Standing water that has not dried within 24–48 hours
- Any occupant showing unexplained respiratory decline or worsening asthma
The CDC notes that mould exposure can cause nasal and sinus congestion, respiratory problems, and skin and eye irritation, with more severe reactions in sensitive individuals. Do not wait for symptoms to escalate before acting.
What should you do right now if you find mould?
Speed matters, but so does doing things in the right order. Disturbing mould without containment spreads spores. Here is the sequence:
- Stop access immediately. Close the crawl space hatch and keep everyone out until you have a plan.
- Ventilate living areas. Open windows on upper floors. Do not direct fans toward the crawl space or run forced-air systems if you suspect the ductwork passes through the affected area.
- Document everything. Photograph the mould, the moisture sources you can see, any standing water, and the condition of insulation and joists.
- Reduce humidity where you safely can. Divert downspouts away from the foundation. Run a dehumidifier on the first floor if the crawl space is not accessible. Do not place fans directly in the crawl space without containment.
- Call a certified professional if the area exceeds 10 sq ft, if you see structural damage, or if any occupant is already showing symptoms.
Do not do these things:
- Do not apply household bleach to wood framing. Bleach cleans surface colour but does not penetrate wood; mould hyphae remain embedded and regrow.
- Do not seal or encapsulate while surfaces are still wet or actively mouldy. Sealing active mould into an encapsulated space traps dormant spores against structural timber where they continue degrading wood unseen.
- Do not dry-brush or sand mould without full PPE and containment — that releases a concentrated cloud of spores.
The two-phase remediation process: moisture first, then removal
Effective crawl-space remediation follows a strict sequence. Skipping phase one is the most common reason mould returns within a season.
Phase 1: moisture correction
- Identify every moisture source: exterior grading, gutter discharge points, plumbing, groundwater intrusion, and HVAC condensation.
- Correct exterior drainage: regrade soil away from the foundation, extend downspouts at least 1.2 metres from the house, and clear gutters.
- Install interior drainage or a sump pump if groundwater is a recurring issue.
- Install a vapour barrier. A 6–20 mil polyethylene barrier over the full floor and up the foundation walls significantly reduces soil vapour transmission. Heavier barriers (12–20 mil) are more durable and worth the extra cost.
- Consider full encapsulation: seal foundation vents, insulate walls with closed-cell foam, and install a crawl-space dehumidifier to hold relative humidity within a range recommended for long-term mould control.
Phase 2: physical removal and repair
- Remove all contaminated insulation. Wet fibreglass cannot be dried and reused; it must go.
- HEPA vacuum all surfaces before any mechanical cleaning to capture loose spores.
- Mechanically clean joists and subfloor with wire brushing or soda blasting where appropriate. Soda blasting is particularly effective on wood framing because it removes surface mould without damaging the wood fibre.
- Apply an EPA/IICRC-approved antimicrobial as a finishing step only after surfaces are completely dry. Biocides are a finishing step, not a substitute for mechanical removal.
- Replace insulation with closed-cell spray foam on foundation walls rather than batt insulation on joists.
Verification
| Checkpoint | Target | Method |
|---|---|---|
| Wood moisture content | — | Moisture meter |
| Relative humidity | 45–55% RH | Calibrated hygrometer |
| Air quality clearance | No elevated spore counts | Post-remediation air sampling |
| Visual inspection | No visible growth | Torch and mirror check |
Post-remediation air sampling confirms the space is clear before encapsulation is sealed. A HEPA air scrubber running on negative pressure during the work keeps spores from migrating upstairs.
Encapsulation plus a crawl-space dehumidifier is the gold standard for long-term mould prevention — but only after active mould has been physically removed and the space is dry.
Can you clean crawl-space mould yourself?
For a small, isolated patch on a concrete surface or a non-porous material, a careful DIY approach is reasonable. For anything on wood framing, anything larger than roughly 10 sq ft, or any situation involving standing water or structural damage, hire a certified contractor.
| Situation | DIY or Pro? | Key reason |
|---|---|---|
| Small patch (<10 sq ft), non-porous surface | DIY possible | Limited spore load, easy containment |
| Mould on wood joists or subfloor | Pro recommended | Bleach ineffective; mechanical removal needed |
| Area >10 sq ft | Professional required | Level II/III protocols, containment, air testing |
| Standing water present | Pro required | Drainage work needed before remediation |
| Occupant with asthma or immune issues | Pro required | Spore exposure risk during disturbance |
| Suspected toxic species (black mould) | Pro required | Lab identification and full containment |
If you do tackle a small job yourself:
- Wear an N95 respirator (half-mask is better), nitrile gloves, and eye protection
- Use hydrogen peroxide or a specialised mould cleaner rated for porous surfaces, not bleach
- HEPA vacuum before and after cleaning
- Double-bag all contaminated insulation and dispose of it per your municipality’s guidelines
- Some cleaning tasks genuinely require professional equipment and training — know where that line is before you start
Questions to ask any remediation contractor:
- Are you certified to IICRC S520 protocols? Do you hold ACAC or provincial hazardous-materials licences?
- What containment and negative-air setup will you use?
- Will you do pre- and post-remediation air sampling?
- What is your waste disposal method, and does it comply with Ontario regulations?
- Do you offer a warranty on encapsulation work?
What does crawl-space remediation cost in Canada?
Cost ranges vary widely depending on the size of the affected area, the moisture source, and whether encapsulation is included. There are no publicly standardised Canadian benchmark figures for this work, so the ranges below reflect the general scope factors rather than quoted prices.
Get at least three written, itemised quotes. A quote that bundles remediation and encapsulation without separating the line items makes it impossible to compare contractors fairly.
Factors that drive cost up:
- Large affected area or widespread structural damage requiring joist sistering or replacement
- Standing water requiring drainage installation or a sump pump
- Full encapsulation (heavy-gauge barrier, sealed vents, dehumidifier) versus a basic vapour barrier only
- Soda blasting or media blasting on wood framing
- Pre- and post-remediation air and bulk sampling (lab fees apply)
- Hazardous waste disposal fees
Scope and timeline by project phase:
- Inspection and testing: typically completed in a single visit; lab results usually take a few business days
- Small cleanup (DIY-scale, <10 sq ft): one day or less
- Professional remediation without encapsulation: one to three days depending on access and scope
- Full encapsulation with drainage work: three to five days or more for a complex job
Always ask for post-remediation testing to be included in the scope, and confirm the contractor’s warranty on the vapour barrier and dehumidifier installation.
How to prevent mould from coming back
Remediation without a maintenance plan is a temporary fix. The crawl space needs ongoing attention, particularly in Canada where spring thaw and heavy-rain seasons create predictable moisture spikes.
- Inspect twice a year — once in late spring after snowmelt and once in early autumn. Look for new staining, barrier tears, standing water, and pest intrusion.
- Monitor humidity continuously. A data-logging hygrometer left in the crawl space gives you a record of RH over time. If readings climb above 55%, investigate before mould has time to establish.
- Inspect and reseal vapour barrier seams. Barriers shift and tear over years; tape or weld any open seams immediately.
- Clean gutters and check grading twice a year. Most moisture intrusion problems trace back to water discharging too close to the foundation.
- Service the crawl-space dehumidifier annually. Check the drain line, clean the coils, and confirm the setpoint is holding at 50–55% RH. Encapsulation plus a dehumidifier eliminates most recurrent moisture problems when maintained properly.
- Choose the right insulation. Closed-cell spray foam on foundation walls outperforms fibreglass batt on joists in a crawl space. Batt insulation traps moisture against wood and is the first place mould establishes.
Seasonal notes for Canadian homeowners: Spring thaw is the highest-risk period. Frozen ground thaws unevenly, and water that cannot drain quickly pools against foundations. In cold months, condensation dynamics shift: the crawl space may actually be drier in deep winter but spike in humidity during freeze-thaw cycles. Adjust your dehumidifier setpoints seasonally and check the space after any significant rain or snowmelt event.
What should you expect from a certified remediation company?
Credentials matter in this industry. Mould remediation involves hazardous materials, containment protocols, and disposal requirements that vary by province. In Ontario, look for contractors who follow IICRC S520 protocols, hold ACAC certification or equivalent, and carry the provincial licences required for hazardous-materials handling.
What a professional job looks like, step by step:
- Pre-work air and bulk sampling to establish baseline spore counts and identify species
- Containment setup with polyethylene sheeting and negative-air machines (HEPA air scrubbers) to prevent cross-contamination
- Mechanical removal of contaminated materials, including insulation and non-salvageable wood
- Mechanical cleaning of structural members (wire brushing, soda blasting) followed by antimicrobial application
- Disposal of all waste per Ontario regulations
- Post-remediation air sampling and clearance testing before the space is sealed or re-occupied
- Written documentation of findings, methods, and clearance results — useful for insurance claims and property resale
A certified contractor will never tell you that mould will “die off” once humidity drops. Some species become dormant at low humidity but reactivate when conditions change. Physical removal is the only reliable solution.
MSN Environmental provides certified mould testing, removal, and post-remediation verification across Ontario, following IICRC-aligned protocols and provincial hazardous-materials standards.
Key takeaways
Mould in a crawl space requires moisture correction before physical removal; encapsulation and mechanical dehumidification to 45–55% RH is the only long-term solution that prevents recurrence.
| Point | Details |
|---|---|
| Fix moisture first | Remediation without correcting the moisture source always leads to recurrence. |
| Physical removal is non-negotiable | Sprays and bleach do not penetrate wood; mechanical cleaning is required for joists and subfloor. |
| Target 45–55% RH | A crawl-space dehumidifier and sealed vapour barrier are the tools that hold humidity in this range. |
| Know the DIY limit | Areas larger than 10 sq ft, structural damage, or occupant health concerns require a certified professional. |
| MSN Environmental | Provides certified mould removal, air and bulk sampling, and encapsulation services across Ontario. |
A technician’s perspective on diagnosing crawl-space mould
The first thing I check on any crawl-space inspection is not the mould itself. It is the moisture meter reading on the joists nearest the foundation walls. That number tells me more about the scope of the problem than anything visible. A reading above 20% on wood that looks clean means the mould front is coming, even if you cannot see it yet.
The second thing I look for is the insulation. Fibreglass batt hanging from the joists in a damp crawl space is almost always compromised. Homeowners resist removing it because it looks intact, but wet fibreglass holds moisture against the wood for months after the visible water is gone. Removing it is not optional; it is where the remediation actually starts.
The most common mistake I see is homeowners or even some contractors sealing a crawl space before it is genuinely dry. They install a vapour barrier over damp soil or, worse, over surfaces that still have active mould. The encapsulation looks great from the hatch. Underneath, the wood continues to degrade. By the time the problem resurfaces, the structural damage is far more expensive than the original remediation would have been.
Encapsulation is the right long-term answer for most Canadian homes, particularly in regions with significant spring thaw. But the sequence is everything: dry, remove, verify, then seal.
MSN Environmental: certified mould removal across Ontario
When the crawl space needs more than a weekend project, MSN Environmental is the certified option for Ontario homeowners. The team handles the full scope: mould testing and inspections, hazardous-materials removal, encapsulation, and post-remediation verification with written clearance documentation for insurance or resale purposes.

Every job follows IICRC-aligned protocols: containment, negative-air setup, mechanical removal, and final air sampling before the space is handed back. There are no shortcuts on structural members, and no job is considered complete without clearance testing. For homeowners who want to know exactly what they are getting, the top reasons to hire certified professionals for hazardous-materials work are worth reading before you book anyone.
MSN Environmental serves homeowners across Ontario, including Hamilton, Toronto, Cambridge, and the Kitchener-Waterloo region. To book an inspection or get a quote for professional mould removal, contact the team directly through the website.
Further reading and sources
These are the primary sources used throughout this guide. The first is the most useful for homeowners doing their own research; the standards documents are best for contractors or anyone verifying professional protocols.
- Crawl Space Mold — InspectApedia: Detailed technical reference on moisture sources, mould identification, and remediation sequencing. Best for DIY reference and understanding the two-phase approach.
- Guide to Crawl Space Sealants and Sanitizers — InspectApedia: Explains why biocides are a finishing step, not a primary treatment. Useful for understanding what sprays can and cannot do.
- Mold in Crawl Spaces — Mold Remediation Authority: Good overview of encapsulation versus passive venting, and the professional protocol thresholds (10 sq ft rule).
- Mold in Crawl Space Remediation Guide — Mold Action Plan: Practical guidance on vapour barriers, bleach limitations, and mechanical removal methods.
- CDC — Indoor Environmental Quality: Mould Symptoms: Primary health authority source for mould exposure symptoms and at-risk populations.
- MSN Environmental — Mould Removal Services: MSN Environmental’s service page covering professional remediation methods and Ontario coverage.