

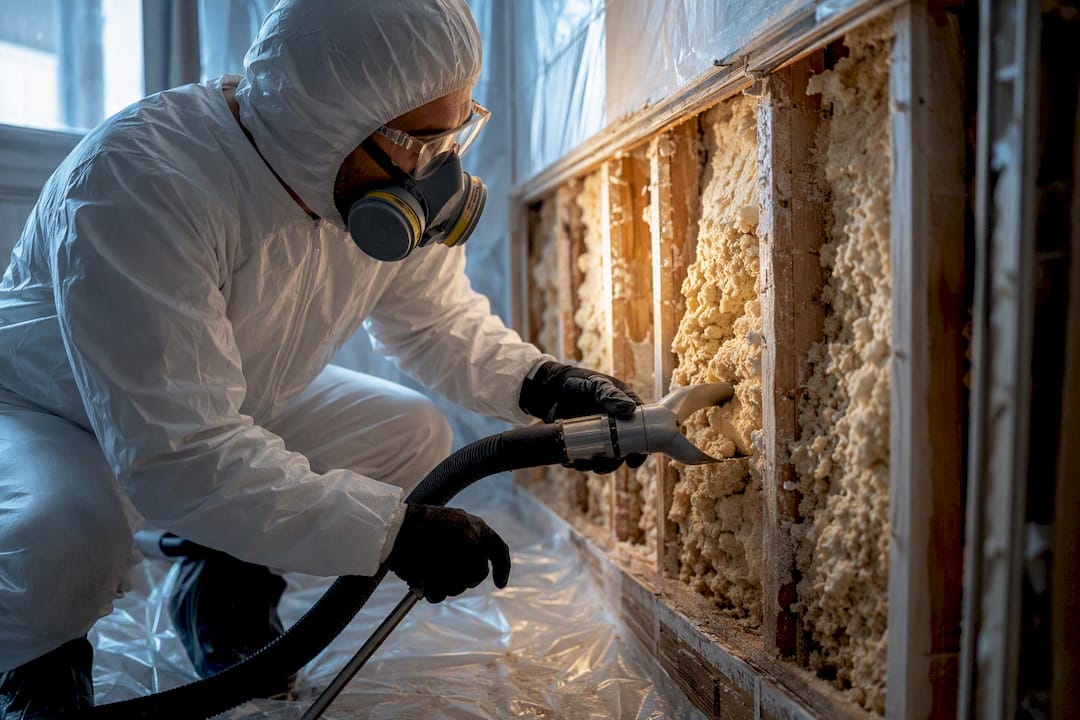
Removal isn’t automatic. Dry, intact UFFI sealed inside undisturbed wall cavities is typically inert and can often stay put. But foam that’s wet, crumbling, or about to be exposed during a renovation should come out, and only a specialist should do that work. If you suspect either problem, arrange an inspection before you touch anything. MSN Environmental is one option for that assessment.
TL;DR:
- Removal should focus on wet, crumbling, or moldy foam, as stable, dry UFFI inside sealed wall cavities generally remains inert and safe.
- Professional removal involves controlled extraction, containment, and post-remediation testing, with costs varying based on accessibility, size, and moisture issues.
- DIY removal is risky due to dust and formaldehyde exposure, and proper containment and HEPA equipment are essential for safety if disturbance is unavoidable.
- Visual inspection alone is insufficient; post-removal air testing and HEPA wipe sampling are necessary to confirm the space is safe before closing walls.
- Reputable contractors provide detailed plans, risk assessments, and documentation; avoid firms unwilling to show containment methods or offer official clearance testing plans.
Table of Contents
- How to spot UFFI and know when the UFFI removal process is necessary
- Should you remove, test, encapsulate, or leave UFFI alone?
- What does professional UFFI removal actually involve?
- Can you remove UFFI yourself, or is it always a job for a pro?
- What does the UFFI removal process cost and how long does it take?
- How do you choose a contractor for professional UFFI removal?
- How do you know the UFFI removal is actually complete?
- Why professional judgment beats reflex removal
- Ready for a UFFI inspection or removal quote?
- Where to check the official guidance
- Sources
- FAQ
How to spot UFFI and know when the UFFI removal process is necessary
Urea-formaldehyde foam insulation was pumped as a liquid into wall cavities, mostly in homes built or retrofitted several decades ago, where it expanded and hardened around wiring, studs, and sheathing. You won’t see it without opening a wall, but a few clues give it away.
- Small injection holes plugged with caulk or wood filler, spaced evenly along exterior walls
- A pale yellow, tan, or brownish foam visible through cracks, outlet covers, or attic access points
- Crumbling, shrinking, or a chalky texture where foam has pulled away from framing
- Musty odours, staining, or damp patches near exterior walls
Presence alone doesn’t demand removal — degradation does. Moisture is the trigger that turns stable foam into a problem, so check for leaks, condensation, or grading issues before assuming the insulation itself is at fault. If you find crumbling foam or damp cavities, stop opening walls further and call a qualified assessor, especially to check moisture problems that may reactivate formaldehyde off-gassing.
Should you remove, test, encapsulate, or leave UFFI alone?
Four situations cover almost every case:
- Foam is wet, deteriorating, or mouldy. Removal by a specialist is the right call, and the moisture source needs fixing first or the problem returns.
- You’re renovating and will disturb the cavity. Plan for controlled removal or professional containment rather than exposing foam mid-project.
- Foam looks intact, dry, and won’t be disturbed. Testing or periodic monitoring is usually enough. No urgent action needed.
- You’re unsure of its condition. A bulk sample or a professional visual assessment settles the question faster than guessing.
Encapsulation can work when full extraction isn’t practical, but it doesn’t eliminate the source. Any encapsulation job needs post-remediation air testing to confirm it’s actually holding.
What does professional UFFI removal actually involve?
Certified contractors follow a sequence that’s designed to keep dust and fumes contained, not just to pull foam out fast.
- Survey and risk assessment. A technician inspects the cavities, checks for moisture, and drafts a method statement outlining scope, access points, and disposal plans before any quote is finalized.
- Containment setup. Crews seal doorways, cover vents, and establish negative air pressure in the work zone so dust and formaldehyde vapour don’t migrate into living spaces.
- Controlled access. Rather than tearing open entire walls, technicians cut targeted openings sized to reach the foam without unnecessary demolition.
- Extraction. Foam is mechanically broken up and removed, with HEPA-filtered vacuums capturing dust and fragments as they go, since UFFI adheres stubbornly to framing and crumbles as it’s disturbed.
- Cleaning and sealing. Cavity surfaces get wiped down, sometimes with local removal of contaminated material, before sealing and preparing for re-insulation.
- Disposal and documentation. Waste is bagged and hauled to an approved facility, and the homeowner receives records of what was removed, how, and where it went.
- Verification. Post-work checks, often including HEPA wipe sampling or air testing, confirm the space meets clearance standards.
Pro Tip: Ask your contractor to show you the negative-pressure setup before extraction starts. If they can’t explain how containment works or skip it entirely, that’s a red flag worth walking away from.
Can you remove UFFI yourself, or is it always a job for a pro?
Disturbing UFFI without containment releases dust and formaldehyde vapour into living space, and that’s the exposure risk that matters most. DIYers routinely underestimate how much dust settles into HVAC systems, carpets, and furniture once a wall is opened without proper sealing.
- Do not cut into cavities, sand foam, or attempt removal without HEPA equipment and containment.
- Stop water leaks or condensation sources yourself. That’s safe and genuinely helps.
- Photograph visible damage, staining, or crumbling foam for your contractor’s assessment.
- Keep pets and household members away from suspect areas until a specialist arrives.
If you’ve already exposed foam accidentally, seal the opening loosely with plastic sheeting and call a professional rather than continuing.
What does the UFFI removal process cost and how long does it take?
Most jobs run through three phases: a site survey and quote, containment and extraction which can take several days depending on scope, and final verification testing before completion.
Cost swings on a few factors:
- Access difficulty. Foam behind finished drywall costs more to reach than exposed basement or attic cavities.
- Square footage of affected walls. More cavities mean more containment area, more labour hours, and more disposal volume.
- Moisture or mould presence. Wet foam often means hidden rot or mould that needs addressing alongside the UFFI itself.
- Disposal classification and finishing. Contaminated waste disposal fees vary, and drywall or trim repairs after extraction add to the final bill.
Budget a contingency for hidden damage. Walls that look fine from outside sometimes hide rot behind the foam, and that discovery mid-project is common enough to plan for rather than be surprised by.
How do you choose a contractor for professional UFFI removal?
Reputable UFFI abatement contractors put everything in writing before work starts. Vague verbal promises are the biggest warning sign in this industry.
- Request a written method statement. It should detail containment setup, access points, and extraction sequence, not just a one-line quote.
- Ask for the risk assessment. This document identifies hazards specific to your property and how the crew plans to manage them.
- Confirm hazardous-waste disposal arrangements. Ask which licensed facility will take the material and request a disposal manifest afterward.
- Verify liability insurance and worker certifications. Ask to see current proof, not just a claim that they’re insured.
- Ask for a clearance testing plan and references. Photos or contact details from similar past jobs tell you more than a sales pitch ever will.
Pro Tip: If a contractor hesitates when you ask about post-removal air testing, treat that as disqualifying. Clearance testing is standard practice, and dodging the question usually means they skip it.
Walk away from anyone who won’t put the method statement or disposal plan in writing.
How do you know the UFFI removal is actually complete?
Visual inspection alone isn’t enough, since foam residue can cling to cavity faces even after mechanical extraction. Reputable crews follow up with HEPA wipe sampling and targeted air testing to confirm the space meets clearance levels before anything gets closed up again.
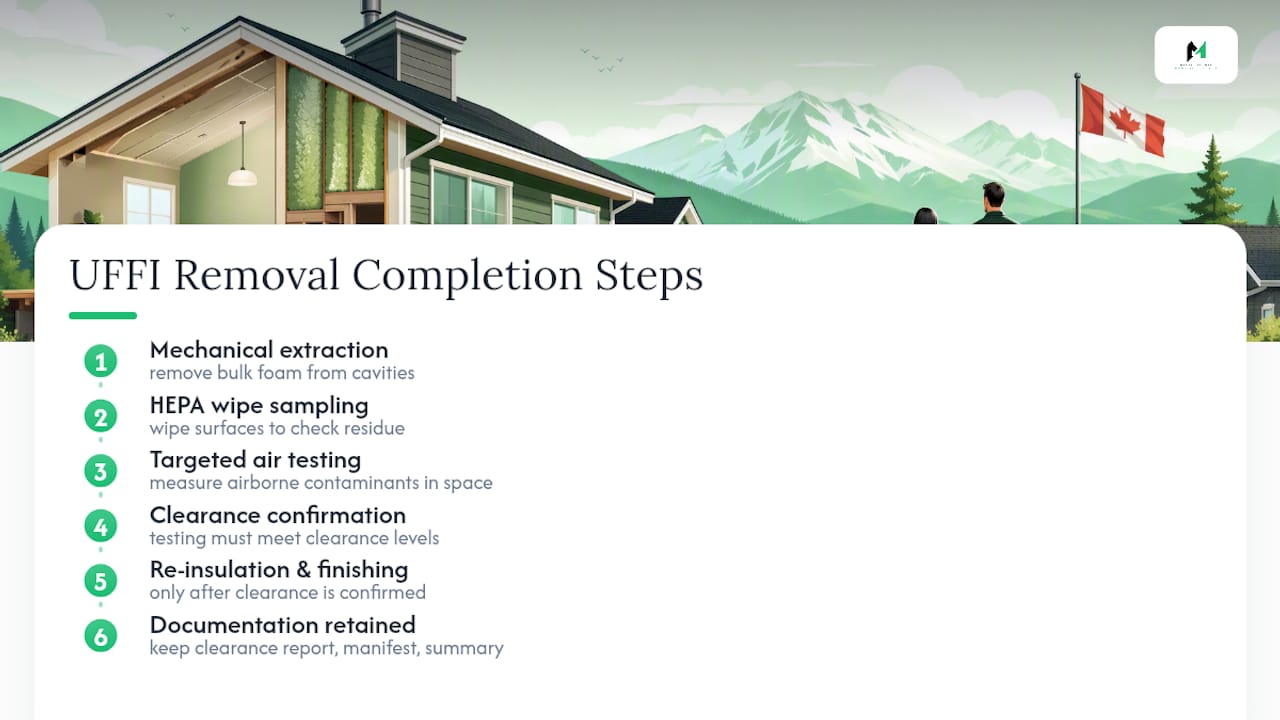
Once testing passes, re-insulation and wall finishing can proceed. This is also the point where documentation matters most: keep the clearance report, disposal manifest, and contractor’s final summary on file. Lenders, surveyors, and future buyers may ask for that paperwork, particularly since UFFI is commonly flagged during resale inspections in many provinces.
Why professional judgment beats reflex removal
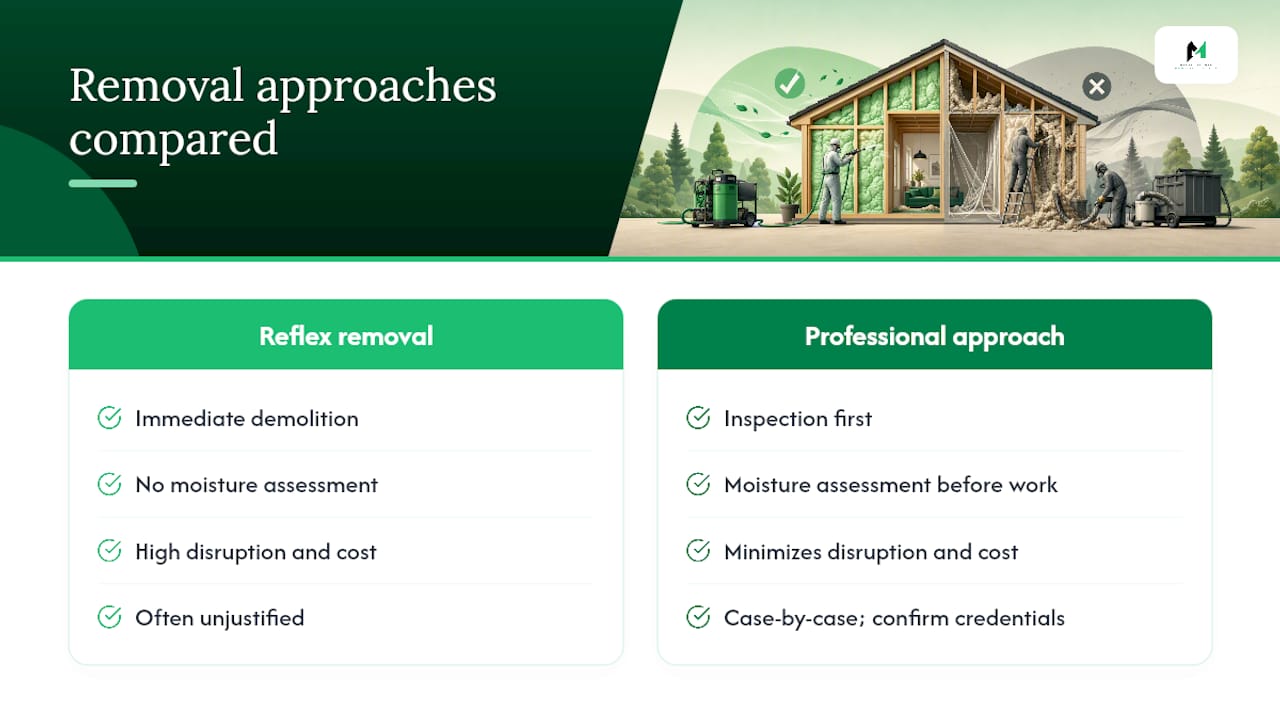
Homeowners often assume finding UFFI means immediate demolition, and that instinct causes more harm than good. Tearing into a wall without a moisture assessment first can turn a manageable situation into an expensive one. MSN Environmental’s approach starts with inspection, not extraction, because dry and stable foam rarely justifies the disruption and cost of full removal.
Case-specific credentials, certifications, and project history are best confirmed directly with the MSN Environmental team, since every property’s history is different.
— Moacyr
Ready for a UFFI inspection or removal quote?
If you’ve found suspect foam, staining, or crumbling insulation, Professional services handle the parts of this process that carry real risk: bulk sampling to confirm what you’re dealing with, full containment and removal when foam is deteriorated, HEPA cleaning, compliant disposal, and post-remediation air testing to prove the job’s done.

A site visit typically starts with a visual assessment and, where needed, a sample pulled for lab analysis. From there, you get a written scope and quote before any work begins, along with the documentation buyers, lenders, or surveyors might ask for later. Have your address, the age of the property, and any visible signs of moisture or damage ready when you call. For homeowners weighing a DIY attempt against hiring it out, this rundown on reasons to hire certified professionals lays out exactly what’s at stake. Reach out to request an inspection and get a written quote before your next renovation step.
Where to check the official guidance
Health Canada’s prohibition notice on urea-formaldehyde foam insulation covers the regulatory history. CMHC’s UFFI publication explains condition-based removal criteria in more technical depth. For hands-on removal methodology, InspectApedia’s UFFI guide is a solid independent reference.
This article is general information, not a substitute for advice from a qualified doctor. Consult a qualified healthcare professional about your own circumstances before acting on anything here.
Sources
- Canadian prohibition: urea-formaldehyde foam insulation — Health Canada
- Urea-formaldehyde foam insulation (UFFI) — CMHC / Government of Canada publication
- UFFI insulation identification and removal — InspectApedia
- Formaldehyde foam insulation safety, risks and alternative solutions — Build-Construct
FAQ
Why is UFFI insulation no longer used?
Health Canada issued a prohibition on urea-formaldehyde foam insulation after concerns emerged about formaldehyde off-gassing during and shortly after installation, particularly in the early 1980s.
Should urea-formaldehyde insulation be removed?
Not always. Government guidance indicates dry, intact UFFI installed before 1980 is unlikely to cause elevated formaldehyde levels now, but foam that’s wet, deteriorating, or about to be disturbed during renovation should be removed by a specialist.
When was UFFI banned in Canada?
Health Canada’s prohibition dates back to the early 1980s, following reports of formaldehyde exposure concerns tied to the insulation’s installation process.
What does UFFI mean in real estate?
UFFI stands for urea-formaldehyde foam insulation, and its presence is commonly flagged during home inspections or required disclosures because of its regulatory history and moisture sensitivity.
How much does professional UFFI removal cost?
Cost depends heavily on access difficulty, the amount of affected wall area, moisture damage, and disposal requirements, so getting a site-specific quote from a certified contractor is the only reliable way to budget.