

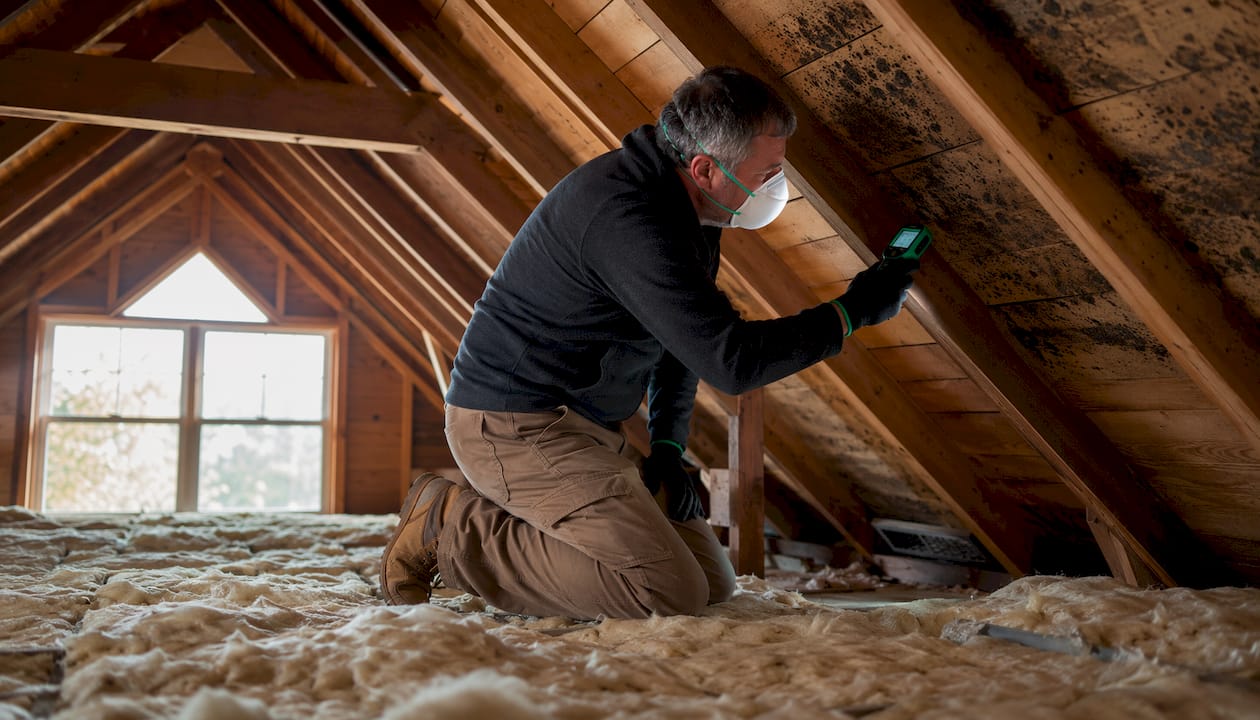
Small attic mould patches under 10 square feet can be handled by a careful homeowner following proper safety steps. Anything larger, or any situation involving HVAC contamination, structural damage, or occupant health concerns, requires a certified professional following the IICRC S520 standard. If you are not certain of the scope, treat it as a professional job until proven otherwise. Msnenvironmental is a certified Canadian option for assessment and full remediation.
Immediate actions to take right now:
- Stop using the attic and restrict access until the scope is confirmed
- Seal or cover the attic hatch to limit spore migration into living areas
- Turn off forced-air HVAC to prevent spores from circulating through ductwork
- Note any obvious moisture sources: dripping, staining, frost, or condensation on sheathing
- Photograph everything before touching anything
Call a professional if any of these apply: the affected area exceeds roughly 10 sq ft, the wood feels soft or spongy underfoot, the HVAC system may be contaminated, there is evidence of sewage or flood water, or anyone in the home has respiratory conditions or a compromised immune system.
Table of Contents
- Why does attic mould keep coming back?
- How do you spot attic mould versus harmless staining?
- Can you safely remove small attic mould patches yourself?
- When should you hire a certified mould remediator?
- What does professional attic mould remediation actually involve?
- How much does attic mould remediation cost in Canada?
- How do you stop attic mould from coming back?
- When does air testing actually help?
- What to ask before hiring a mould remediation contractor
- Key takeaways
- A professional perspective on attic mould
- Msnenvironmental’s attic mould services across Ontario
- Useful sources and Canadian resources
Why does attic mould keep coming back?
Attic mould is overwhelmingly a ventilation and air-sealing problem, not a cleaning problem. You can scrub every surface in the attic and the mould will return within a season if the moisture source is still active. Industry professionals consistently frame attic mould as a ventilation failure wearing a mould costume. That framing matters because it changes where you spend your remediation budget.
Here is the basic physics: warm, humid air from your living space rises and finds its way into the attic through gaps around recessed lights, plumbing chases, chimneys, and the attic hatch itself. When that warm air hits the cold underside of the roof sheathing in winter, it condenses. OSB and plywood sheathing absorb that condensation, and once wood moisture content exceeds roughly 19–20%, mould colonisation accelerates quickly.
The most common culprits, in rough order of frequency, are:
- Bathroom, kitchen, or dryer exhaust fans venting into the attic instead of outdoors. This is the single most common cause in Canadian homes.
- Blocked soffit vents buried under insulation, cutting off the cold fresh air that should flush the attic continuously
- Insufficient ridge or gable venting that leaves warm stale air trapped under the peak
- Air bypasses at recessed light fixtures, plumbing chases, and the attic hatch frame
- Roof leaks or ice dams that introduce liquid water rather than vapour
The Canadian building code baseline for attic ventilation is 1 ft² of net free area (NFA) per 150 ft² of attic floor, split evenly between low (soffit) and high (ridge or gable) vents. That ratio keeps air moving continuously from eave to peak. When soffit vents are blocked or ridge venting is absent, even a perfectly sealed attic floor will eventually develop condensation problems.
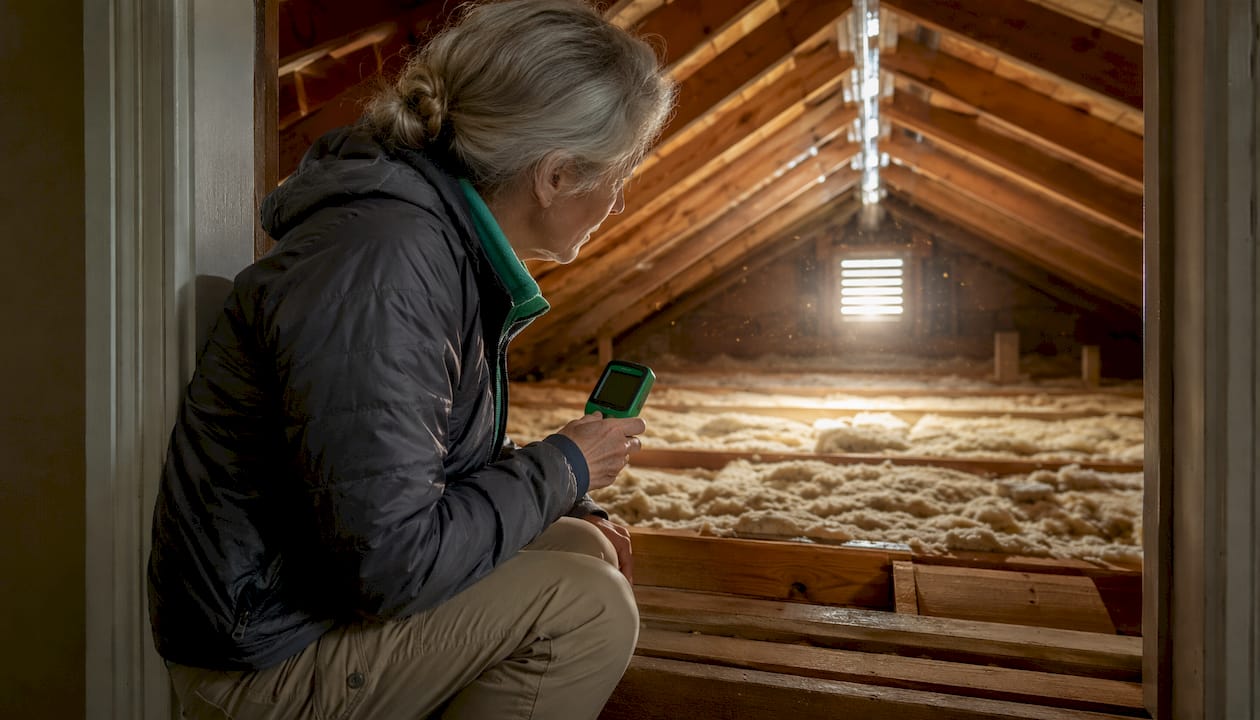
Diagnosing ventilation and air leakage before any cleaning is the single highest-value step in attic mould remediation. A moisture meter reading above roughly 19% on sheathing or rafters is a reliable indicator of active condensation risk, not just past wetting.
Pro Tip: Before scheduling any cleaning, take a moisture meter and map readings across the sheathing in a grid pattern. Readings above 19% tell you where active condensation is occurring. Readings below 15% on dry days suggest the moisture source may already be resolved or seasonal. That map drives the remediation plan.
How do you spot attic mould versus harmless staining?
Not every dark mark on attic sheathing is mould, but you need to rule it out safely. Blue-grey staining on fresh lumber is often a harmless fungal sap stain that does not pose health risks. Active mould growth looks different: fuzzy or powdery texture, often black, green, or white, and almost always accompanied by a musty, earthy odour that hits you as soon as you open the hatch.
Entry safety before you go up
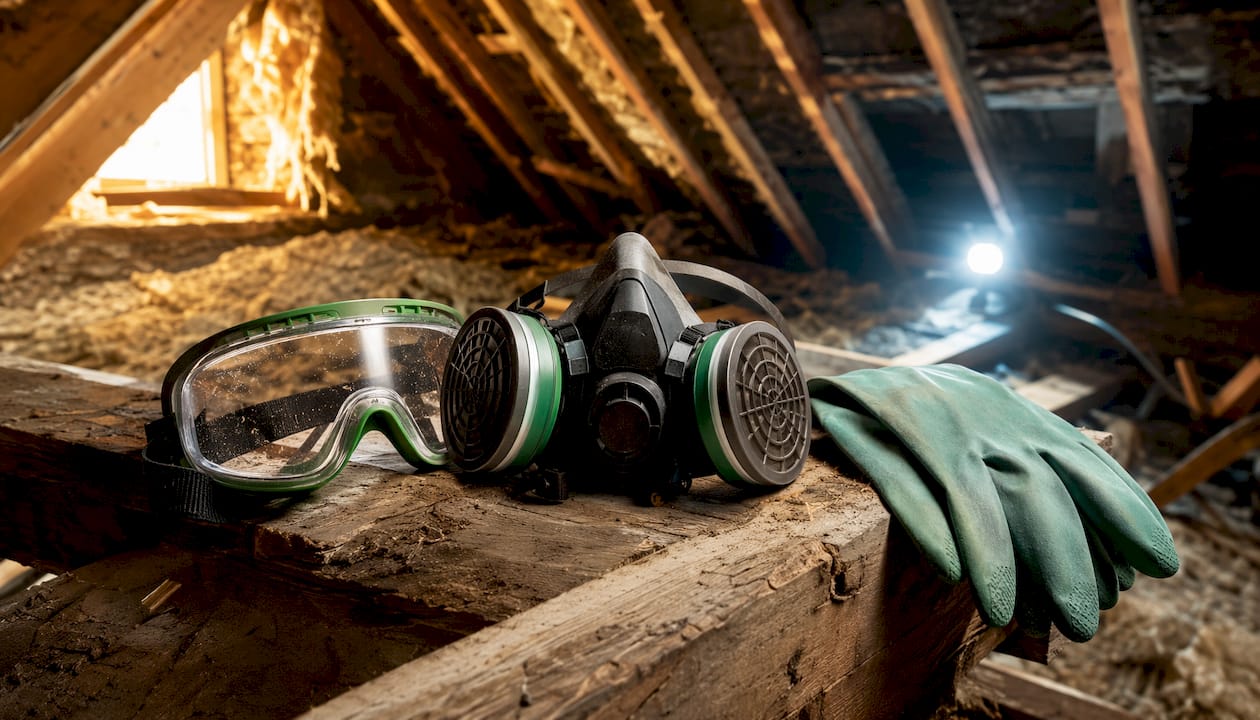
Wear a fit-tested N95 at minimum. If the attic is dusty, insulation-heavy, or the contamination is visible from the hatch, step up to a half-face respirator with P100 cartridges. Add safety glasses or goggles, disposable gloves, and a Tyvek suit or old clothes you can bag immediately after. Bring a strong flashlight or headlamp; attic lighting is almost always inadequate for spotting early growth.
Check the temperature before entering. In a Canadian winter, an unheated attic can be dangerously cold, and in summer it can exceed 50°C. Both extremes affect how long you can safely work and how accurately you can read a moisture meter.
What to look for
Work systematically from the hatch outward. Look for:
- Dark staining on the underside of sheathing, especially near the eaves and ridge
- Fuzzy or powdery growth on rafters, blocking, or the top plates of exterior walls
- Condensation or frost on metal fasteners, pipes, or HVAC ducts
- Wet, compressed, or discoloured insulation (wet insulation loses its R-value and holds moisture against the sheathing above it)
- Musty odour that intensifies as you move toward the eaves
Pro Tip: A moisture meter is more useful than your eyes for early detection. Press the pins into sheathing every 60–90 cm across the attic floor and record each reading on a rough sketch. Readings above 19% in multiple locations confirm active condensation, even when visible growth is still minimal.
Take photographs of every affected area with a scale reference (a tape measure or coin works). That documentation speeds up any professional assessment and gives you a baseline for post-remediation comparison.
If the attic access is too tight, the insulation depth makes safe movement impossible, or you cannot see the full extent of the staining, stop and call a professional assessor. Guessing at scope is how small projects become expensive ones.
Can you safely remove small attic mould patches yourself?
Yes, but only under specific conditions. The EPA DIY threshold is less than 10 sq ft of affected surface area, with no HVAC contamination, no structural damage, and no occupant health vulnerabilities. If all four conditions are met, a careful homeowner can proceed.
Step-by-step DIY sequence
- Isolate the work area. Seal the attic hatch with polyethylene sheeting and tape. Turn off the HVAC system. If you have a portable HEPA air purifier, set it up in the attic exhausting through a window or vent opening to create slight negative pressure.
- Put on full PPE. N95 or P100 half-face respirator, safety glasses, nitrile gloves, and disposable coveralls or dedicated work clothes.
- HEPA-vacuum loose spores. Before any wet cleaning, vacuum all affected surfaces with a HEPA-filtered vacuum. This removes loose spores without spreading them into the air.
- Clean affected surfaces. Use a commercial mould-specific cleaner, or a solution of white vinegar and water, applied with a stiff brush. Work the solution into the wood grain. Do not rinse immediately; let it dwell for several minutes.
- Dry thoroughly. Use fans directed at the cleaned surfaces. A moisture meter reading below 15% on the treated wood confirms adequate drying. Do not skip this step; residual moisture is what invites regrowth.
- Apply a mould-inhibiting encapsulant (optional but useful on bare wood) once the surface is fully dry.
- Monitor for 30 days. Take moisture readings weekly. If readings climb back above 19%, the moisture source is still active and you need professional help.
PPE and tools checklist
- Fit-tested N95 or P100 half-face respirator
- Safety glasses or goggles
- Nitrile or rubber gloves
- Disposable coveralls or dedicated work clothes
- HEPA vacuum with sealed bag
- Moisture meter
- Stiff-bristle brush
- Mould-specific cleaner or white vinegar solution
- Heavy-gauge polyethylene sheeting and tape for containment
- Sealed plastic bags for waste
Safe disposal
Bag all contaminated porous materials (insulation, cardboard, wood scraps) in heavy-gauge plastic bags, seal with tape, and label them as mould-contaminated waste. Check your municipality’s rules; most Ontario municipalities accept bagged mould-contaminated insulation as regular waste, but confirm before disposal.
Pro Tip: Do not use bleach as your primary cleaning agent on wood sheathing. Bleach kills surface mould but does not penetrate wood grain, and the residual moisture it leaves behind can encourage regrowth. Vinegar or a dedicated mould cleaner penetrates better. Never power-sand contaminated sheathing without full containment; sanding aerosolises spores across the entire attic.
If the wood feels soft or spongy when you press it, or if the contamination is more extensive than your initial estimate, stop immediately and call a certified remediator. Soft wood means structural compromise, which is beyond DIY scope.
When should you hire a certified mould remediator?
Some situations are not judgment calls. Call a certified professional when any of the following apply:
- The affected area is larger than roughly 10 sq ft
- The sheathing or rafters feel soft, spongy, or structurally compromised
- There is an active or unresolved roof leak
- The HVAC system or its ductwork passes through or near the affected area
- The water source involved sewage or flood water
- Anyone in the household has asthma, allergies, or a compromised immune system
- You cannot determine the full extent of the contamination
These thresholds align with EPA mould cleanup guidance and reflect the practical limits of DIY containment. Beyond 10 sq ft, the spore load during cleaning becomes difficult to control without professional-grade negative air equipment.
Pro Tip: Before calling a remediator, prepare a short summary: approximate affected area in sq ft, moisture meter readings if you have them, photos of the growth and any obvious moisture sources, and a note on whether the HVAC runs through the attic. A remediator who receives that information can give you a more accurate quote on the first call, often without a site visit.
When you call, ask whether the company provides a written assessment before any work begins. A reputable firm will not quote remediation without first confirming scope. If someone quotes you a price over the phone without seeing the attic, that is a red flag.
What does professional attic mould remediation actually involve?
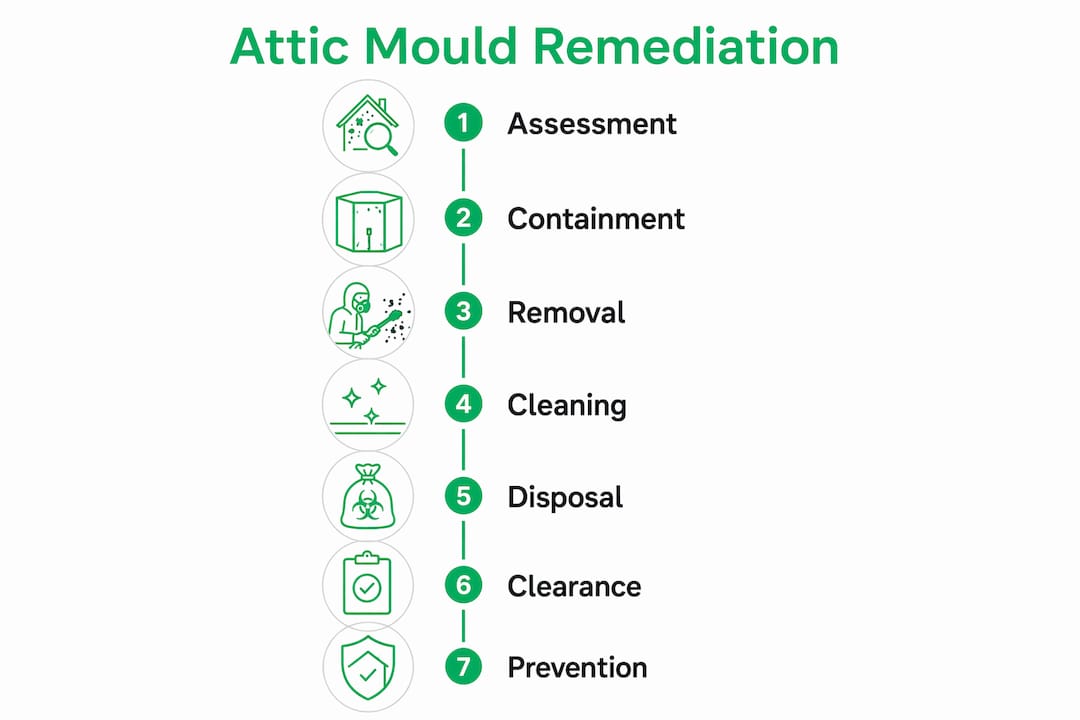
Professional remediation follows the IICRC S520 standard, which defines a specific sequence designed to prevent cross-contamination and verify results. Here is what that looks like in practice.
The IICRC S520 sequence
| Phase | What happens |
|---|---|
| Assessment and moisture mapping | Technicians measure moisture across sheathing and rafters, identify moisture sources, and document scope with photos and written records |
| Containment | Polyethylene barriers at the attic hatch and any HVAC penetrations; negative air maintained by HEPA-filtered air scrubbers exhausted outside |
| Removal of unsalvageable materials | Contaminated insulation, severely degraded wood, and any porous materials that cannot be cleaned are removed and bagged |
| Mechanical cleaning | HEPA vacuuming followed by mechanical abrasion; professionals increasingly favour dry-ice or soda blasting for large attic projects because these methods remove mould from wood without excessive sheathing loss |
| Antimicrobial treatment | Biocide applied to cleaned surfaces; fogging used to reach hidden cavities |
| Structural drying | Dehumidifiers and airflow maintained until moisture readings confirm the wood is below 15–16% |
| Clearance testing | Air or surface samples taken by an independent party to confirm remediation success before containment is removed |
Soda blasting, which uses sodium bicarbonate propelled at high speed, removes roughly a sixteenth of an inch of material from the wood surface, taking mould and residual spores with it. Dry-ice blasting achieves a similar result without leaving residual moisture. Both methods are significantly more effective than surface wiping alone on rough-sawn sheathing.
What to request from your remediator
- Written proof of IICRC S520 adherence and technician certifications
- Certificate of liability insurance and workers’ compensation coverage
- A written scope of work with moisture readings taken before work begins
- Pre-work and post-work photographs
- A clearance testing plan, ideally with an independent third-party tester
- Disposal documentation for all removed materials
Msnenvironmental operates across Ontario, offering inspection, testing, and full remediation following industry-standard protocols, with air and bulk sampling available as part of the assessment process.
How much does attic mould remediation cost in Canada?
Cost varies more than most homeowners expect, and the range is wide enough that a ballpark figure without context is nearly useless. The variables that drive price are:
- Affected area size. This is the single biggest cost driver. A 20 sq ft patch on accessible sheathing costs a fraction of a full-attic contamination.
- Access difficulty. Low-pitch roofs, tight knee walls, and deep insulation all add labour time.
- Whether sheathing must be replaced. Structurally compromised sheathing requires removal and replacement, which adds both material and carpentry costs.
- Insulation removal and disposal. Contaminated insulation must be removed, bagged, and disposed of before sheathing can be treated, then replaced afterward.
- Containment and air scrubbing requirements. Larger projects require more equipment and longer setup time.
- Local labour rates. Rates in the Greater Toronto Area and Kitchener-Waterloo region differ from rural Ontario.
For a rough sense of scale: small to moderate professional remediations commonly fall in the $1,500–$5,000 range, while projects requiring sheathing replacement can reach $10,000–$15,000 or more. These figures reflect commonly cited North American estimates and should be treated as directional; get at least two written quotes from certified Ontario contractors for your specific situation.
Typical project timeline
| Phase | Typical duration |
|---|---|
| Initial assessment and moisture mapping | 1–3 hours on-site |
| Containment setup | 2–4 hours |
| Remediation (cleaning, blasting, treatment) | 1–3 days depending on scope |
| Clearance testing and lab turnaround | 2–5 business days |
| Total from first call to clearance | 1–2 weeks for most projects |
Insurance coverage
Home insurance policies in Canada vary significantly on mould coverage. Sudden and accidental water damage (a burst pipe, for example) is often covered; long-term condensation damage typically is not. If you have a sewer backup or overland flood endorsement, check whether it extends to mould remediation resulting from those events. Document everything before any work begins, and notify your insurer before remediation starts if you plan to make a claim. This is general guidance only; confirm the specifics of your policy with your broker.
How do you stop attic mould from coming back?
Remediation without corrective work is money spent twice. The most effective prevention combines continuous soffit-to-ridge airflow, sealed air bypasses at the attic floor, and exhaust fans that actually vent outdoors.
Prevention checklist:
- Install rafter baffles in every bay to maintain a clear airflow channel from the soffit to the ridge, even where insulation is deep
- Reroute all exhaust fans outdoors. Bathroom fans, kitchen range hoods, and dryer vents must terminate outside the building envelope, not into the attic. This is the highest-yield single fix in most Canadian homes.
- Seal air bypasses at the attic floor: around recessed light fixtures, plumbing and electrical chases, the attic hatch frame, and any chimney or flue penetrations
- Confirm soffit and ridge vents are unobstructed and meet the 1 ft² NFA per 150 ft² baseline
- Replace contaminated insulation with new material after the sheathing is confirmed dry and clean
- Check insulation placement to confirm it does not cover soffit vents; baffles prevent this
Maintenance schedule
Inspect soffit and ridge vents annually, ideally in early spring after the freeze-thaw season. After any renovation that touches the attic floor or ceiling, check that exhaust ducts are still connected and routed correctly. Disconnected bathroom fan ducts are one of the most common post-renovation surprises.
Pro Tip: Install a wireless hygrometer in the attic and log readings monthly. Attic relative humidity above 70% in winter is a warning sign worth investigating before mould appears. A $30 sensor can save a $5,000 remediation bill.
When does air testing actually help?
Testing is not always necessary, but there are situations where it changes the decision. Commission air or surface testing when:
- The contamination is large, hidden, or suspected behind finished surfaces
- The HVAC system is near or within the affected area
- You need documentation for an insurance claim or a real estate transaction
- Occupants have respiratory conditions and you need objective clearance confirmation
Types of testing
Visual inspection is the starting point and, for obvious growth on accessible surfaces, often sufficient to confirm scope. It costs nothing beyond the assessor’s time.
Bulk sampling involves cutting a small piece of contaminated material (sheathing, insulation) and sending it to a lab for species identification. Useful when you need to know what you are dealing with, particularly for insurance or legal purposes.
Surface tape sampling lifts spores from a surface with adhesive tape and sends them to a lab. Good for confirming whether a stained surface is active mould or harmless discolouration.
Air sampling (spore trap) compares indoor spore counts to an outdoor control sample taken at the same time. Elevated indoor counts relative to outdoors suggest active mould, even when growth is not visible. This is the most common method for clearance testing.
Clearance testing
A clearance test is taken after remediation is complete but before containment is removed. An independent tester (not the same company that did the remediation) takes air samples inside the contained area and compares them to outdoor control samples. A visual pass requires no visible growth or debris. Moisture readings on treated surfaces must be below 15–16%. Lab results typically take 2–5 business days.
Pro Tip: Always use an independent tester for clearance. A remediator who tests their own work has an obvious conflict of interest. Ask your remediator upfront who will conduct clearance testing and whether that party is independent. If they cannot answer clearly, that is worth noting.
Msnenvironmental offers air and bulk sampling as part of its assessment services, with the option to arrange independent clearance testing as part of a full remediation project.
What to ask before hiring a mould remediation contractor
The quote process is where most homeowners lose money. A low bid from an uncertified contractor who skips containment and clearance testing is not a bargain; it is a liability. Here is what to ask every contractor you interview:
Essential questions:
- Which standard do you follow? (The correct answer is IICRC S520.)
- Will you provide pre-work and post-work moisture readings and photographs?
- Who performs the clearance testing, and are they independent of your company?
- What disposal documentation will I receive for removed materials?
- Who specifically will be on-site doing the work, and what are their certifications?
- Is your company insured for liability and workers’ compensation?
Red flags to watch for:
- A verbal or vague written scope with no moisture readings or area measurements
- No proof of insurance or technician certifications when asked
- Refusal to include clearance testing in the scope
- Pressure to sign a contract immediately or a same-day discount offer
- A quote that is dramatically lower than all others without explanation
Trust signals that matter:
- Written scope of work with pre-work moisture readings documented
- Proof of liability insurance and workers’ compensation coverage
- IICRC S520 certification or equivalent documented training
- Clear disposal manifests for all removed materials
- A named independent clearance tester included in the project plan
Clear documentation, including pre/post photos, moisture maps, and clearance test results, is the most important consumer protection you can demand from any remediator. A contractor who resists providing it is telling you something important.
Key takeaways
Professional attic mould remediation requires fixing the moisture source first: cleaning without correcting ventilation and air sealing will fail within one season.
| Point | Details |
|---|---|
| DIY threshold | Only attempt DIY cleanup when the affected area is under 10 sq ft, with no HVAC contamination, structural damage, or occupant health vulnerabilities. |
| Moisture is the root cause | Wood moisture content above 19–20% drives rapid mould growth; map readings before any cleaning to confirm the source. |
| Professional protocol | Certified remediators follow the IICRC S520 sequence: containment, removal, mechanical cleaning, antimicrobial treatment, drying, and clearance testing. |
| Cost range | Small to moderate professional remediations commonly fall in the $1,500–$5,000 range; sheathing replacement projects can reach $10,000–$15,000 or more. |
| Msnenvironmental | Msnenvironmental provides certified inspection, air and bulk sampling, and full remediation across Ontario, including Kitchener, Toronto, and Cambridge. |
A professional perspective on attic mould
The thing that frustrates me most about how attic mould gets discussed is the focus on the mould itself. Homeowners call asking how to clean it, and the conversation immediately goes to products, techniques, and costs. But the mould is just the symptom. The actual problem is almost always a bathroom fan dumping moisture into the attic for years, or soffit vents buried under insulation since the last renovation, or an attic hatch with no weatherstripping that has been leaking warm air every winter.
Experienced remediators know this, which is why the best ones spend as much time on the moisture investigation as on the cleaning itself. A company that shows up with a spray bottle and a brush and no moisture meter is not doing remediation. They are doing cosmetic work that will fail.
The other thing homeowners consistently underestimate is the value of documentation. Pre-work moisture readings, photographs, and an independent clearance test are not bureaucratic extras. They are the only way to know whether the work actually succeeded, and they are your protection if the mould returns and there is a dispute about whether the contractor did the job correctly. Demand them. A contractor who pushes back on documentation is telling you they are not confident in their own work.
Attic mould in Canadian homes is largely a winter condensation problem driven by internal moisture sources. Fix the sources, restore the ventilation, and the attic stays dry. Skip those steps, and no amount of cleaning will hold.
Msnenvironmental’s attic mould services across Ontario
Attic mould remediation done right means more than cleaning visible growth. It means a documented assessment, proper containment, mechanical cleaning that reaches into wood grain, and a clearance test that confirms the job is finished before anyone calls it done.
Msnenvironmental provides the full sequence across Ontario, including mould remediation in Kitchener, Toronto, Cambridge, and surrounding communities. Services include on-site inspection and moisture mapping, air and bulk sampling, full remediation following IICRC S520 practices, and post-work clearance testing. The team carries the certifications and insurance that a responsible remediation job requires, and every project includes written documentation from assessment through clearance.
When you call, have your moisture readings, photographs, and a rough estimate of the affected area ready. That information lets the team give you an accurate scope on the first conversation. To book an assessment or get a quote, visit msnenvironmental.com or reach out directly through the contact page.
Useful sources and Canadian resources
The following authoritative sources informed this guide and are worth reading directly for primary guidance.
Primary guidance:
- Health Canada: Addressing Moisture and Mould in Your Home — the Canadian federal reference for residential mould, including health effects and remediation principles
- Canada Mortgage and Housing Corporation (CMHC) — practical guides on moisture control, ventilation, and attic construction for Canadian climates
- US EPA: Mould Cleanup in Your Home — the source for the 10 sq ft DIY threshold and general cleanup guidance
- CDC / NIOSH — occupational health guidance on mould exposure and respiratory protection
- This Old House: How to Get Rid of Attic Mould — practical demonstration of professional soda blasting and containment techniques
Finding certified remediators and labs in Canada:
- Search the IICRC’s online directory for certified mould remediators in your province
- Ask any testing lab whether they are accredited under the Standards Council of Canada (SCC) before submitting samples
- When reviewing a lab report, focus on the ratio of indoor to outdoor spore counts rather than absolute numbers; a ratio above 1.5 for the same species warrants follow-up
What to ask a testing lab before hiring:
- Are you SCC-accredited for mould analysis?
- Will you provide an outdoor control sample comparison in the report?
- What is your turnaround time, and do you offer rush processing for insurance claims?
- Can you explain the results in plain language, or provide a written interpretation?
A lab report that lists spore counts without an outdoor comparison is difficult to interpret. Always request paired indoor/outdoor sampling for meaningful results.