

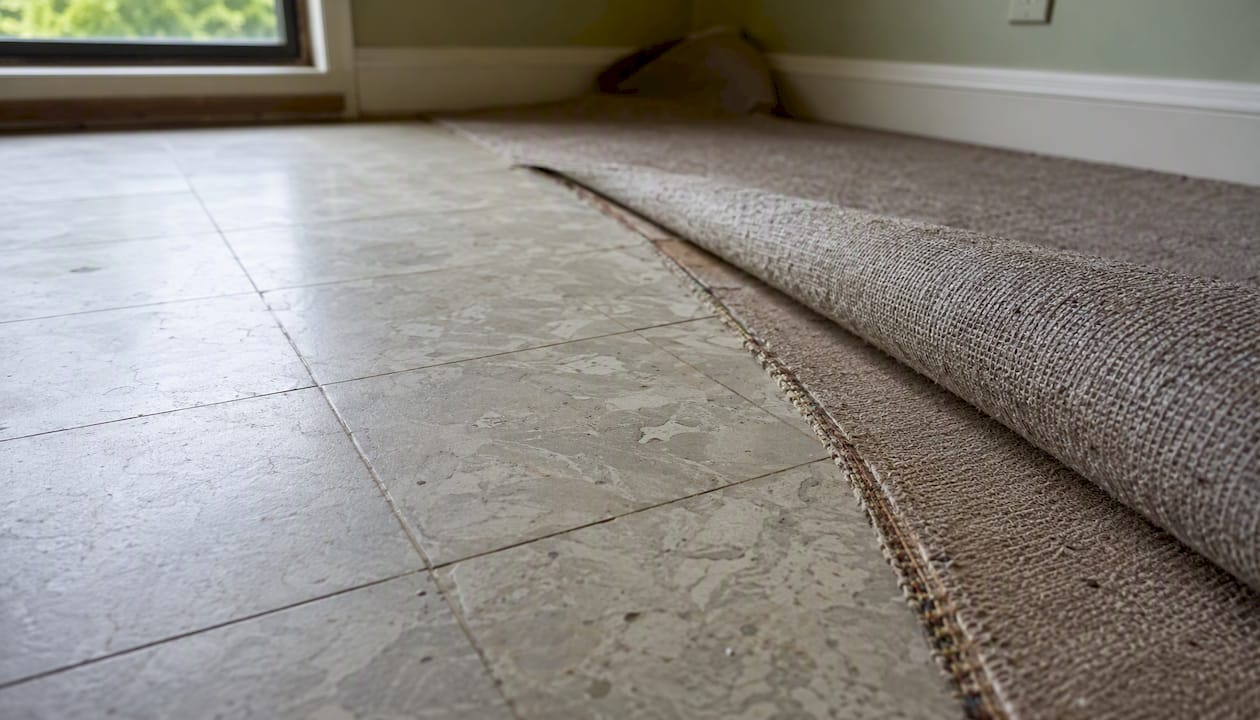
If your home has 9×9-inch floor tiles installed before roughly 1980, treat them as potentially asbestos-containing until a lab says otherwise. The same applies to any floor with dark brown or black adhesive underneath, regardless of tile size. That mastic, often called cutback adhesive, can contain asbestos even when the tile itself tests clean.
Right now, before you do anything else:
- Do not sand, scrape, or dry-buff the tiles
- Do not use a floor stripper or aggressive cleaning machine on them
- Do not break tiles to inspect them
- Do limit foot traffic if tiles are cracked or crumbling
- Do photograph the floor, note the tile size, and check the installation date if you can find it
- Do arrange for accredited lab testing before any renovation work begins
The only definitive answer comes from a sample analysed by an ISO/IEC 17025-accredited laboratory. Until you have that result, assume the worst and act accordingly.
Table of Contents
- How do you identify asbestos floor tiles visually?
- How does asbestos tile testing work in Canada?
- What are the health risks from asbestos in floor tiles?
- When is asbestos in floor tiles actually a problem?
- What are your options for managing asbestos floor tiles?
- What does professional asbestos floor tile removal involve?
- What Canadian regulations govern asbestos in floor tiles?
- How much does asbestos testing and removal cost in Canada?
- How do you choose a certified asbestos abatement contractor in Canada?
- What do asbestos floor tiles actually look like?
- When should you hire a certified abatement company?
- Sources
- FAQ
How do you identify asbestos floor tiles visually?
Visual identification is a probability filter, not a diagnosis. No one can confirm asbestos by looking at a tile, but certain physical clues raise the likelihood enough to justify treating a floor as presumptive asbestos-containing material (ACM) until tested.
Size is the strongest single clue
The 9×9-inch format is the most reliable visual indicator. Tiles of that dimension were manufactured almost exclusively between the 1950s and early 1970s, and asbestos loads in older tiles from that era were commonly significant, often around a quarter of the tile weight. If you pull back a corner of carpet and find 9×9 tiles, stop there and call a professional or arrange testing.
Older 12×12-inch tiles are also possible ACM, particularly those installed before 1980. They tend to be thicker and more brittle than modern vinyl composition tile (VCT). When a corner chips off cleanly rather than bending, that brittleness is a clue worth noting.
Colour and pattern
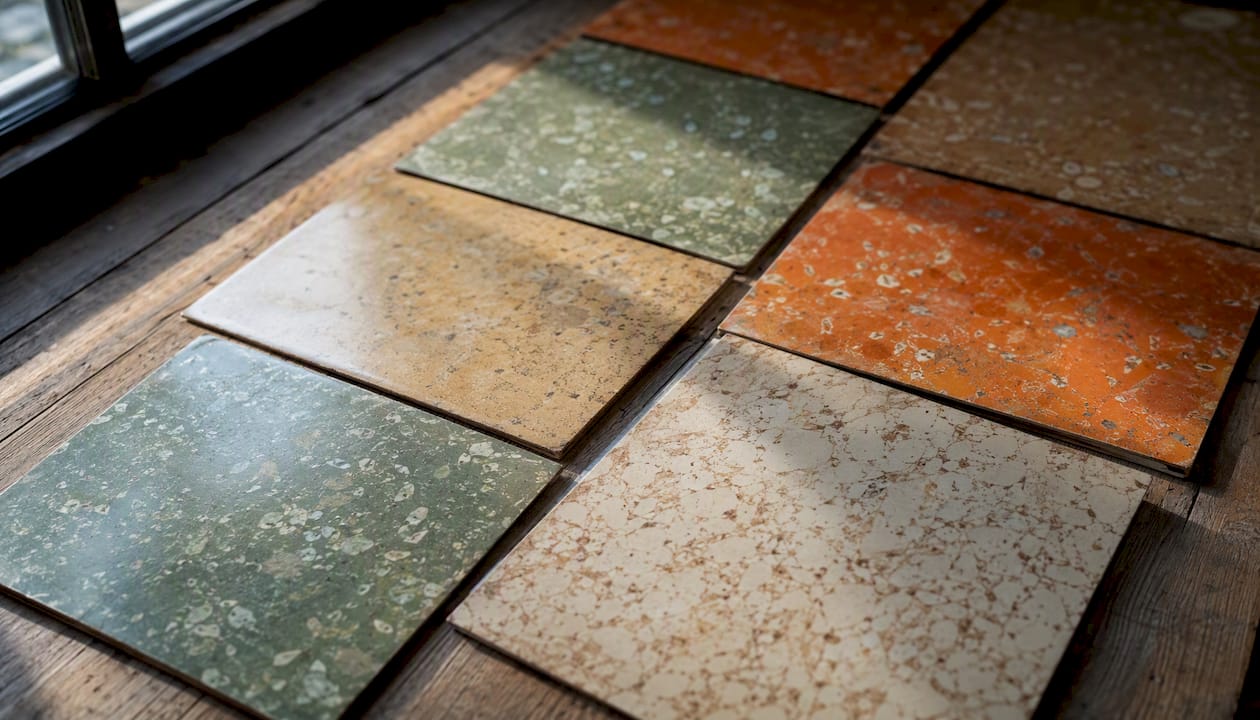
Mid-century asbestos floor tiles typically come in muted, earthy tones: tan, grey, dark brown, brick red, and occasionally a cream or pale green. Marbled or flecked patterns were common. Solid-colour tiles in those same muted shades are also suspect. Bright, saturated colours and flexible, resilient tiles are more consistent with post-1980 vinyl composition tile, though not conclusively so.
The mastic clue
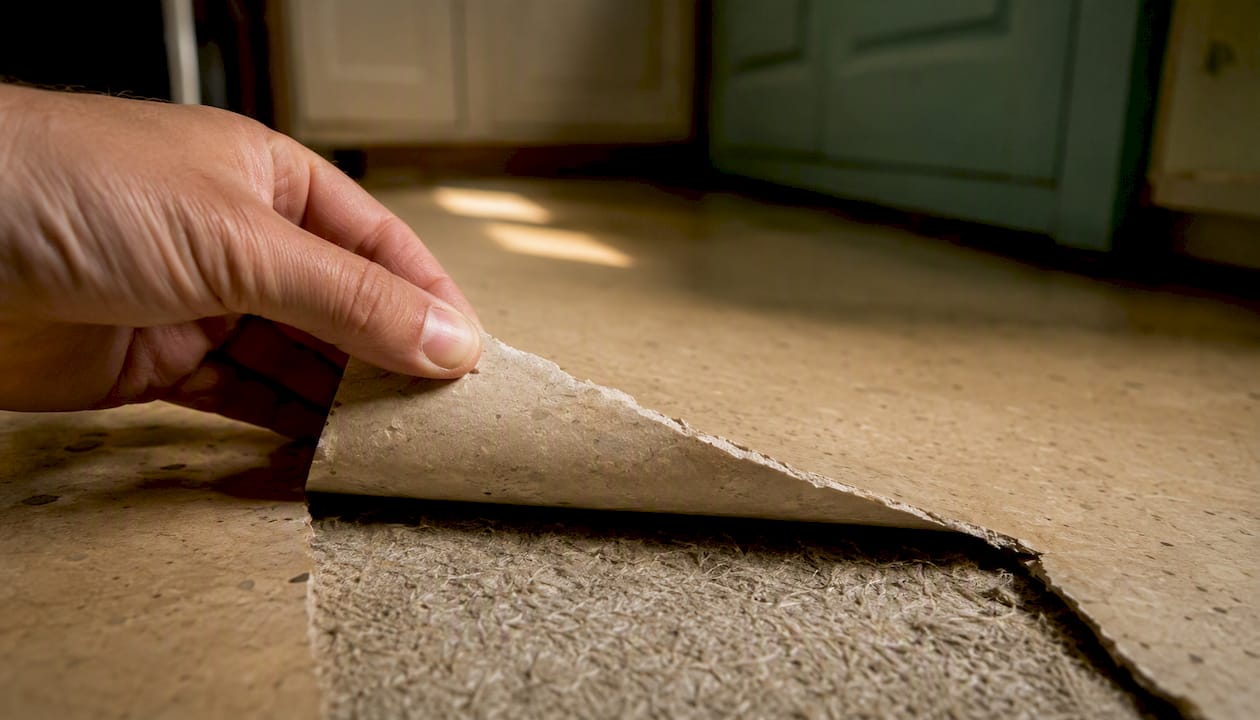
Lift a loose tile or look at a broken edge. If the underside carries a black or very dark brown adhesive, that is almost certainly cutback mastic, a petroleum-based adhesive widely used before the mid-1980s. Testing both the tile and the underlying adhesive is necessary because the mastic frequently contains asbestos even when the tile layer tests negative. Labs report each layer separately for exactly this reason.
Key visual checklist: 9×9-inch format, pre-1980 installation, muted or marbled mid-century colours, brittle fracture behaviour, and black cutback mastic underneath. Any two of these together warrants testing.
Pro Tip: Check an undisturbed area first, such as inside a closet or under a fixed appliance. You get a cleaner look at the tile edge and the mastic without disturbing a high-traffic zone.
Asbestos-containing floor tiles are formally called vinyl asbestos tile (VAT) in industry literature, though the term covers asphalt-based and asphaltic compositions as well. The informal phrase “asbestos floor tiles” is widely used, but VAT is the term you will encounter on lab reports and regulatory documents.
How does asbestos tile testing work in Canada?
Testing is straightforward, relatively inexpensive, and the only way to move from suspicion to certainty. Understanding the full testing process before you collect a sample saves time and prevents common mistakes.
Safe sampling: the wet method
The recommended approach minimises fibre release by keeping the sample wet throughout collection. Here is the standard sequence:
- Put on nitrile gloves and an N95 or P-100 respirator before touching anything.
- Mist the tile surface lightly with water containing a few drops of dish soap.
- Use a sharp utility knife or chisel to cut a small section (roughly 1–2 square centimetres) from an inconspicuous corner or edge.
- If black mastic is present, collect a separate scraping of the adhesive into a second sealed container.
- Seal each sample in a zip-lock bag, label it clearly (tile layer vs. mastic layer), and wipe down the area with a damp cloth.
- Dispose of gloves and the damp cloth in a sealed bag.
When DIY sampling is reasonable and when it is not
A single intact tile in a low-traffic area is a reasonable candidate for owner-collected sampling. The tile must not be crumbling, and the area should be well-ventilated. If tiles are friable (crumbling, powdery, or already broken), if you are planning large-scale renovation, or if the building has vulnerable occupants such as young children or people with respiratory conditions, hire a qualified environmental consultant to collect the sample.
What the lab reports
Send samples to a laboratory accredited to ISO/IEC 17025 for asbestos bulk analysis. In Canada, NVLAP-accredited labs (a US programme) and labs accredited through the Standards Council of Canada (SCC) are both accepted. Ask specifically for polarised light microscopy (PLM) analysis and request layer-by-layer reporting if you submitted both tile and mastic.
Results from most accredited labs come back within three to five business days for standard turnaround, or 24–48 hours for rush service.
Pro Tip: Ask the lab to report each layer separately even if you submit them in the same shipment. A combined result can mask asbestos in the mastic when the tile itself is clean.
What are the health risks from asbestos in floor tiles?
Intact, undisturbed tile is low risk. That is the honest starting point, and it is consistent with Health Canada’s indoor air guidance, which recommends leaving undamaged ACM in place rather than disturbing it. The danger begins when fibres become airborne.
How exposure happens
Asbestos fibres are released when ACM is cut, sanded, scraped, broken, or aggressively buffed. For floor tiles specifically, the highest-risk activities are:
- Dry-scraping tiles during removal
- Sanding or grinding the mastic residue after tiles are lifted
- Breaking tiles with a chisel or floor scraper without wetting them first
- Running a high-speed buffer over deteriorating tile
- Demolition that involves the subfloor
Mastic removal deserves special attention. The adhesive tends to be more friable than the tile itself, and scraping it dry can generate a significant fibre load in a short time.
Health Canada notes that asbestos fibres, once inhaled, can remain in the lungs for decades. The body cannot break them down, and cumulative exposure is what drives long-term disease risk.
Long-term health outcomes
Peer-reviewed evidence links inhaled asbestos fibres to asbestosis (progressive lung scarring), lung cancer, and mesothelioma, a rare cancer of the lining of the lungs and abdomen. These diseases have latency periods of 20–40 years, which is why the risk from a single renovation event is difficult to quantify precisely but is not zero. Chrysotile, the fibre type most common in floor tiles, is generally considered less potent than amphibole fibres such as crocidolite, but it is still classified as a known human carcinogen.
Occupants living above intact tile face negligible daily exposure. Renovators, tradespeople, and flooring contractors who disturb ACM repeatedly without proper controls face the highest cumulative risk.
When is asbestos in floor tiles actually a problem?
The practical question is not whether your tiles contain asbestos. It is whether the condition of those tiles, and what you plan to do with them, creates a real exposure risk.
Act immediately if any of these apply:
- Tiles are visibly crumbling, powdery, or missing chunks.
- You are planning demolition, subfloor replacement, or any work that requires lifting the tiles.
- High foot traffic is wearing through the tile surface.
- Children or people with respiratory conditions live or work in the space.
- You are selling the property and disclosure obligations apply in your province.
Lower-risk scenarios where monitoring is usually sufficient:
- Tiles are intact, firmly bonded, and covered by carpet or another overlay.
- No renovation is planned in the near term.
- The space is a low-traffic utility area.
Common scenarios and recommended next steps
- Selling a home: Order a bulk sample test before listing. Many buyers’ home inspectors flag suspect tiles, and having a lab result in hand avoids renegotiation delays.
- Bathroom or kitchen renovation: Stop work immediately if you uncover suspect tiles. Test before proceeding. If ACM is confirmed, hire a licensed abatement contractor before the flooring trade returns.
- Small patch repair: A single cracked tile can often be stabilised with a compatible adhesive and covered. Test first to confirm ACM status, then decide whether encapsulation or professional repair is appropriate.
- Basement finishing: Basements in homes built before 1980 are a high-probability zone for both VAT and cutback mastic. Test the floor before framing walls over it.
What are your options for managing asbestos floor tiles?
Leaving intact tiles undisturbed is often the safest and most cost-effective path. Removal is necessary only when disturbance is unavoidable or when regulation requires it.
| Option | Safety risk | Relative cost | Disruption | Resale/disclosure notes |
|---|---|---|---|---|
| Leave in place (intact tiles) | Low, provided no disturbance | Minimal | None | Disclosure may be required; document the ACM location |
| Encapsulate or overlay | Low to moderate during installation | Low to moderate | 1–3 days | Discloses ACM presence; overlay must be documented |
| Full professional removal | Controlled risk during abatement | Highest | 2–5+ days | Cleanest disclosure position post-removal |
Leaving tiles in place
Health Canada’s guidance supports this approach when tiles are intact and undisturbed. The practical requirement is documentation: record the tile location, the lab result, and the date so future owners or contractors are informed. Property managers should add ACM locations to their designated substance register.
Encapsulation and overlays
Covering VAT with plywood, a floating floor, or new sheet vinyl is a legitimate management strategy. The overlay keeps the tiles intact and prevents disturbance. Overlays are not appropriate when tiles are already crumbling, when the subfloor needs repair, or when the overlay would create a tripping hazard at transitions. Note that the mastic layer changes the calculation: if the adhesive is friable and the tiles are loose, an overlay does not eliminate the risk of future disturbance during any subsequent renovation.
Full removal
Professional removal is the right choice when tiles are deteriorating, when the subfloor must be accessed, or when a buyer or tenant requires a clean result. It is the most disruptive and expensive option, but it eliminates the ongoing management obligation. The asbestos floor tile removal process in Canada follows strict containment and disposal protocols described in the next section.
What does professional asbestos floor tile removal involve?
Professional removal follows a defined sequence. Any contractor who cannot describe each of these steps in their proposal is not operating to standard.
The answer up front: compliant abatement uses containment, wet methods, HEPA filtration, and clearance air testing. Dry scraping or uncontained work is never acceptable.
Step-by-step abatement sequence
- Notification: In Ontario and most provinces, the contractor notifies the relevant authority (the Ministry of Labour in Ontario) before work begins. Timelines vary by province and project scale.
- Containment setup: The work area is sealed with polyethylene sheeting. Doorways and HVAC vents are covered. A negative-pressure unit with HEPA filtration exhausts air out of the containment zone.
- Wet removal: Tiles are saturated with amended water (water with a surfactant) to suppress fibre release before and during lifting. Tiles are removed whole where possible rather than broken.
- Mastic removal: Residual adhesive is removed using wet methods or chemical strippers rated for ACM work. Dry grinding or sanding is prohibited.
- Waste handling: All ACM waste is double-bagged in labelled, heavy-gauge polyethylene bags and transported to an approved landfill that accepts asbestos waste. A waste manifest is completed.
- Final clean: All surfaces in the containment zone are HEPA-vacuumed and wet-wiped before containment is removed.
- Clearance air testing: An independent hygienist collects air samples after containment is removed. In Canada, a passing result is typically below 0.01 fibres per cubic centimetre (f/cc) by phase contrast microscopy (PCM), though some provinces apply more stringent thresholds.
Worker protection
Workers wear full Tyvek suits, P-100 half-face respirators or powered air-purifying respirators (PAPRs), nitrile gloves, and disposable boot covers. HEPA vacuums (not standard shop vacs) are used for all cleanup. Negative air units maintain pressure differential throughout the job.
Pro Tip: Ask your contractor for the clearance air test report, not just a verbal confirmation that the job passed. A written result from an independent hygienist is the document you keep for property disclosure.
US EPA guidance on floor tiles and mastic is useful background for understanding when non-friable tile becomes regulated ACM during disturbance, a principle that Canadian provincial regulations mirror closely.
What Canadian regulations govern asbestos in floor tiles?
Canada moved to prohibit asbestos comprehensively, and the federal regulatory approach under the Canadian Environmental Protection Act (CEPA) informs provincial rules on handling, disposal, and contractor licensing. The practical rules homeowners and contractors encounter, however, are mostly provincial.
Health Canada’s position is clear: where asbestos-containing materials are present and undamaged, leave them alone. Where disturbance is unavoidable, follow the applicable provincial occupational health and safety code and hire qualified workers.
What to verify before hiring a contractor
- Provincial contractor licence for asbestos abatement (required in Ontario, British Columbia, Alberta, and most other provinces)
- Certificate of insurance covering asbestos abatement work
- Compliance with the applicable provincial occupational health and safety regulation (in Ontario, O. Reg. 278/05 under the Occupational Health and Safety Act)
- Written notification to the Ministry of Labour (Ontario) or equivalent provincial authority before work begins
- Waste manifest and confirmation of an approved disposal facility
Disposal rules
Asbestos waste is a designated substance in Canada. It must be:
- Double-bagged in labelled, heavy-gauge polyethylene
- Transported by a licensed carrier with a completed manifest
- Deposited at a landfill that has received provincial approval to accept asbestos waste
Homeowners cannot dispose of ACM in regular household waste or at standard municipal transfer stations. Your abatement contractor handles this, but ask for the manifest as proof.
Property managers in Ontario are required to maintain a designated substance report (DSR) for any building where ACM is present, and to provide it to contractors before renovation or demolition work begins. Failure to do so creates liability exposure that extends beyond the environmental file.
How much does asbestos testing and removal cost in Canada?
Testing is fast and inexpensive. Removal costs vary widely, but the ranges below reflect typical Canadian residential projects.
What drives the price up
- Friable mastic: Soft, crumbling adhesive requires more careful wet work and generates more waste volume.
- Area size: Larger floors mean more containment, more labour, and more disposal bags.
- Multiple layers: Tiles installed over earlier tiles (a common practice) multiply the work.
- Disposal distance: Remote properties may face higher transport costs to an approved landfill.
- Ancillary repairs: Subfloor damage discovered during removal adds cost outside the abatement scope.
Sampling results typically arrive within three to five business days. Abatement notification periods in Ontario are generally two weeks for Type 3 (high-risk) work, though timelines differ by province and project classification. A straightforward single-room removal usually takes one to two days on site.
How do you choose a certified asbestos abatement contractor in Canada?
Hire a licensed, insured contractor who provides a written method statement and includes clearance air testing in the quote. That is the non-negotiable baseline.
Questions to ask every contractor
- Are you licensed for asbestos abatement in this province? Can you provide your licence number?
- Do you carry liability insurance and workers’ compensation coverage for asbestos work?
- Will you provide a written work plan describing containment, removal method, PPE, and waste disposal?
- Is clearance air testing by an independent hygienist included in your quote?
- Which disposal facility will you use, and can you provide the waste manifest after the job?
- What training and certification do your workers hold?
- Have you completed similar projects in this building type? Can you provide references?
Red flags
- A bid that is significantly lower than others with no explanation of how containment or disposal will be handled
- Refusal to provide a written method statement or licence documentation
- No mention of clearance air testing
- Workers arriving without full PPE
- Proposal to remove tiles dry or without a negative-pressure unit
A compliant contract should specify the scope of work, the regulatory notification requirements, the waste disposal plan, the clearance testing protocol, and the change-order triggers (such as discovering additional ACM layers or subfloor damage). Get it in writing before work starts.
What do asbestos floor tiles actually look like?
Photographs help, but the visual clues are subtle enough that no image replaces a lab test. The descriptions below correspond to the most common tile types found in Canadian homes.
Common appearances
- 9×9 vinyl asbestos tile: Typically 3/32 to 1/8 inch thick, with a slightly waxy surface. Colours run to tan, grey, dark brown, and brick red, often with a marbled or flecked pattern. Found most often in kitchens, basements, and utility rooms of homes built between 1950 and 1975.
- Older 12×12 tiles: Thicker and more rigid than modern VCT. Similar muted colour palette. Common in institutional settings (schools, hospitals) and residential basements from the 1960s and 1970s.
- Asphaltic or asphalt-composition tiles: Dark brown to black, very brittle, and often found in basements. These almost always contain asbestos when installed before 1980.
- Black cutback mastic: Visible at tile edges, under lifted tiles, or where tiles have broken away. Ranges from a thin, hard film to a thick, soft layer. The softer and more pliable it is, the more friable and potentially hazardous.
Do not pry tiles aggressively to get a better look at the underside. A clean view of the mastic is possible at any broken edge or loose corner without forcing intact tiles off the subfloor and releasing fibres unnecessarily.
Chrysotile fibres, the type most commonly found in VAT, appear as fine, curly white threads under a microscope. Crocidolite fibres are blue and straighter. You will not see either with the naked eye, which is precisely why lab analysis matters. Microscope images of chrysotile and crocidolite are available through Wikimedia Commons for reference.
Pro Tip: Take a photo of the tile pattern, measure the tile size with a tape measure, and note the room location before calling a professional. That information alone helps a consultant give you a faster, more accurate preliminary assessment.
When should you hire a certified abatement company?
Hire a certified abatement company when tiles are friable, when mastic is suspected to contain asbestos, for any large-area work, or when regulatory clearance documentation is required. Those are the four conditions where professional involvement is not optional.
MSN Environmental provides asbestos abatement and removal services across Ontario, covering the full scope from initial sampling and designated substance surveys through containment, wet removal, waste disposal, and independent clearance air testing. Their technicians follow Ontario’s O. Reg. 278/05 requirements and carry the provincial licensing and insurance that compliant abatement demands.
What a professional process delivers that a DIY approach cannot:
- A written designated substance survey (DSS) that satisfies Ontario’s pre-renovation disclosure requirement
- Negative-pressure containment that keeps fibres out of the rest of the building
- Waste manifests and disposal documentation for property records
- Independent clearance air testing with a written pass result
- Liability protection: if something goes wrong during a licensed contractor’s work, their insurance responds
Pro Tip: Ask MSN Environmental for a copy of the clearance air test report and the waste manifest after the job. Keep both with your property records. They are the documents a future buyer’s lawyer or home inspector will ask for.
For property managers, the designated substance report obligation under Ontario’s Occupational Health and Safety Act means that having a certified company conduct the survey is not just good practice. It is a legal requirement before any contractor enters a space where ACM may be present.
The case for conservative risk management
The most common mistake people make with asbestos floor tiles is not panic. It is complacency. A floor that has been intact for 40 years feels safe, and it probably is, right up until the moment someone decides to renovate without testing first.
The evidence is consistent: disturbance is the trigger. Intact tile poses negligible daily risk. The same tile, dry-scraped by a flooring contractor who did not know what they were dealing with, can contaminate an entire floor of a house in an afternoon. The fibres settle on surfaces, get tracked through the building, and stay there. Remediation after an uncontrolled release is far more expensive and disruptive than a proper abatement job would have been.
Test early, before any renovation planning gets too far along. If the result is positive, treat encapsulation as the default unless removal is genuinely necessary. And when removal is necessary, hire a licensed contractor, get the clearance test in writing, and keep the documentation. That sequence is not overcautious. It is the only approach that actually protects you, your family, and anyone who works in the building.
MSN Environmental handles testing and certified removal across Ontario
When you have confirmed or suspected asbestos floor tiles and need more than a lab result, MSN Environmental offers the full service chain: environmental testing and inspection, licensed abatement, and post-removal clearance testing, all under one roof. Their teams serve residential and commercial clients across Ontario, including Toronto, Kitchener, Waterloo, Cambridge, London, and Hamilton.
Before your first call, have the following ready: the approximate age of the building, the tile size and location, any lab results you already have, and photos of the floor and any visible mastic. That information lets the team give you an accurate scope and quote without a preliminary site visit in many cases. To get started, visit the asbestos removal services page or contact MSN Environmental directly for a quote. The top reasons to hire certified professionals are worth reading before you decide.
Key takeaways
Treat any pre-1980 floor tile as presumptive ACM until an ISO/IEC 17025-accredited lab confirms otherwise, and never disturb suspect tiles before testing.
| Point | Details |
|---|---|
| Treat suspect tiles as ACM | Pre-1980 tiles and black cutback mastic should be presumed asbestos-containing until lab-tested. |
| Never disturb before testing | Sanding, scraping, or dry-breaking tiles can release fibres; wet methods and PPE are required even for sampling. |
| Test tile and mastic separately | Mastic frequently contains asbestos even when the tile layer tests negative; request layer-by-layer lab reporting. |
| Encapsulate when removal is unnecessary | Leaving intact tiles covered is often safer and cheaper than removal; document ACM location for property records. |
| MSN Environmental for licensed removal | MSN Environmental provides certified abatement, clearance air testing, and disposal documentation across Ontario. |
Sources
- PMC article: asbestos exposure health review
- Health risks — asbestos (Health Canada)
- Test Tile for Asbestos: 9×9 Vinyl Floor Tile Sampling Guide – InspectandTest
- How EPA’s asbestos regulations apply to floor tiles and mastic | US EPA
- Asbestos tile guide: 9×9 identification, risk, cost (AsbestosHQ)
This article is general information, not a substitute for advice from a qualified doctor. Consult a qualified healthcare professional about your own circumstances before acting on anything here.
FAQ
How do I know if my floor tile contains asbestos?
Visual clues, particularly the 9×9-inch format, pre-1980 installation, muted mid-century colours, and black cutback mastic underneath, raise the probability, but the only definitive answer is bulk sample analysis by an ISO/IEC 17025-accredited laboratory.
Should I worry about asbestos floor tiles in my home?
The concern rises sharply when tiles are crumbling, when renovation is planned, or when any activity would break or scrape the tile surface.
Is it safe to walk on asbestos floor tiles?
Walking on intact, firmly bonded tiles does not release measurable fibres and is generally considered safe. The risk increases if tiles are cracked, worn through, or if the surface is being abraded by heavy equipment or aggressive cleaning.
Are 12×12 floor tiles likely to contain asbestos?
Twelve-by-twelve tiles installed before 1980 can contain asbestos, though the 9×9-inch format is the stronger visual indicator. Age and the presence of black cutback mastic matter as much as size when assessing likelihood.
Can I remove asbestos floor tiles myself in Canada?
Provincial regulations in most Canadian jurisdictions require licensed contractors for any significant asbestos abatement work. Small-scale sampling by a homeowner is generally permissible with proper wet methods and PPE, but actual removal of confirmed ACM should be handled by a certified abatement contractor to meet regulatory requirements and protect occupant health.