

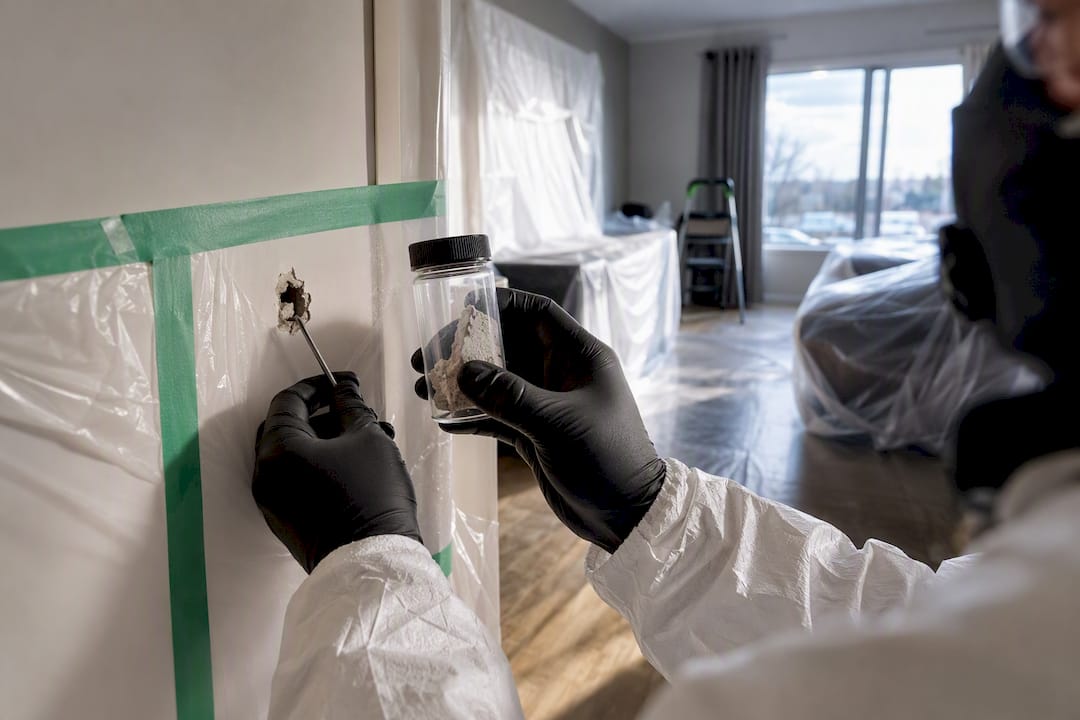
If the suspect material is intact and non-friable, a DIY mail-in kit is an acceptable first step. If it’s friable, vermiculite, part of a renovation, or needed for a real-estate sale, hire a certified sampler. Either path ends at an accredited lab running PLM or TEM analysis, with results back in a few business days to two weeks and costs from roughly $30 to over $1,000 depending on scope.
TL;DR:
- DIY asbestos testing is suitable only for small, intact, non-friable samples and should be approached with proper safety precautions like wetting and protective gear.
- Major renovation plans, visible damage, or friable materials such as vermiculite insulation demand immediate professional testing and possibly licensed abatement.
- Lab results specify asbestos percentage, fibre type, and analysis method but do not assess health risks or material safety unless combined with condition assessments.
- Accredited labs using PLM or TEM provide reliable results, with turnaround times from a few days to two weeks and costs ranging from $30 for a single sample to over $1,000 for extensive surveys.
- Once asbestos is confirmed, management options include leaving stable, sealed materials in place or employing licensed removal with proper documentation to ensure safety and compliance.
Table of Contents
- What asbestos testing actually shows
- Signs you should arrange asbestos testing now
- DIY kits or professional sampling: how to choose
- PLM, TEM, and what your lab report should actually say
- What asbestos testing costs and how long it takes
- How to choose an accredited lab (and spot a weak report)
- Your sample is positive: now what?
- Why a certified contractor matters once testing is done
- Test early, worry less later
- Ready for professional sampling or removal?
- Where to verify accreditation and methods
- Sources
- FAQ
What asbestos testing actually shows
A lab result from asbestos testing tells you three things: the percentage of asbestos in the sample, the fibre type (chrysotile, amosite, or crocidolite are the common ones), and the method used to find it. Nothing more, nothing less. It’s not a home inspection and it’s not a health assessment. It’s a material identification test, full stop.
Asbestos shows up in a predictable list of building materials, mostly from homes and buildings constructed or renovated before the early 1990s:
- Vinyl floor tile and the black mastic underneath it
- Popcorn or textured ceiling finishes
- Pipe and duct insulation wrap
- Vermiculite attic insulation
- Old joint compound and plaster
- Cement or asbestos-cement siding shingles
Finding asbestos in a material doesn’t automatically mean you need to remove it. A sealed, undisturbed tile under a rug can sit safely for years. The real trigger for concern is condition and disturbance: is it crumbling, cracked, or about to get sawed, sanded, or torn out?
Signs you should arrange asbestos testing now
Some situations call for testing right away, others can wait for a natural pause in your plans. In order of urgency:
- You’re planning a renovation or demolition. Any activity that cuts, drills, or removes older building material should be preceded by testing, not followed by regret.
- You see visible damage. Cracked pipe wrap, crumbling ceiling texture, or water-damaged tile releases fibres more easily than intact material.
- You have vermiculite insulation. This is the highest-priority material on the list because it’s naturally friable and often disturbed just by attic access.
- You’re buying or selling a property. Buyers increasingly ask for documentation, and a clean asbestos report can smooth a closing.
- A contractor has flagged suspect material. Trades who spot old insulation or tile mastic will often stop work until testing clears it.
Vermiculite and any friable material jump the queue because they don’t need much force to shed fibres into the air. If children, elderly occupants, or anyone with a respiratory condition lives in the home, treat all of the above with extra urgency. Airborne fibre exposure carries no safe threshold, and Health Canada’s guidance on exposure and management is worth reading before you decide how fast to move.
DIY kits or professional sampling: how to choose
The honest answer depends on what the material is doing, not just what it’s made of. A DIY kit works fine on a single, intact, non-friable item, like one floor tile or a chunk of undamaged siding. It falls apart, literally and figuratively, on anything friable, extensive, or tied to a transaction that needs paperwork.
DIY makes sense when:
- The material is a small, isolated sample (one tile, one piece of siding)
- It’s intact, not crumbling or water-damaged
- You just want a yes/no answer for your own peace of mind, not a formal document
If you go the DIY route, follow a basic safety sequence: mist the material with water before touching it (this is the wet method, and it keeps fibres from becoming airborne), wear a properly fitted P100 respirator, double-bag the sample in sealed plastic, and photograph and label it before shipping.
Hire a certified sampler when:
- The material is friable, extensive, or already deteriorated
- You have vermiculite insulation anywhere in the building
- You need a full pre-renovation survey covering multiple materials
- You need chain-of-custody documentation for a real-estate deal or a permit
Cost-wise, DIY mail-in kits typically cost in the range of about $30 to $80 per sample, kit and lab fee included. Professional sampling and small surveys commonly range from a few hundred to over a thousand dollars depending on scope.
Pro Tip: Never dry-sand, drill, or break a suspect material to get your sample. If it’s crumbling on its own, that’s your answer to hire a professional, not to collect it yourself.
PLM, TEM, and what your lab report should actually say
Almost every bulk material sample goes through polarized light microscopy first. PLM is the standard method for identifying asbestos in solid building material because it’s fast, affordable, and accurate enough for the vast majority of cases: floor tile, insulation, siding, joint compound.
Transmission electron microscopy (TEM) comes into play when PLM isn’t sensitive enough. That’s usually air samples, where fibre concentrations are far lower than in bulk material, or bulk samples where the asbestos content sits near a legal threshold and you need a more precise number. TEM sees smaller fibres and gives more structural detail, which matters for air clearance testing after abatement work.
A report worth trusting includes:
- The analyst’s name or ID number
- The exact method used (PLM or TEM)
- Percent asbestos content, by type
- The detection limit for that method
- The date of analysis
Here’s a number that surprises a lot of homeowners: some low-content or air samples fall below what standard PLM can reliably detect, which is exactly why commercial labs offer point counting and gravimetric reduction as add-on techniques that lower the detection floor. If your first PLM result comes back “none detected” but you’re still uneasy about the material, ask whether a point count or TEM re-analysis is available.
Lab accreditation matters more here than almost anywhere else in home inspection work. Accredited laboratories, meaning NVLAP or an equivalent regional accreditation, are the recognized standard for consistent bulk and air analysis, and an unaccredited lab’s results can be rejected outright by an abatement contractor or a municipal permit office.
What asbestos testing costs and how long it takes
Three variables drive the price of any asbestos test: the number of samples, whether TEM is needed, and how fast you need the answer.
- Single tile or material sample (PLM): roughly between about $30 and $80 through a mail-in kit
- Three-sample DIY kit: typically priced per sample, so expect three times the single rate plus shipping
- Ten-sample pre-renovation survey with a professional: several hundred dollars into four figures, depending on the number of materials and whether a written report is included
Rush service, travel time for a technician, chain-of-custody paperwork, and TEM analysis all push costs upward. Canadian labs commonly publish tiered pricing, with standard turnaround running a few business days to about two weeks and expedited options available for an extra fee, usually a same-day or 24-hour rush charge on top of the base rate.
Budget accordingly if you’re planning a renovation: a $50 tile test that comes back positive can save you from a five-figure abatement surprise mid-project.
How to choose an accredited lab (and spot a weak report)
Before you ship a sample anywhere, run through this checklist:
- Confirm accreditation. Ask directly whether the lab holds NVLAP or an equivalent regional accreditation, and for which methods (PLM, TEM, or both).
- Ask for chain-of-custody documentation. This matters most for real-estate transactions and permit applications, where an unsigned or undocumented result won’t hold up.
- Check the detection limit. A lab that won’t state its detection limit, or that gives a vague “trace” result without a percentage, isn’t giving you a usable answer.
- Confirm whether point counting was used for low-content or borderline samples. This is the difference between a defensible “none detected” and a guess.
Red flags include labs that won’t name their accreditation body, reports with no analyst signature, and vague method descriptions like “microscopic examination” instead of naming PLM or TEM specifically. Choosing carelessly here isn’t a minor risk. Insufficient accreditation or experience with varied building materials is one of the more common reasons a homeowner ends up with a false negative or a report that’s useless to a contractor.
Pro Tip: Keep every lab report from every property you own or manage in one folder. A five-year-old “none detected” result on a specific material can save you from re-testing the same tile twice.
Your sample is positive: now what?
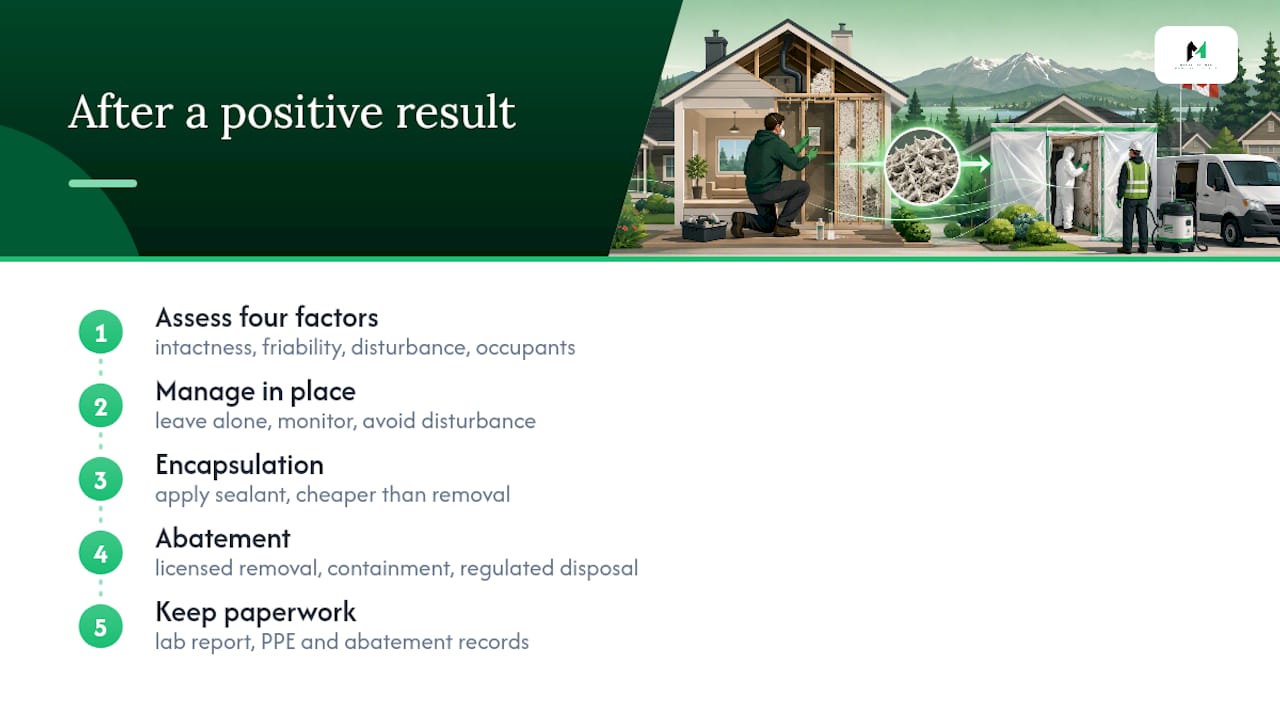
A positive result isn’t automatically a demolition order. What happens next depends on four things: how intact the material is, whether it’s friable, whether you’re about to disturb it, and who’s in the building day to day.
If the material is stable, sealed, and not in anyone’s way, manage in place is often the right call. That means leaving it alone, checking on its condition periodically, and avoiding anything that would disturb it, like drilling, sanding, or demolition.
Encapsulation covers the material with a sealant that locks fibres in place. It’s a reasonable middle step for materials that are mostly intact but showing early wear, and it costs considerably less than full removal.
Abatement is the answer when the material is friable, deteriorating, or standing between you and a renovation. Full removal involves containment, negative air pressure, and regulated disposal, done by licensed technicians, not a general contractor.
Whichever path you choose, keep the lab report and any asbestos personal protective equipment documentation and abatement paperwork on file. Future buyers, insurers, and contractors will all ask for it eventually.
Why a certified contractor matters once testing is done
DIY sampling answers “is it asbestos.” It doesn’t answer “how do I safely remove it,” and that gap is where most costly mistakes happen. Certified technicians bring containment equipment, negative-air setups, and regulated disposal channels that a homeowner simply can’t replicate with a respirator and a garbage bag.
MSN Environmental’s technicians work through this exact sequence daily across residential and commercial sites, pairing accredited testing, inspections, and assessments with full asbestos removal when a sample comes back positive. Documentation follows every step, so the paperwork holds up for insurers, buyers, and municipal inspectors alike. If you’re past the sampling stage and into “what do we actually do about it,” that’s the point where a licensed crew earns its cost.
Test early, worry less later
If there’s one lesson worth repeating from years of watching renovation projects stall mid-demolition, it’s this: test before you swing the hammer, not after. Schedule sampling at the very start of your project timeline, before permits, before demo crews, before you’ve committed to a completion date.
Pay the extra cost for professional sampling on anything friable or extensive. A cheap DIY test on the wrong material is how projects end up shut down for weeks. Safety first isn’t a slogan here. It’s the only sequence that avoids expensive surprises.
— Moacyr
Ready for professional sampling or removal?
Once a report comes back positive, or you’ve got a material that’s clearly too risky for a mail-in kit, the next call matters more than the last one. A professional service can handle both ends of the process: accredited sampling and air monitoring on-site, then full abatement and disposal if the result requires it, with documentation built for insurers, buyers, and permit offices from day one.
Booking starts with a straightforward site visit. A technician assesses the suspect material, collects samples following proper chain-of-custody procedure, and walks you through what the lab report will cover before it’s even sent out. If removal ends up necessary, the same team can handle containment and disposal without handing you off to a second contractor.
Read through the top reasons to hire certified professionals for hazardous material removal if you’re still weighing DIY against professional help, or go straight to the asbestos abatement and removal services page to request a quote for your property.
Where to verify accreditation and methods
- Health Canada for national public-health guidance on exposure risk
- NVLAP’s accredited lab directory to confirm a lab’s accreditation before shipping samples
- PLM vs TEM method breakdowns for a deeper look at how each analysis works
This article is general information, not a substitute for advice from a qualified doctor. Consult a qualified healthcare professional about your own circumstances before acting on anything here.
Sources
FAQ
How do I test for asbestos?
Collect a small sample of the suspect material using the wet method to limit fibre release, double-bag it, and send it to an accredited lab for PLM analysis, or hire a certified sampler if the material is friable or extensive.
How much does asbestos testing cost?
DIY mail-in kits typically run $30 to $80 per sample (https://inspectandtest.net/guides/home-asbestos-testing/), while professional sampling and small surveys range from a few hundred dollars to over a thousand depending on the number of materials tested.
What is the 3-5-7 rule for asbestos sampling?
Definitions of this rule vary by region and aren’t standardized across Canadian guidance, so check with your lab or a certified sampler for the sampling protocol that applies to your specific material and jurisdiction.
How much does an asbestos check cost?
A basic single-sample check through a DIY kit costs roughly $30 to $80, while a professional inspection covering multiple materials in a home typically starts in the low hundreds of dollars and rises with scope and turnaround speed.
When should I hire a professional instead of using a DIY kit?
Hire a certified sampler for vermiculite insulation, any friable or deteriorated material, full pre-renovation surveys, or whenever you need chain-of-custody documentation for a real-estate transaction.