

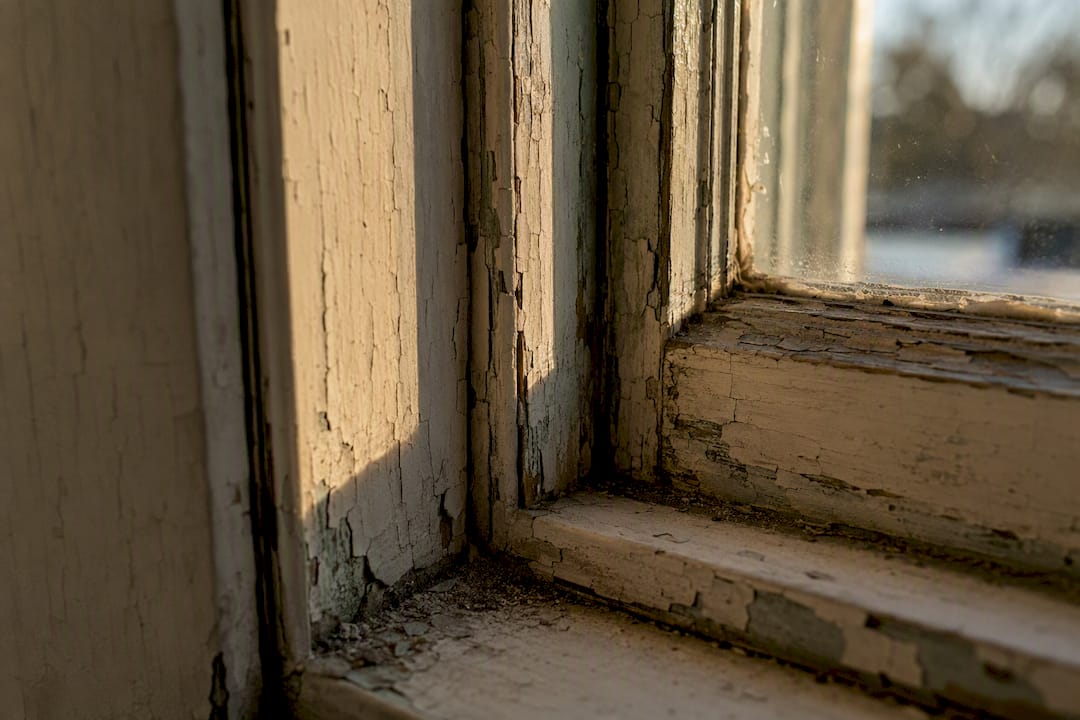
If your windows were painted before 1978, they may contain lead, and any sanding, scraping, or heat-gun work should stop immediately until you know for sure. The reason is simple: window sashes rub against their frames every time they open, and that friction grinds old paint into fine dust that settles on sills and floors where kids play.
Do this now:
- Stop any work that disturbs painted surfaces on windows, trim, or sashes.
- Close off the room, keep pets and children out, and wet-wipe any visible dust or chips with paper towels (never dry sweep or vacuum with a regular household vacuum).
Call a certified contractor or testing service right away if the paint is peeling or chalking, if you have children under six or someone pregnant in the home, or if you’re planning renovations that will disturb window components. According to Health Canada, you cannot confirm lead paint by looking at it. Testing is the only way to know what you’re dealing with, and it’s the step that determines everything that follows.
Key Takeaways
Lead paint on windows poses its highest risk through friction-generated dust on sills and troughs, and only testing plus documented clearance results can confirm a hazard is actually resolved.
| Point | Details |
|---|---|
| Stop and isolate first | Halt any sanding or scraping immediately, close off the area, and wet-wipe visible dust before doing anything else. |
| Test, don’t guess | Use XRF screening or bulk paint-chip testing since visual inspection cannot reliably confirm lead presence. |
| Friction is the real hazard | Window sashes generate lead dust through normal use even when the paint looks intact. |
| Match the fix to the risk | Choose monitoring, encapsulation, replacement, or abatement based on paint condition, occupants, and budget. |
| Demand clearance testing | A job isn’t finished without a passing dust-wipe result confirming the space is safe to reoccupy. |
| Hire certified expertise | MSN Environmental provides XRF testing, HEPA cleaning, certified abatement, and clearance testing with full documentation. |
Table of Contents
- How to test for lead paint on windows
- Why windows are a bigger lead risk than walls
- Should you monitor, encapsulate, replace, or abate?
- Safe DIY practices and what never to attempt
- What a certified contractor actually does on-site
- Why homeowners choose a certified abatement firm
- Getting your windows tested and remediated properly
- Sources
- FAQ
How to test for lead paint on windows
Guessing based on the age of a house or the look of the paint gets a lot of homeowners into trouble. A home built in the 1960s might have had its original sashes replaced decades ago with lead-free paint, while a 1980s addition on an older property could still carry contaminated trim from a previous owner’s careless touch-up. Visual inspection alone cannot rule lead in or out, and Health Canada is explicit that only proper testing confirms its presence.
That said, certain clues should raise your suspicion enough to test sooner rather than later: houses built before 1978, single-pane wood sash windows, alligatoring or chalky paint texture, and any chipping near the sill or the parting stop (the thin strip of wood that separates the upper and lower sash).
The three main testing methods
- XRF screening. A trained technician uses a handheld X-ray fluorescence analyzer that reads the lead content of a painted surface in seconds, without removing any paint. It’s fast, non-destructive, and gives you a reading on the spot. A result above the regulated threshold confirms lead is present in that layer; a negative reading on one spot doesn’t guarantee every window in the house is clean, since older homes often have different paint histories layer by layer. XRF lead testing explains what the numbers actually mean and where the method’s limits are.
- Bulk paint-chip testing. A small paint sample gets sent to a lab for analysis. This method is more precise for a single spot but destructive, since it requires removing a chip of paint down to the substrate. It’s often used to confirm or double-check an XRF reading, or when a homeowner wants a lab-grade result for a specific renovation plan.
- Dust-wipe testing. This is a clearance tool, not a diagnostic one. After remediation or renovation work, technicians wipe surfaces like sills and troughs with a specialized cloth and send it for lab analysis to confirm dust levels are low enough for the space to be reoccupied safely.
Finding a qualified tester means asking a few pointed questions before you book: Is the technician certified for lead-based paint inspection? Will you receive a written report with room-by-room readings? Does the company carry liability insurance for this specific type of work? A testing and inspection service should hand you documentation you can keep on file, not just a verbal “yes it’s there” or “no it’s not.”
Pro Tip: Ask for XRF readings on every window in a room, not just one. Paint history often varies window to window even in the same house, especially if any sashes were ever replaced or refinished separately.
Why windows are a bigger lead risk than walls
A wall painted with lead-based paint that’s fully intact and undisturbed poses a relatively low hazard. A window is a different story entirely, because it’s a moving part. Every time a sash slides up or down, wood rubs against wood at the frame and the parting stop, and that friction grinds paint into a fine powder even when the paint looks perfectly sound to the eye.
This is the mechanism that makes windows uniquely dangerous among all the painted surfaces in an older home. Research on lead in house dust identifies friction-generated dust from window operation as a primary residential exposure pathway, distinct from paint that’s simply peeling or flaking on a wall. Paint doesn’t need to be visibly deteriorating to be a hazard on a window. “Sound” paint on a frequently used sash can still shed dust with every open and close.
That dust doesn’t just disappear. It settles into two spots that matter enormously for small children:
- Sills, the flat horizontal surface at the base of the window, are exactly at toddler height and exactly where a curious kid rests their hands or drops a toy.
- Troughs, the recessed channel where the lower sash sits when the window is closed, accumulate dust and paint chips out of sight, often going unnoticed for years.
From there, the exposure pathway is almost entirely hand-to-mouth. A child touches a dusty sill, puts fingers in their mouth, and ingests trace amounts of lead repeatedly over weeks and months. It’s a slow, cumulative exposure rather than a single dramatic event, which is part of why it goes undetected in so many households until a blood test flags it.
Children under six face the highest risk because their nervous systems are still developing and they absorb a larger proportion of ingested lead than adults do. Pregnant people are the other group specialists flag consistently, since lead can cross the placenta. This is exactly why dust-wipe clearance testing matters so much after any remediation work: a room can look clean and still fail a lab test, and a passing result is the only real proof the hazard has been addressed rather than just visually tidied up.
Should you monitor, encapsulate, replace, or abate?
Not every lead-painted window needs the same response. The right path depends on a handful of concrete factors, and walking through them honestly will save you from either overreacting on a low-risk window or under-reacting on a genuinely hazardous one.
Weigh these factors before deciding:
- Condition of the paint (intact and smooth versus chipping, peeling, or chalking)
- Who lives in the home (young children and pregnant occupants raise the stakes considerably)
- How often the window is actually operated (a sealed, painted-shut window behaves very differently than one opened daily)
- Heritage or architectural value that might make wholesale replacement undesirable
- Budget and how much disruption you can tolerate
Monitor with no immediate action
If the paint is fully intact, the window is rarely operated, and no young children or pregnant people are in the home, ongoing monitoring can be a reasonable short-term choice. The catch is that this isn’t a permanent fix. It requires regular visual checks for deterioration and honesty with yourself about whether “rarely operated” stays true once summer rolls around and everyone wants that window open.
Stabilization or encapsulation
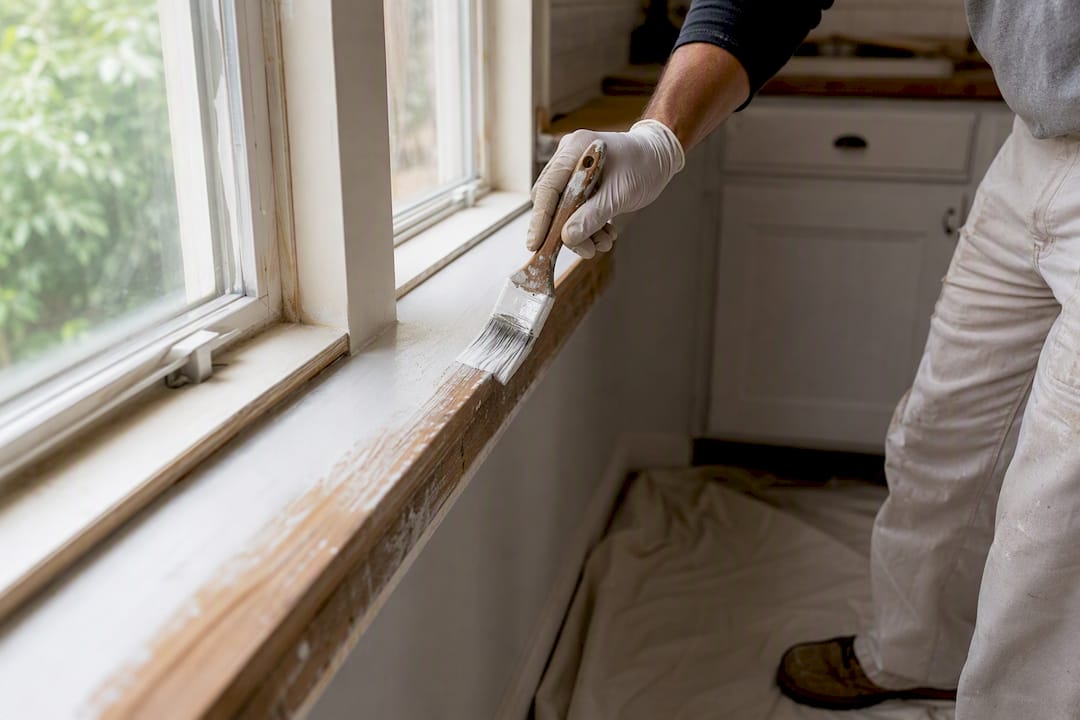
This involves cleaning the surface, repairing any damaged substrate, and applying a specialized encapsulant coating that seals lead paint underneath a durable barrier. It’s less invasive and less expensive than replacement, and it can buy years of protection on a window that’s structurally sound. The tradeoff is maintenance: encapsulation needs periodic inspection, and any future damage to the coating (a scrape, a impact, normal wear) can expose lead paint again. It’s a management strategy, not a permanent one.
Lead-safe window replacement
Replacing the entire window unit removes the friction surface altogether, which eliminates the ongoing dust-generation problem rather than just covering it up. NCHH’s research on window replacement found this approach reduces child lead exposure effectively, and pairing it with weatherization upgrades can also cut energy costs, since old single-pane sashes are notoriously drafty. The consideration here is heritage character: a homeowner in a designated historic property may need custom or heritage-style replacements to satisfy local preservation rules, which adds cost and lead time.
Certified abatement
For windows with heavily deteriorated paint, or in homes where occupant risk is high and time matters, professional abatement, meaning full removal of the contaminated component by certified technicians, is often the most direct route. This is a bigger job than a coat of encapsulant: it involves containment, specialized cleaning, and mandatory clearance testing before the room is considered safe again. It costs more than stabilization but resolves the hazard rather than managing it.
Pro Tip: If you’re weighing replacement against abatement and the window is beyond midlife anyway (drafty, hard to operate, single-pane), replacement often makes more financial sense than paying to remediate a component you’ll want to replace within a few years regardless.
Safe DIY practices and what never to attempt
Small repairs on a lead-painted window aren’t automatically off-limits for a homeowner, but the line between a safe minor fix and a dangerous mistake is thinner than most people assume. Get this wrong and you can turn a contained hazard into an airborne one that spreads through the entire house.
Never do any of the following on a window suspected or confirmed to have lead paint:
- Dry sand or dry scrape the paint
- Use a heat gun or open flame to strip paint
- Run a power sander, grinder, or rotary tool without HEPA dust capture
- Use a regular shop vacuum or household vacuum to clean up paint chips or dust
Every one of those methods either aerosolizes lead dust or spreads it further, which is the opposite of what you want when the entire hazard mechanism is airborne particulate.
If you’re tackling something genuinely small, like touching up a chipped corner or tightening a loose sash cord, safer practices exist:
- Wet the surface with a fine mist before doing any scraping, since moisture keeps dust from becoming airborne.
- Use hand tools only, not power tools, and work slowly.
- Tape off the work area with plastic sheeting to contain any debris that does come loose.
- Wear a properly fitted respirator rated for lead particulate (a basic dust mask does not qualify) along with disposable gloves.
- Clean up with wet rags and a HEPA-filter vacuum, never a standard household model.
Waste disposal matters too. Contaminated rags, plastic sheeting, and any paint chips need to go into sealed, labelled bags, and many municipalities have specific hazardous waste rules for lead-contaminated materials rather than allowing them in regular curbside trash.
The moment to stop and call a certified contractor is whenever the scope grows beyond a touch-up: full sash removal, work on multiple windows, uncertainty about how many paint layers are underneath, or any household with young children where you’re not fully confident in your containment. Interior demolition versus abatement breaks down exactly where that line sits and why component removal often needs a different skill set than a simple repaint.
What a certified contractor actually does on-site
A professional lead abatement job follows a fairly consistent sequence, and knowing what that sequence looks like helps you evaluate whether the contractor standing in your living room is doing it right.
It starts with inspection and testing, typically XRF screening or bulk sampling, to confirm lead presence and map exactly which components are affected. From there, a legitimate contractor writes up a scope of work rather than just quoting a number verbally. That scope should specify which windows or components are being treated, what method will be used (encapsulation, component replacement, or full abatement), and what the containment plan looks like.
Containment comes next: plastic sheeting sealing off the work area, negative air pressure in more involved jobs, and warning signage. The actual work, whether that’s stripping, replacing sashes, or removing entire window units, follows HUD’s technical guidance on containment and cleaning. After the physical work wraps up, HEPA vacuuming and wet cleaning of every surface in the containment zone comes before anyone even considers the job finished.
The last step, and the one some less scrupulous operators skip, is dust-wipe clearance testing. HUD’s guidance treats this as a mandatory final check, not an optional add-on, because a room can look spotless and still fail a lab test for residual lead dust.
What to demand from any contractor before signing anything:
- A written XRF or bulk sample report identifying exactly which components tested positive
- Pre-work and post-work dust-wipe results, not just a verbal assurance the space is clean
- Proof of worker training and certification for lead-safe work practices
- Current liability insurance documentation
On the contract side, a few terms are worth scrutinizing closely. Ask whether payment includes a holdback until clearance testing passes, who is responsible for hazardous waste disposal and how it’s documented, and whether there’s a warranty covering the remediated area if problems resurface.
Pro Tip: A contractor who can’t produce a written dust-wipe clearance result after the job is done hasn’t actually finished the job, no matter how clean the room looks.
Why homeowners choose a certified abatement firm
Testing and remediation on lead-painted windows isn’t a place where cutting corners saves you anything in the long run. A negative dust-wipe result is the only real proof the hazard is gone, and getting there requires the right equipment, the right protocols, and technicians trained specifically for this kind of work.
MSN Environmental handles this process end to end: XRF lead testing to identify exactly which windows and components are affected, HEPA cleaning and wet-cleaning protocols during and after the work, certified abatement or lead-safe replacement depending on what the window condition calls for, and dust-wipe clearance testing to confirm the space is genuinely safe before anyone moves back in.
The value of a certified firm isn’t just the removal work itself. It’s the documentation trail: a written test report before work starts, a defined containment and cleaning method during the job, and a passing clearance result at the end that you can keep on file for future renovations, sales, or peace of mind.
Detailed methodology and result interpretation for the initial testing step are laid out on the XRF lead testing resource page, which is worth a read before you book any inspection so you know what questions to ask and what a legitimate report should include.
What that documentation trail gives a homeowner:
- A record for future home sales or renovation disclosure requirements
- Proof the work meets recognized clearance standards, not just a visual once-over
- A baseline for any future testing if you renovate again down the road
Author perspective — balancing preservation with safety
There’s a real tension in older homes between wanting to preserve original wood windows and needing to deal with a genuine health hazard, and I don’t think the honest answer is the same for every house. A window with tight, intact paint in a low-traffic room of a heritage property can sometimes be a candidate for careful stabilization rather than wholesale replacement. That’s a legitimate choice, not a compromise.
Where I push back is on homeowners who treat “the paint looks fine” as a substitute for testing, especially in households with young kids. It isn’t a substitute. Friction dust doesn’t announce itself, and a window that looks pristine can still be shedding lead every time it’s opened. Preservation instincts are worth respecting, but they should kick in after testing confirms what you’re actually dealing with, not instead of it.
My bias, for what it’s worth: insist on documented, certified work and a passing clearance test regardless of which path you choose. Skip that step and you’ve just spent money without actually solving the problem.
— Moacyr
Getting your windows tested and remediated properly
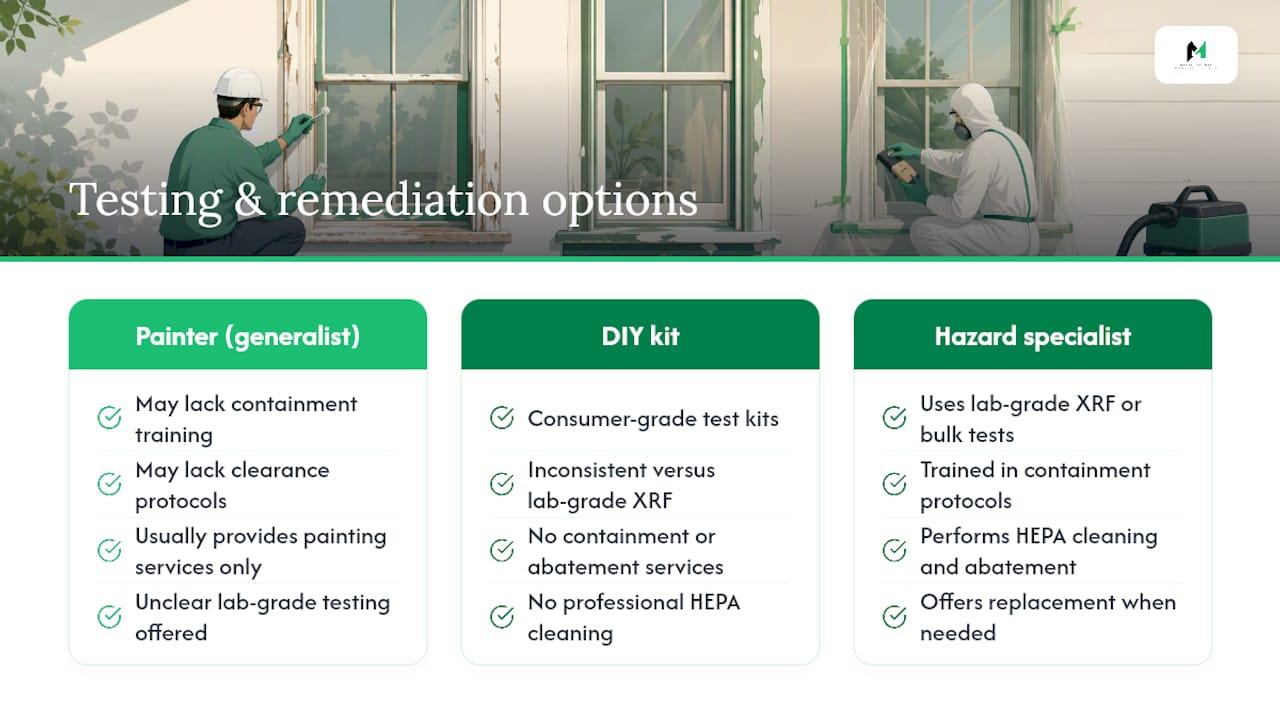
There are a few routes homeowners take when they suspect lead paint: hire a generalist painting contractor and hope for the best, attempt DIY testing kits from a hardware store, or bring in a firm that specializes specifically in hazardous materials. The first two come with real gaps. Generalist painters often aren’t trained in containment or clearance protocols, and consumer testing kits are notoriously inconsistent compared to lab-grade XRF or bulk sample analysis.

MSN Environmental focuses on exactly this category of work, hazardous materials removal including lead, asbestos, and mould, alongside the environmental testing that confirms a job actually worked. That combination matters here specifically: the same technicians who test your windows with XRF equipment are the ones who carry out containment, HEPA cleaning, and the abatement or replacement work itself, then confirm the result with dust-wipe clearance testing. You’re not coordinating three separate vendors and hoping the handoffs go smoothly.
If you’ve read this far because you suspect a problem, the next step is straightforward: reach out for testing and inspection services to get a definitive answer on your windows, or review the reasons to hire certified professionals for hazardous materials work before deciding how to proceed. Either way, get a written test result in hand before you touch another window.
This article is general information, not a substitute for advice from a qualified doctor. Consult a qualified healthcare professional about your own circumstances before acting on anything here.
Sources
- Lead in house dust and residential exposure pathways (PubMed)
- Lead-based paint — Health Canada
- Preventing child lead exposure by replacing windows | NCHH
- Lead-based paint handbook chapter on abatement (HUD)
FAQ
How bad is lead paint on windows?
It’s a genuine health concern, particularly for children under six and pregnant people, because window operation grinds paint into fine dust that settles on sills and troughs where hand-to-mouth exposure happens repeatedly over time.
How long does it take for lead paint to harm you?
Exposure is typically cumulative rather than immediate. It builds up through repeated small doses of dust ingestion over weeks or months rather than causing harm from a single brief contact.
Is lead paint still toxic if painted over?
Paint that’s been covered by newer, non-lead coatings is generally less hazardous while it stays fully intact and undisturbed, but any friction, chipping, or sanding down to the lead layer reintroduces the hazard, which is exactly why windows are riskier than static wall surfaces.
What if I accidentally sanded lead paint?
Stop immediately, leave the area, and avoid dry sweeping or using a regular vacuum, since that spreads dust further. Wet-wipe visible debris with disposable rags, seal them in a bag, and arrange dust-wipe testing to check whether the space needs professional cleaning before it’s reoccupied.