

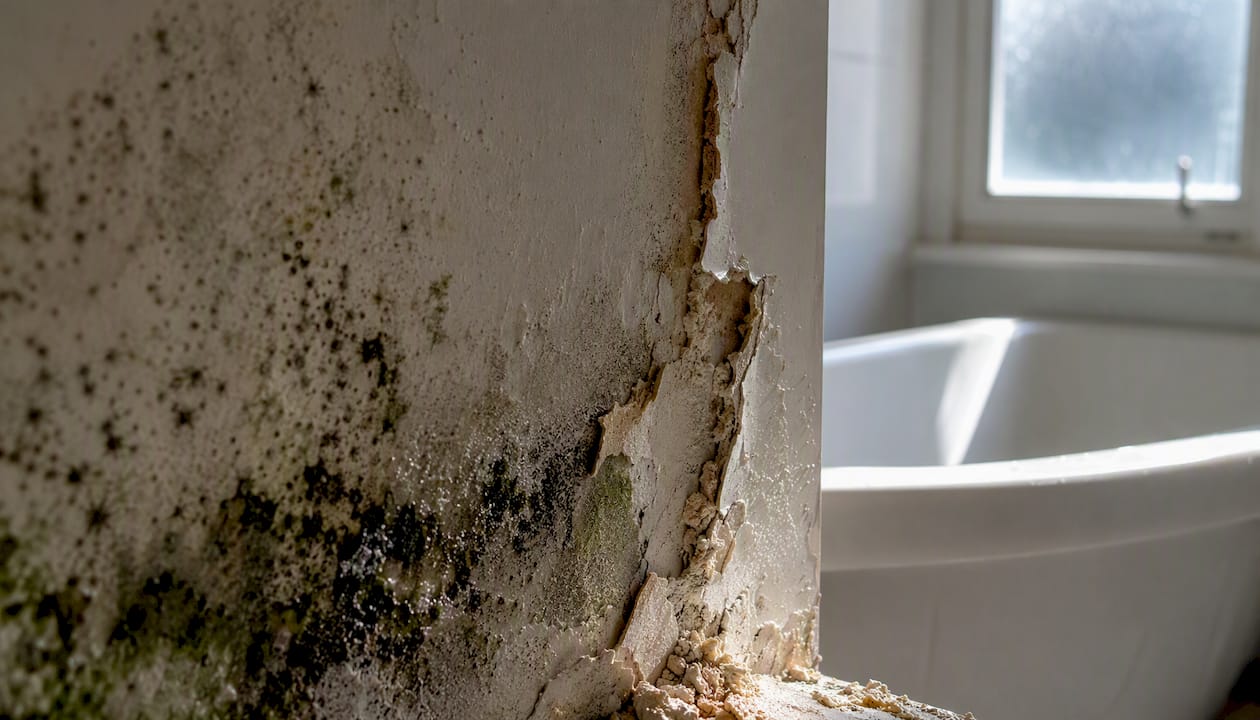
Black mould on drywall is dangerous when it covers a large area, when the board is soft or saturated, or when anyone in the home has respiratory conditions. For a small, dry, surface patch under 10 square feet on structurally sound drywall, careful DIY cleanup is reasonable. For anything larger, flood-related, or hidden behind walls, stop work and call a certified remediation contractor.
Immediate steps before you do anything else:
- Ventilate the room: open a window and close the door to the rest of the house.
- Stop the moisture source if you can do so safely (shut off a leaking supply line, for example).
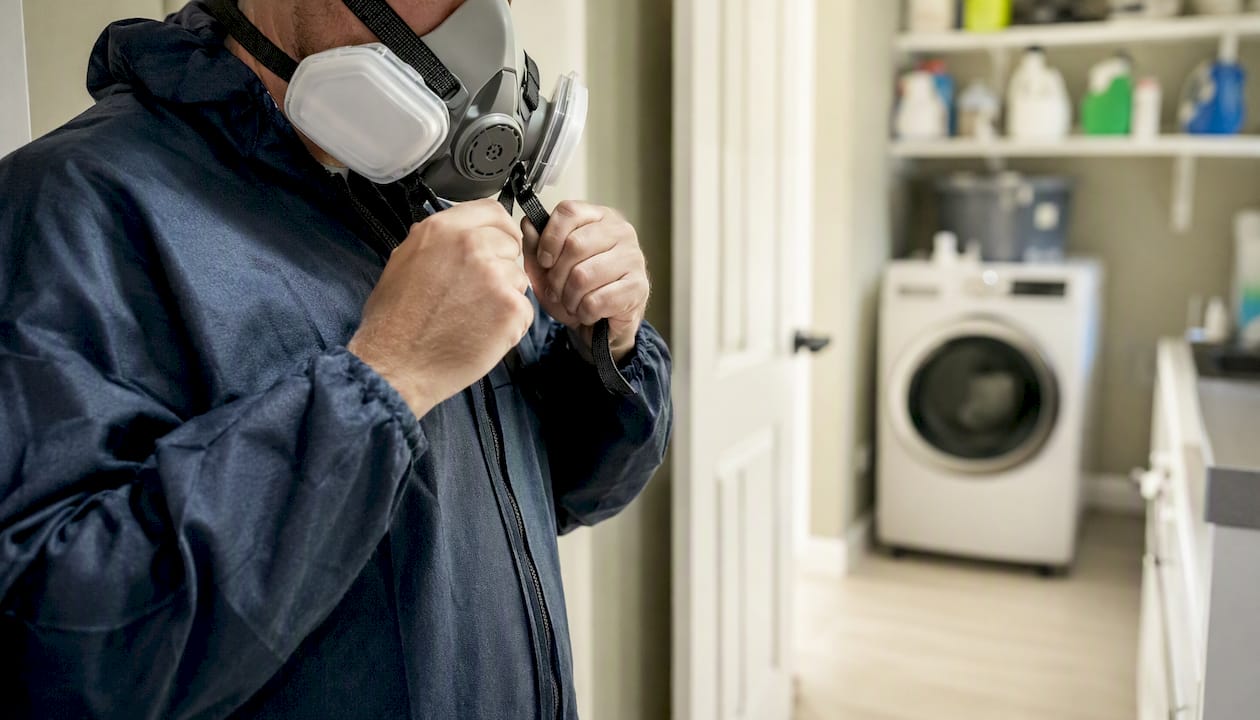
- Put on a NIOSH-approved N95 respirator, nitrile gloves, and eye protection before getting close.
- Do not disturb the growth by scrubbing, vacuuming with a regular vacuum, or cutting drywall until you have assessed the full extent.
- If the affected area is larger than roughly 10 square feet, or if you suspect mould is growing behind the wall, treat it as a professional job from the start.
Key takeaways
Black mould on drywall requires removal when the board is saturated, soft, or the affected area exceeds 10 square feet; surface cleaning is only reliable on dry, structurally sound drywall with the moisture source already fixed.
| Point | Details |
|---|---|
| DIY size threshold | Areas under 10 square feet on dry, firm drywall are generally manageable for careful DIY cleanup. |
| Moisture matters most | Drywall wet for more than 48 hours or reading above 17% on a moisture meter requires removal, not cleaning. |
| Cutback distance | Cut at least 12 inches beyond visible mould and verify readings below 15–17% before rebuilding. |
| Fix the source first | No cleaning holds without correcting the underlying moisture problem; Health Canada’s guidance makes this the first step. |
| MSN Environmental | Provides inspection, containment, removal, drying, and clearance testing for Ontario homeowners when the scope exceeds DIY limits. |
Table of Contents
- What are the health risks of black mould on drywall?
- How do you identify black mould on drywall?
- When should you clean versus replace the drywall?
- How do you protect yourself before starting any DIY work?
- Step-by-step DIY cleanup for small mould patches
- When does drywall have to come out?
- When does air or bulk testing actually help?
- How do you stop mould from coming back?
- When should you hire a certified mould remediation contractor?
- Why I think the DIY threshold is often set too high
- MSN Environmental handles the work you should not do yourself
- Sources
- FAQ
What are the health risks of black mould on drywall?
The term “black mould” is commonly used to describe Stachybotrys chartarum, but many other species produce dark-coloured colonies on drywall. Colour alone does not confirm species. What matters for health is the concentration of airborne spores and mycotoxins, and how long occupants are exposed.
Short-term effects include nasal congestion, throat irritation, coughing, skin rashes, and eye irritation. People with asthma or allergies often experience worsening symptoms within days of exposure. Prolonged exposure in a poorly ventilated space can contribute to chronic respiratory problems and, in rare cases, more serious outcomes in people who are already immunocompromised.
The National Collaborating Centre for Environmental Health (NCCEH) specifically flags infants, the elderly, people with chronic lung conditions such as COPD, and immunocompromised individuals as the groups most at risk. For these households, the threshold for professional intervention should be lower than the standard 10 square foot guideline.
Health Canada’s guidance on moisture and mould is the primary Canadian reference for homeowners. It emphasises that painting over mould does not fix contamination and that the moisture source must be corrected before any remediation will hold. That point is worth repeating: no cleaning product, paint, or encapsulant is a substitute for fixing the leak or condensation problem driving the growth.
How do you identify black mould on drywall?
Not every dark spot on a wall is mould. Soot, water staining, and certain paints can look similar. Here is how to tell the difference.
Visual signs to look for:
- Irregular, spreading patches rather than uniform discolouration. Mould colonies tend to follow moisture paths, so they often appear near baseboards, around window frames, at ceiling-wall junctions, or along seams.
- Colour ranges from black and greenish-black to grey, brown, or white depending on species and stage. A powdery texture suggests a dry surface colony; a slimy or wet appearance suggests active moisture and deeper penetration.
- Paint that is bubbling, peeling, or blistering often signals moisture behind the drywall, which may mean mould is already growing on the back face before it appears on the front.
Smell and tactile signs:
A persistent musty or earthy odour in a room, even when nothing is visible, is a strong indicator of hidden growth. Press gently on the drywall surface near a suspected area. Soft, spongy, or crumbling board means the gypsum core has absorbed water and the material is likely contaminated through its full thickness.
Tools that help:
A moisture meter is the most useful diagnostic tool a homeowner can own. A flashlight and an inspection camera (a flexible borescope, available at most hardware stores) let you check inside wall cavities through a small drilled hole without opening the whole wall. Surface swab test kits are sold at hardware stores and can confirm the presence of mould, but they cannot tell you the species, the spore count, or whether growth has penetrated the material. Treat a positive swab as confirmation to act, not as a complete picture.
Quick diagnostic checklist:
- Is there a musty smell in the room?
- Is the drywall soft, crumbling, or visibly stained through to the seams?
- Are there bubbling or peeling paint patches?
- Does the moisture meter read above 17% near the suspect area?
- Is there a known or suspected water source nearby (plumbing, roof, window, basement wall)?
Two or more “yes” answers warrant a closer inspection and likely remediation.
When should you clean versus replace the drywall?
The 10 square foot threshold comes from EPA-aligned guidance widely used by property managers and remediation contractors across North America. Areas smaller than roughly 10 square feet on sound, dry drywall are generally considered manageable for a careful DIY approach. Larger areas, or any area where the drywall has been wet for more than 48 hours, typically require professional remediation and material removal.
Drywall saturated for more than 48 hours commonly develops contamination that penetrates the paper facing and the gypsum core, making surface cleaning ineffective.
| Condition | Moisture reading | Suggested action |
|---|---|---|
| Small surface staining, dry board, known cause fixed | Below 17% | Clean in place with appropriate solution |
| Staining after brief condensation (shower area), dry board | Below 17% | Clean in place; improve ventilation |
| Staining after a plumbing leak, board damp but firm | 17–20% | Dry thoroughly first; reassess before cleaning |
| Gypsum soaked after flood or leak lasting more than 48 hours | Above 20% | Remove and replace drywall |
| Soft, crumbling, or stained through to back face | Any reading | Remove and replace drywall |
| Area larger than 10 square feet regardless of moisture | Any reading | Hire a certified remediation contractor |
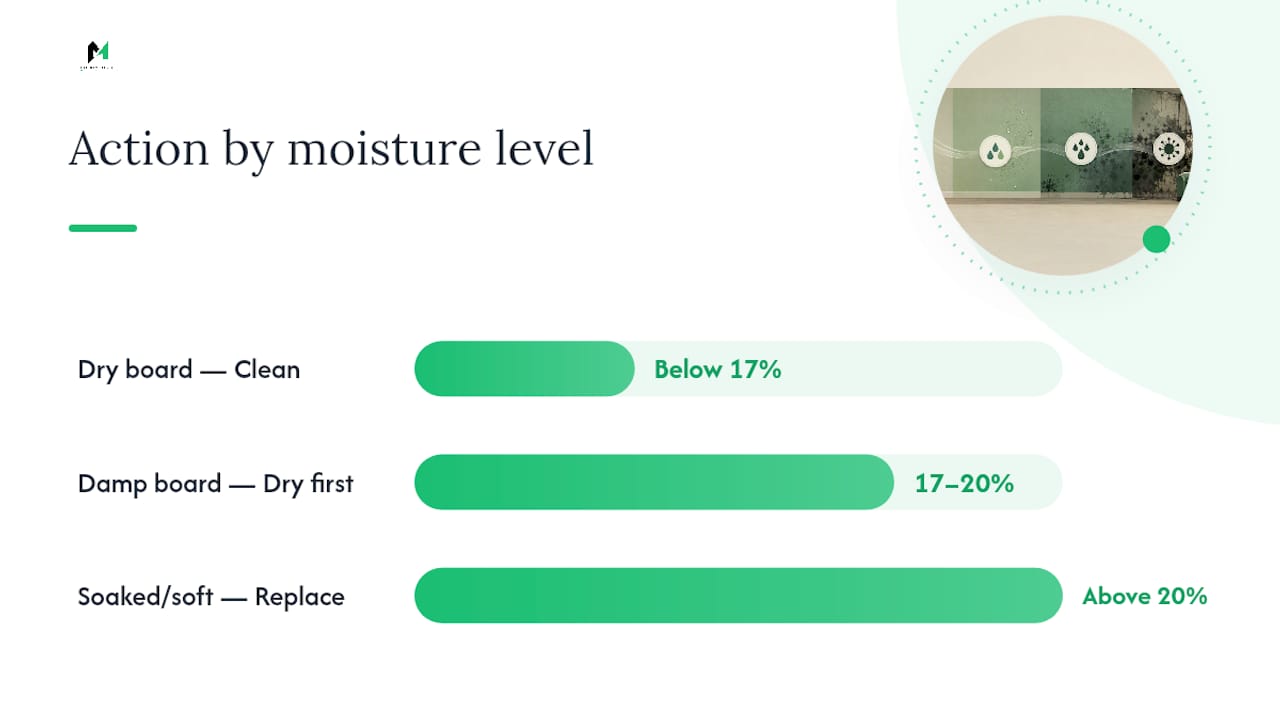
A small patch of surface discolouration near a bathroom exhaust fan that appeared after a single steamy shower is a very different situation from a basement wall that was wet for a week after a sump pump failure. The first is a DIY candidate. The second is not.
How do you protect yourself before starting any DIY work?
Personal protective equipment is not optional for mould work, even for small jobs. Disturbing a mould colony releases spores into the air, and you will inhale them unless you are properly protected.
Respirator selection:
The CDC recommends a NIOSH-approved N95 respirator as the minimum for household mould cleanups. For extended work, demolition, or any job involving cutting drywall, a half-face or full-face respirator with P100 cartridges provides substantially better protection. A dust mask or a surgical mask does not filter mould spores effectively.
Other PPE:
Nitrile gloves (not thin latex), safety glasses or goggles, and disposable coveralls or old clothing you can bag immediately after the job. Wash any reusable clothing separately in hot water.
Containment basics:
Seal doorways to adjacent rooms with plastic sheeting and tape. Block HVAC vents in the work area so spores do not travel through the duct system. Remove soft furnishings, bedding, and clothing from the room before you start. Turn off any forced-air heating or cooling while working.
Spore counts in a room being disturbed can spike dramatically compared to baseline levels. If at any point you feel eye irritation, throat tightening, or dizziness, stop immediately, leave the area, and get fresh air. Those are signs your protection is insufficient for the conditions.
Step-by-step DIY cleanup for small mould patches
DIY cleanup is reasonable when the affected area is under 10 square feet, the drywall is structurally sound (firm, not soft), the moisture source has been fixed, and no vulnerable occupants (infants, elderly, immunocompromised) are in the home.
Step-by-step procedure:
- Prepare and contain. Put on all PPE. Seal the room as described above. Lay plastic sheeting on the floor under the work area.
- HEPA vacuum the surface. Before applying any liquid, vacuum the mould colony gently with a HEPA vacuum to reduce loose spores. This step is often skipped and it matters.
- Wash with detergent and water. Scrub the surface with a stiff brush and a solution of dish soap and warm water. This removes the bulk of the colony and the organic material it feeds on.
- Apply a disinfecting solution. For non-porous surfaces adjacent to the drywall (tile, painted trim), a bleach solution works well. The CDC’s bleach dilution guidance is no more than 1 cup of bleach per gallon of water. On the drywall surface itself, bleach has a significant limitation: because drywall is porous, bleach does not penetrate deeply enough to kill hyphae that have grown into the paper and gypsum core. It may lighten the stain while leaving the root structure alive. White vinegar (undiluted) penetrates slightly better and is a reasonable alternative for surface treatment on drywall, though it is not a substitute for removal when growth has penetrated the material.
- Rinse and dry thoroughly. Wipe away residue with a damp cloth, then dry the area completely. Use a fan directed at the surface and, if available, a dehumidifier in the room. The target moisture reading before any repainting or patching is below 15%.
- HEPA vacuum again. A second pass after drying picks up any remaining debris.
- Bag and dispose of waste. Place all used cloths, plastic sheeting, disposable coveralls, and debris in heavy-duty plastic bags. Seal them before carrying through the house and dispose of them with regular household waste unless your municipality has specific requirements for mould-contaminated material.
- Recheck moisture. Before repainting, confirm the moisture meter reads below 15% across the repaired area. Painting over damp drywall traps moisture and the problem returns.
A note on bleach and porous drywall: bleach is widely marketed as a mould killer, and it works on hard, non-porous surfaces. On drywall, it often changes the colour of the stain without eliminating the contamination. If the stain returns within weeks of cleaning, the hyphae have penetrated the material and the board needs to come out.
When does drywall have to come out?
Some situations leave no room for surface treatment. Removal is the only reliable fix when:
- The drywall is soft, spongy, or crumbles when pressed.
- Staining is visible on the back face of the board (confirmed by removing an outlet cover or drilling a small inspection hole).
- Mould is growing at seams, behind trim, or along the base of the wall where moisture has wicked up from the floor.
- The same patch has regrown within a few weeks of cleaning, indicating the hyphae are established below the surface.
- The board was wet for more than 48 hours after a flood, pipe burst, or roof leak.
- The affected area exceeds 10 square feet.
How far to cut back:
Industry practice is to cut at least 12 inches beyond the visible edge of the mould colony on all sides. Mould hyphae extend microscopically past what you can see, and cutting to the visible edge leaves contaminated material in the wall.
Post-removal checks:
- Inspect studs and plates visually and with a moisture meter. Discoloured or soft wood may need treatment with an antimicrobial solution or, in severe cases, replacement.
- Remove any wet or visibly contaminated insulation. Fibreglass batt and cellulose insulation cannot be dried and reused once contaminated.
- HEPA vacuum all exposed framing and the cavity surfaces before closing the wall.
- Confirm the moisture source is fully repaired before installing new drywall.
When does air or bulk testing actually help?
Testing is not always necessary, and it is worth being clear about what it can and cannot tell you. A single air sample gives a spore count at one point in time in one location. Spore levels fluctuate with activity, ventilation, and season, so a single sample can miss contamination or overstate it depending on conditions.
Testing is genuinely useful when:
- The contaminated area is large or the source is unknown and you need to map the extent before deciding on scope.
- Occupants have health complaints and a physician or insurer requires documentation.
- You are buying or selling a property and want an independent assessment.
- Post-remediation clearance testing is required by an insurer, a landlord, or a building code authority to confirm the job is complete.
- You suspect mould in an HVAC system, which can distribute spores throughout the entire home.
What tests show and what they don’t:
| Test type | What it tells you | Limitation |
|---|---|---|
| Air sampling (spore trap) | Airborne spore count and general species groupings | Single-point snapshot; misses settled or dormant colonies |
| Bulk/surface sampling | Species present in a specific material | Does not indicate airborne concentration or health risk level |
| Moisture mapping | Active moisture intrusion locations | Does not confirm mould presence; needs visual or sampling follow-up |
For professional air and bulk sampling in Ontario, a qualified environmental consultant or certified remediation contractor collects samples and sends them to an accredited laboratory. Clearance testing after remediation follows the same process and confirms that post-remediation spore counts are within acceptable ranges. The NCCEH evidence review notes that interpreting single samples requires caution and that results should always be considered alongside visual inspection findings.
Understanding what a mould inspection involves before you book one helps you ask the right questions and understand what the report actually covers.
How do you stop mould from coming back?
Remediation without fixing the moisture source is a temporary fix. Mould needs water to grow. Remove the water and it cannot establish.
Common moisture sources in Canadian homes:
- Slow plumbing leaks behind walls or under sinks, often undetected for months.
- Roof leaks that travel along rafters before appearing on a ceiling or wall.
- Condensation on cold exterior walls or windows in winter, particularly in homes with poor vapour barriers or inadequate insulation.
- Basement groundwater intrusion through foundation cracks or a failing weeping tile system.
- HVAC imbalances that create cold spots or inadequate air circulation in certain rooms.
- Inadequate bathroom and kitchen exhaust fans that allow humid air to condense on walls and ceilings.
Practical prevention steps:
- Check under sinks, around the toilet base, and behind the washing machine every few months.
- Run bathroom exhaust fans for at least 20 minutes after a shower and verify they actually vent to the exterior, not into the attic.
- Inspect the roof and attic after major storms. Attic mould is a common consequence of roof leaks that go unnoticed for a season.
- Keep basement relative humidity below 50% with a dehumidifier, particularly through summer.
- Recheck repaired areas with a moisture meter every few months for the first year after remediation.
Canada’s changing climate is increasing the frequency of extreme precipitation events in many regions, which raises the likelihood of basement flooding and roof stress. Building in a regular inspection habit after major storms is a practical response to that trend.
When should you hire a certified mould remediation contractor?
Some situations are straightforward DIY calls. Others are not. Hire a professional when:
- The visible mould area exceeds approximately 10 square feet.
- The mould followed a flood, a burst pipe, or any water intrusion that lasted more than 48 hours.
- You suspect mould is growing inside the wall cavity, in the HVAC system, or in a crawl space.
- Occupants are experiencing health symptoms that may be mould-related.
- You cannot identify or fix the moisture source yourself.
- The property is a rental and documentation is required for legal or insurance purposes.
What a certified contractor does:
- Conducts a visual inspection and, where warranted, air or bulk sampling to define the scope.
- Sets up containment: plastic barriers, negative air pressure using HEPA air scrubbers to prevent cross-contamination to other areas of the home.
- Removes contaminated drywall, insulation, and other porous materials using HEPA vacuums and sealed waste bags.
- Treats exposed framing and hard surfaces with antimicrobial solutions.
- Dries the cavity with commercial drying equipment and verifies moisture readings before closing the wall.
- Conducts or arranges clearance testing to confirm the remediation is complete.
- Provides documentation of the scope, methods, and clearance results for insurance or resale purposes.
Questions to ask before hiring:
- What certifications do your technicians hold? (Look for IICRC Applied Microbial Remediation Technician or equivalent.)
- Are you licensed and insured in Ontario?
- Does your scope include clearance testing, or is that a separate cost?
- Will you provide a written scope of work and a post-remediation report?
- Can you provide references from similar residential projects?
Remediation costs in Canada vary considerably by scope. Forbes reports that remediation can run into several thousand dollars depending on the extent of contamination and the materials involved. A small contained job might be resolved in a day; a flood-related remediation involving multiple rooms can take a week or more. Understanding mould liability coverage before work begins is worth a call to your insurer, particularly for rental properties or if a neighbour’s unit is involved.
MSN Environmental’s certified black mould removal process covers the full scope: inspection, containment, removal, drying, clearance testing, and rebuild coordination, all compliant with Ontario regulations.
Why I think the DIY threshold is often set too high
The 10 square foot rule is a useful starting point, but it can give homeowners a false sense of confidence. In practice, visible mould on the face of drywall is often the smallest part of the problem. The colony you can see is the fruiting body. The hyphae, the root-like structures that actually penetrate and digest the material, can extend several centimetres into the gypsum and paper before any discolouration appears on the surface.
What I see repeatedly in remediation work is this: a homeowner cleans a patch that looks like 6 or 7 square feet, feels satisfied, repaints, and calls it done. Six months later the stain is back, often larger, because the hyphae were never removed. The moisture source was also not fully addressed, which compounds the problem. By the time a professional is called, the contamination has spread behind the baseboard, into the adjacent stud bay, and sometimes into the insulation.
The 10 square foot rule was designed for situations where the drywall is dry, the source is fixed, and the growth is genuinely surface-level. If any of those three conditions is not met, the threshold should be treated as irrelevant. A small patch of mould on wet drywall with an unresolved leak is a bigger problem than a larger patch on dry board after a one-time condensation event.
Clearance testing matters for the same reason. It is not bureaucratic box-ticking. It is the only objective confirmation that the job is actually done. A visual inspection after remediation can miss residual contamination in cavities, behind trim, or in HVAC components. Clearance testing with an independent lab gives you and your insurer a defensible record.
MSN Environmental handles the work you should not do yourself
When the scope goes beyond a small surface patch, the right call is a contractor who brings the equipment, certifications, and documentation that a DIY approach cannot replicate.
MSN Environmental provides the full remediation scope for Ontario homeowners: initial inspection and moisture mapping, containment with negative air pressure, removal of contaminated drywall and insulation, antimicrobial treatment of exposed framing, commercial drying, and independent clearance testing. Every job is documented with a post-remediation report you can provide to your insurer or a future buyer. Technicians are certified and the work is compliant with Ontario regulations.
To get an estimate, contact MSN Environmental with the approximate affected area, the suspected moisture source, and whether any occupants have health concerns. That information lets the team scope the job accurately before the first site visit. There are seven strong reasons to hire certified professionals for hazardous material removal, and documentation and clearance testing are near the top of that list. Book your assessment through MSN Environmental’s mould removal services page.
Sources
- Guide to addressing moisture and mould indoors
- Mold Clean Up Guidelines and Recommendations | Mold | CDC
- Black Mold on Drywall: Testing and Removal Guide – Mold Action Plan
- Mould Assessment Evidence Review
- How To Remove Mold From Drywall
FAQ
How bad is black mould on drywall?
Black mould on drywall ranges from a minor surface nuisance to a serious health and structural hazard depending on the extent, how long the moisture has been present, and who lives in the home. Vulnerable occupants including infants, the elderly, and immunocompromised individuals face greater health risk even from smaller amounts of growth.
Does drywall with black mould need to be replaced?
Not always, but often. Firm, dry drywall with a small surface patch under 10 square feet can sometimes be cleaned in place, though bleach alone is not reliable on porous drywall.
How do you get rid of black mould on drywall yourself?
Fix the moisture source before starting or the mould will return.
Can you live in a house with black mould?
Short-term exposure to a small, contained patch is unlikely to cause serious harm for healthy adults, but living with ongoing mould growth is not advisable. Health Canada recommends addressing mould promptly, and the risk is meaningfully higher for children, elderly occupants, and anyone with asthma, allergies, or a compromised immune system.