

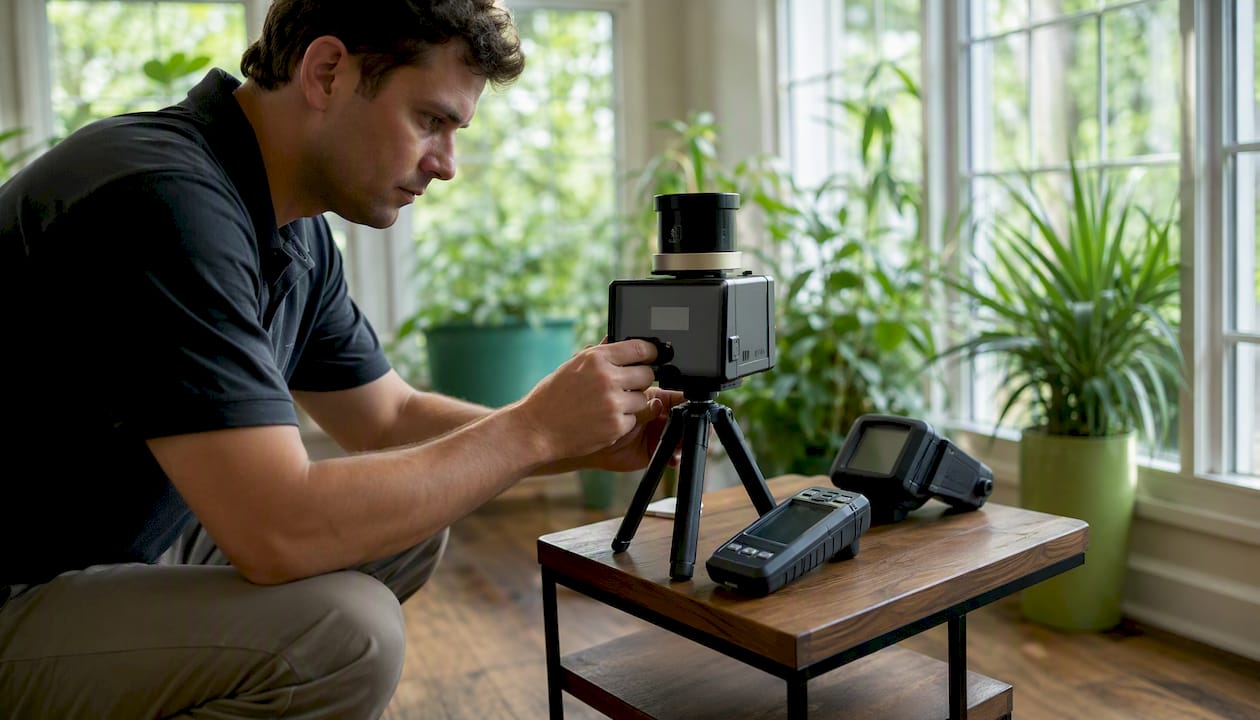
For most Canadian homeowners, mould air testing is not the right first step. Health Canada’s guidance is clear: routine air sampling is generally not recommended because test results cannot predict health effects and often tell you little about where the mould is coming from or why it is growing. The priority is finding and fixing the moisture source, not collecting spore counts.
That said, there are situations where professional air testing genuinely earns its place:
- Suspected hidden growth with no visible mould but persistent musty odour or unexplained symptoms
- Post-remediation clearance testing (also called post remediation verification, or PRV testing) to confirm a remediation was successful
- Immunocompromised occupants where a higher level of certainty about indoor air quality is warranted
- Real-estate transactions, insurance claims, or legal disputes requiring documented, chain-of-custody evidence
When testing is done, a concurrent outdoor control sample is not optional. Without a baseline reading of what spores are naturally present in the outdoor air that day, indoor counts are nearly impossible to interpret meaningfully.
Key takeaways
Mould air testing is a useful tool in specific situations, but Health Canada’s guidance is consistent: find and fix the moisture source first, and reserve air sampling for cases where it can actually answer a question.
| Point | Details |
|---|---|
| Health Canada’s core position | Routine air testing is not recommended; no federal health-based thresholds exist for airborne mould in Canada. |
| Visual inspection comes first | Moisture mapping, photos, and odour detection are more reliable than air sampling for locating most mould problems. |
| Outdoor control is non-negotiable | Indoor spore counts are uninterpretable without a concurrent outdoor baseline sample collected the same day. |
| Best use cases for air testing | Post-remediation clearance (PRV testing), suspected hidden growth, immunocompromised occupants, and legal or insurance documentation. |
| MSN Environmental’s role | Provides certified inspection, accredited air and surface sampling, and mould remediation across Ontario with independent lab analysis and chain-of-custody documentation. |
Table of Contents
- Why does Health Canada advise against routine mould air testing?
- What do the different mould sampling methods actually measure?
- When is a professional air test genuinely worth the cost?
- How do you read a mould air testing lab report?
- DIY mould test kits: honest assessment
- What happens during a professional mould inspection and air test?
- What does professional mould testing cost in Canada?
- How do you choose a qualified, independent inspector or lab in Canada?
- MSN Environmental’s approach to inspection, testing, and remediation
- The part most homeowners get wrong
- MSN Environmental: certified mould inspection and testing in Ontario
- Sources
- FAQ
Why does Health Canada advise against routine mould air testing?
The short answer: there are no federal health-based threshold limit values for airborne mould in Canada. None. Health Canada and Health Canada’s indoor air quality guidance both confirm that no established concentration of airborne spores can be labelled “safe” or “toxic” by a laboratory. A number on a lab report means very little without professional context, a paired outdoor sample, and knowledge of the building’s history.
The EPA makes the same point: when visible mould growth is present, sampling is unnecessary. You can already see the problem. Spending money on air testing before you have done a thorough visual inspection is, in most cases, money wasted.
NIOSH and CDC guidance reinforces this further, noting that a thorough visual inspection combined with detection of musty odours is often more reliable than short-term air sampling for locating mould problems. The Minnesota Department of Health puts it plainly: testing is often not the right first response because results reflect only a single moment in time and can easily mislead.
The recommended sequence in Canada is:
- Conduct a thorough visual inspection, including photos and moisture mapping
- Identify and address the moisture source driving any growth
- Pursue air or surface sampling only when the inspection leaves a genuine unanswered question
What do the different mould sampling methods actually measure?
Professional mould testing is not one thing. Several distinct methods exist, each measuring something different and carrying its own limitations.
Spore-trap (cassette) sampling
A calibrated pump draws a known volume of air through a sticky cassette. The lab counts spores under a microscope and reports results as spores per cubic metre, broken down by genera. This is the most widely used professional method. It captures both viable and non-viable spores, which is useful for understanding total airborne load, but it cannot distinguish live from dead spores and cannot speciate many genera beyond a broad category.
Viable/culture sampling
Air is drawn through a filter or impactor and the collected material is incubated on growth media. The lab reports colony-forming units (CFUs) by species. This method identifies living organisms and can speciate more precisely, but it misses non-viable spores entirely and takes longer to produce results (typically 7–14 days for incubation).
Settle plates
Open petri dishes left in a room for a set period collect whatever settles by gravity. Professional guidance consistently flags settle plates as unreliable for general indoor air quality decisions because they are heavily biased toward larger, heavier spores and do not reflect what occupants actually inhale.
Surface sampling (tape, swab, bulk)
These methods confirm whether mould is present at a specific location rather than measuring airborne concentrations. Tape lifts and swabs are useful for identifying genera on a surface; bulk samples (a piece of drywall, insulation, or flooring material) go to the lab for analysis. Surface sampling is the right tool when you need to confirm visible growth or characterise what is on a specific material before remediation.
ERMI and dust-based DNA testing
ERMI (Environmental Relative Mouldiness Index) uses PCR to detect mould DNA in settled dust. It was designed as a research tool for population-level studies, not as a diagnostic for individual homes. ERMI can produce elevated readings from old, dead spores in historic dust, so a high score does not necessarily mean active growth is present. Treat it as one data point, not a verdict.
| Method | What it measures | Typical use case | Key limitation |
|---|---|---|---|
| Spore-trap cassette | Total airborne spores per m³ | Baseline comparison, post-remediation clearance | Cannot distinguish live from dead; limited speciation |
| Viable/culture | Living colony-forming units by species | Species identification, health-risk context | Misses non-viable spores; slow turnaround |
| Settle plate | Gravity-settled spores | Rarely recommended professionally | Biased toward large spores; not representative of inhaled air |
| Surface (tape/swab/bulk) | Mould on a specific surface | Confirming visible growth, pre-remediation characterisation | Does not reflect airborne concentrations |
| ERMI/dust DNA | Mould DNA in settled dust | Research screening | Detects dead spores; not diagnostic for individual homes |
Pro Tip: The three protocol details that most often ruin an otherwise well-planned air test are: forgetting the outdoor control sample, running the test immediately after cleaning or vacuuming (which disturbs settled spores), and failing to document HVAC state during sampling. Any one of these can make results uninterpretable.
When is a professional air test genuinely worth the cost?
Most situations do not need it. A few do.
Hidden mould with no visible growth. If occupants report persistent musty odours, unexplained respiratory symptoms, or a history of water intrusion but no visible growth has been found, targeted air sampling can help locate the problem zone. Pair it with moisture mapping and thermal imaging for the best chance of finding the source. Mould in crawl spaces is a classic example: hidden, extensive, and easy to miss without a systematic inspection.
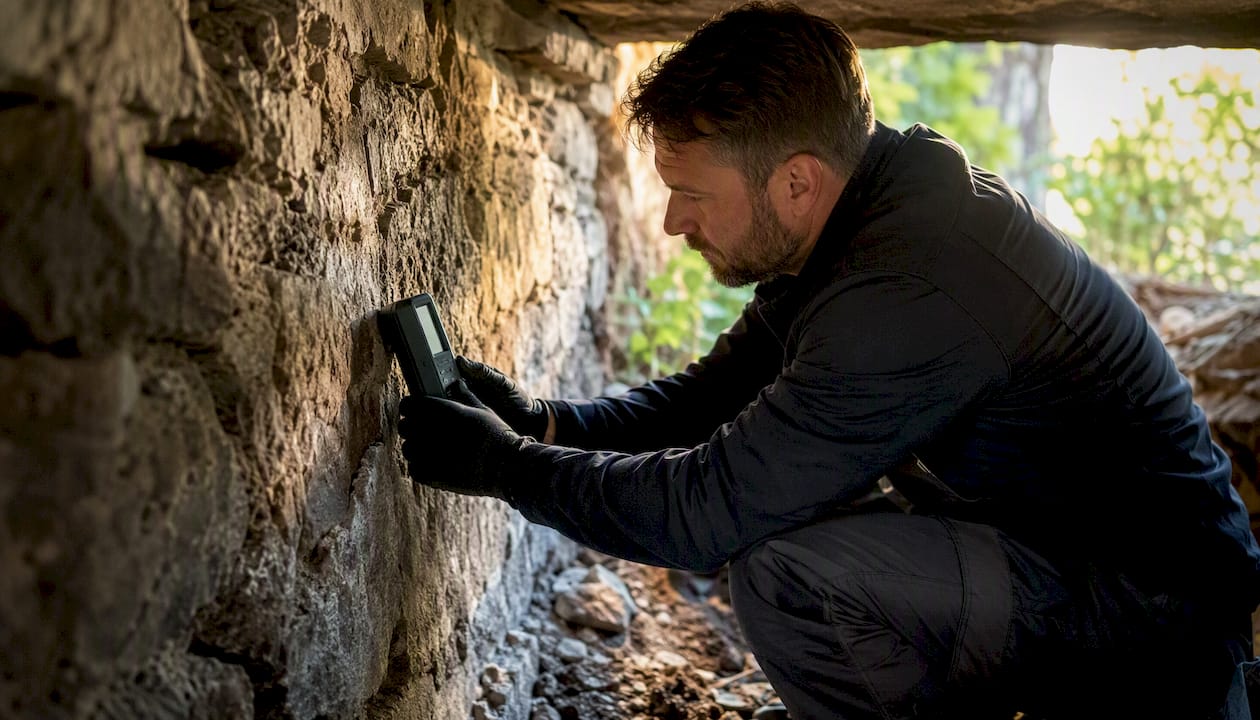
Post-remediation verification (PRV testing). After a mould remediation job, clearance testing confirms the work was effective before walls are closed up or occupants return. This is where air testing has its clearest, most defensible application. Pre-remediation baseline samples taken before work begins make the post-remediation comparison far more meaningful.
Immunocompromised occupants. For households with transplant recipients, chemotherapy patients, or others with severely compromised immune systems, a higher standard of certainty is reasonable. Air testing in this context is a precaution, not a diagnostic.
Legal, insurance, or real-estate documentation. When a dispute requires documented evidence of indoor air quality conditions, professionally collected, chain-of-custody samples from an accredited lab carry weight that a DIY kit or a verbal report never will. If you are dealing with mould liability coverage questions with an insurer, professional documentation is often a prerequisite.
A practical timeline for remediation-related testing:
- Pre-remediation: collect baseline indoor and outdoor samples before work begins
- Remediation: complete all work, allow dust to settle (typically 24–48 hours minimum)
- Post-remediation clearance: collect paired indoor/outdoor samples under the same protocol as the baseline
- Lab analysis and report: compare results against baseline and outdoor control
How do you read a mould air testing lab report?
The number that matters most is not the indoor spore count in isolation. It is the indoor-to-outdoor ratio. If outdoor air contains 800 spores per cubic metre of Cladosporium and your living room shows 750, that is a normal result. If your basement shows 4,200 with a different genera mix than outdoors, that is a flag worth investigating.
Lab reports typically list:
- Spore counts by genera (e.g., Cladosporium, Penicillium/Aspergillus, Alternaria) expressed as spores per cubic metre
- Viable counts by species if culture methods were used, expressed as CFUs per cubic metre
- Qualitative flags such as “normal background,” “elevated,” or “significantly elevated” relative to outdoor controls
- Genera of concern noted separately when water-indicator species are detected
The most important interpretation pitfall is treating the result as a permanent fact. Short-term air samples are snapshots: conditions change hour to hour depending on HVAC operation, occupant activity, outdoor weather, and whether anyone opened a window that morning. A single sample cannot characterise what occupants breathe over days or weeks.
Pro Tip: If your lab report shows Stachybotrys chartarum or Chaetomium — even at low counts — treat that as evidence of water-damaged cellulosic materials and pursue a follow-up investigation regardless of the overall spore count. These genera are strongly associated with chronic moisture damage and do not appear in normal background air.
Seasonal variation matters too. Outdoor spore levels peak in late summer and early autumn in most of Canada, which means an indoor-to-outdoor comparison done in August will look very different from one done in February. A competent professional accounts for this when interpreting results.
DIY mould test kits: honest assessment
Consumer settle-plate kits are widely available at hardware stores across Canada. They are inexpensive, easy to use, and produce results that are almost always ambiguous. The fundamental problem is that settle plates are biased toward larger spores and do not reflect what occupants actually inhale. A kit that shows “mould present” tells you something you could have confirmed by looking; a kit that shows “no mould” does not mean the air is clean.
DIY kits may be acceptable for:
- A very low-stakes initial triage when you want a rough sense of whether any growth is detectable before calling a professional
- Visual confirmation on a surface where you already suspect growth
DIY kits are not acceptable for:
- Health-risk assessment or any decision about whether a space is safe to occupy
- Post-remediation clearance (a professional, chain-of-custody sample is required)
- Detecting hidden growth behind walls or in HVAC systems
- Legal, insurance, or real-estate documentation
If you do use a DIY kit, follow the sampling instructions precisely, place an identical kit outdoors simultaneously as a rough control, and treat any positive result as a reason to call a professional rather than a final answer.
What happens during a professional mould inspection and air test?
Knowing the sequence helps you prepare the property and get the most out of the appointment.
- Scheduling and pre-visit information gathering. The inspector asks about moisture history, symptoms, previous water damage, and HVAC system details before arriving.
- Visual inspection with documentation. The inspector photographs all suspect areas, maps moisture readings using a calibrated moisture metre, and may use thermal imaging to identify temperature anomalies that suggest hidden moisture behind surfaces.
- Targeted surface sampling. Tape lifts, swabs, or bulk samples are collected from any visually suspect areas and packaged with chain-of-custody documentation.
- Outdoor control sample. A spore-trap cassette is collected outdoors simultaneously with indoor samples. Without this, indoor results cannot be properly interpreted.
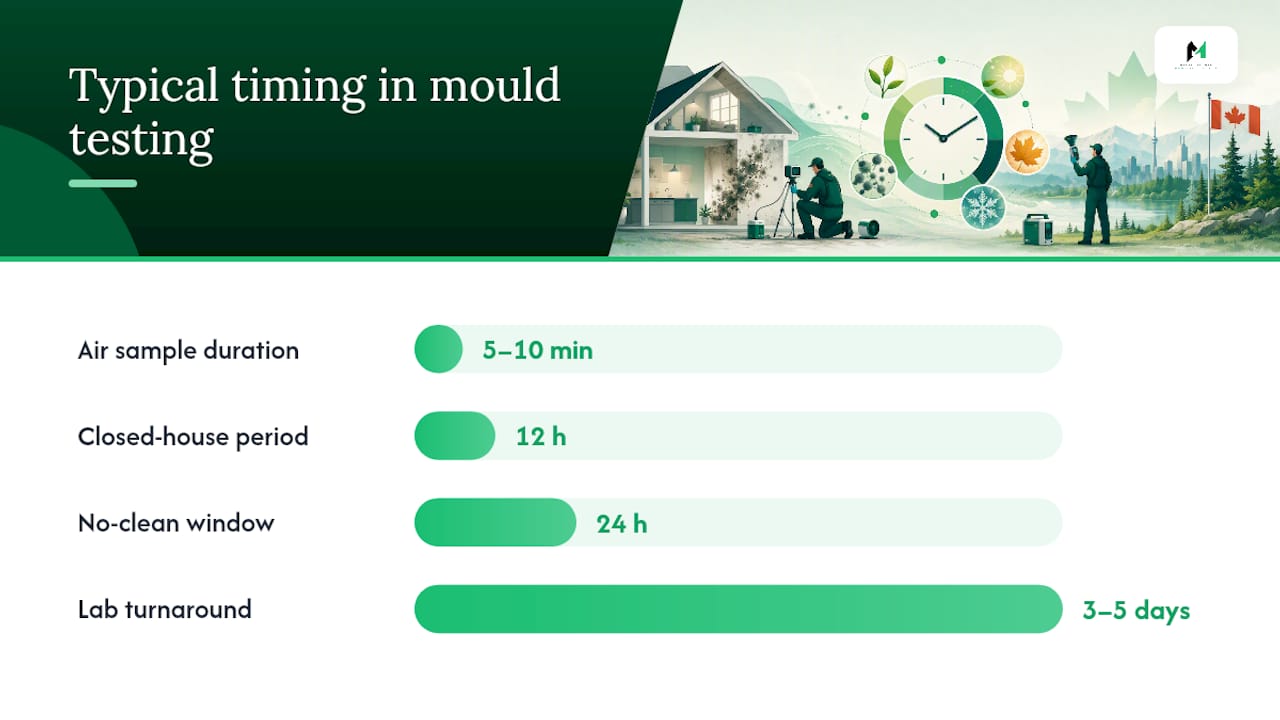
- Indoor air samples. Calibrated pumps run for a set duration (typically 5–10 minutes per cassette) in each area of concern, plus a reference room with no visible issues.
- Chain-of-custody packaging and lab submission. All samples are sealed, labelled, and shipped to an accredited laboratory under documented chain of custody.
- Lab analysis and written report. The lab returns results, typically within 3–5 business days for standard turnaround, and the inspector prepares a written report with findings and recommended actions.
The equipment that matters: calibrated air sampling pumps (set to a specific flow rate, typically 15 litres per minute), spore-trap cassettes, a calibrated moisture metre, and a thermal imaging camera for hidden moisture detection.
Pro Tip: Follow a closed-house protocol before your appointment: close all windows and exterior doors for at least 12 hours before sampling, and run the HVAC system normally on circulate. Do not vacuum, sweep, or dust in the 24 hours before the test. These steps reduce short-term volatility and produce a sample that better reflects what occupants breathe on a normal day.
What does professional mould testing cost in Canada?
Costs vary by region, number of samples, method, and whether chain-of-custody documentation is required. Typical ranges:
- Visual inspection only: $200–$500, depending on property size and travel
- Individual air samples (including lab fee): $75–$150 per sample
- Full multi-room assessment (visual inspection, 4–6 paired indoor/outdoor air samples, lab fees, written report): $600–$1,500
- Post-remediation clearance testing (PRV testing, 2–4 samples, written clearance report): $400–$900
- Expedited lab turnaround (24–48 hours): typically adds $50–$100 per sample
Factors that push costs higher include: a large number of rooms or samples, viable/culture methods (which require longer incubation), urgent turnaround, significant travel distance, and formal chain-of-custody documentation for legal purposes.
Standard lab turnaround for spore-trap analysis runs 3–5 business days. A full investigation-to-clearance cycle, including remediation, typically takes 2–4 weeks from initial inspection to final clearance report, though larger jobs or complex moisture problems can extend that timeline.
How do you choose a qualified, independent inspector or lab in Canada?
The single most important rule: do not hire the same company to both test and remediate without a documented separation of services. A company that profits from finding a problem and then fixing it has an obvious conflict of interest.
A practical checklist for evaluating a prospective tester or laboratory:
- Ask whether the laboratory holds ISO/IEC 17025 accreditation or equivalent. This is the international standard for testing laboratory competence and is the baseline for credible results.
- Confirm the inspector follows recognised sampling protocols (AIHA or ACGIH guidelines) and documents chain of custody for all samples.
- Ask how many samples will be collected and whether an outdoor control is included. If the answer to the outdoor control is “no,” find someone else.
- Ask who interprets the results. A raw lab report without professional interpretation is not a useful deliverable.
- Request references or examples of previous clearance reports.
Red flags to walk away from:
- Any guarantee of an “all clear” before testing is done
- No outdoor baseline sample in the protocol
- The same company offering to test and then immediately quote remediation without any documented separation
- Vague reporting with no genera breakdown or indoor/outdoor comparison
MSN Environmental’s approach to inspection, testing, and remediation
MSN Environmental follows a stepwise workflow grounded in Canadian public-health guidance: visual inspection and moisture mapping first, targeted air or surface sampling only when the inspection leaves a genuine unanswered question, independent accredited laboratory analysis with full chain-of-custody documentation, and certified remediation carried out by trained technicians. Testing and remediation roles are kept appropriately separate so that results are never influenced by a financial interest in finding a problem.
MSN Environmental serves residential and commercial clients across Ontario, including Kitchener, Waterloo, Cambridge, Guelph, Hamilton, London, Brantford, and surrounding communities. For inspection, mould testing services, or certified remediation, contact MSN Environmental directly to discuss your situation and get a clear scope of work before any sampling begins.
The part most homeowners get wrong
There is a version of this conversation that plays out constantly: a homeowner smells something musty, orders a DIY kit, gets an ambiguous result, and then either panics or dismisses the concern entirely. Neither response is grounded in what the result actually shows.
The harder truth is that mould air testing, even when done professionally, is a tool for answering a specific question. It is not a health certificate, not a pass/fail exam for your home, and not a substitute for finding and fixing the moisture problem that is driving any growth. Professional industrial hygienists are consistent on this point: the real value of sampling is in targeted investigations and post-remediation verification, not routine reassurance.
What I see repeatedly in the field is homeowners who invest in testing before they have done the basic work of identifying where moisture is entering the building. The test comes back with elevated counts, they spend money on remediation, and six months later the mould is back because the roof flashing was never fixed or the bathroom exhaust fan still vents into the attic. The moisture source is always the answer. Testing just helps you confirm the remediation worked.
If you are dealing with a situation where hidden growth is genuinely suspected or where clearance documentation is needed, professional testing from an independent, accredited provider is worth every dollar. For everything else, start with a thorough visual inspection and a moisture metre.
MSN Environmental: certified mould inspection and testing in Ontario
When a visual inspection raises questions that only air sampling can answer, or when you need documented clearance after remediation, working with a certified, independent provider matters. MSN Environmental offers professional mould removal and remediation services alongside accredited air and surface sampling, with independent lab analysis and full chain-of-custody documentation on every job.
The team serves homeowners and property managers across Ontario, from Kitchener and Waterloo to Hamilton, London, Cambridge, and Guelph. Whether you need an initial inspection, targeted sampling, or a complete certified remediation, MSN Environmental can scope the work, collect interpretable samples, and deliver a written report with clear next steps. Contact MSN Environmental to book an inspection or get a quote for your property.
Sources
The following sources were used to build this guide. For any policy or health question, Canadian federal and provincial guidance takes precedence.
- Canada
- Mold Testing or Sampling | US EPA
- Mold, Testing, and Remediation | Mold | CDC
- Testing For Mold – MN Dept. of Health
- How Do You Test for Mold in the Air: 2026 Method Guide – InspectandTest
FAQ
Can you actually test for mould in the air?
Yes. Professional spore-trap sampling uses a calibrated pump to draw air through a cassette, which a lab then analyses under a microscope and reports as spores per cubic metre. Results are only meaningful when paired with an outdoor control sample and professional interpretation.
Does a high spore count mean the air is dangerous?
Not necessarily. There are no federal health-based thresholds for airborne mould in Canada, so no laboratory can label a count “safe” or “toxic.” What matters is the indoor-to-outdoor ratio, the genera present, and whether water-indicator species like Stachybotrys are detected.
What are signs that mould may be affecting your health?
Persistent respiratory irritation, unexplained fatigue, worsening allergy symptoms, or headaches that improve when you leave the building can all suggest indoor air quality concerns. Mould air testing cannot diagnose health effects, so anyone with symptoms should consult a physician alongside investigating the building.
What naturally reduces mould spores in indoor air?
These measures address the conditions that allow mould to grow and release spores, which is more effective than any air treatment alone.
When is post-remediation clearance testing required?
Post-remediation verification (PRV testing) is recommended after any significant mould remediation to confirm the work was effective before walls are closed or occupants return. It involves paired indoor and outdoor air samples collected under the same protocol as the pre-remediation baseline, submitted to an accredited lab with chain-of-custody documentation.